
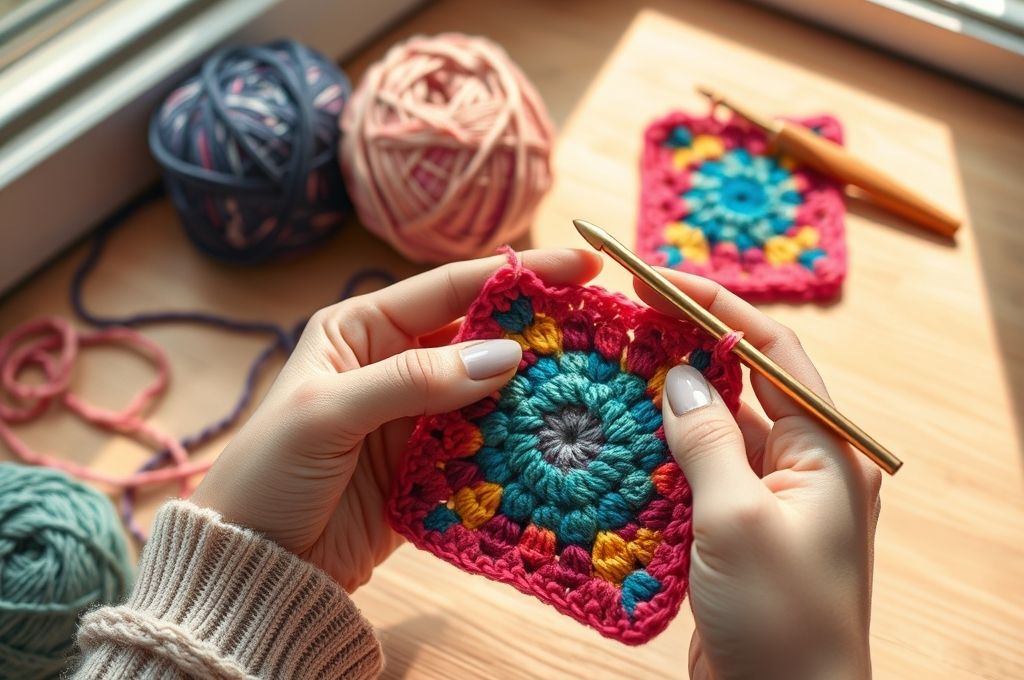
Welcome to the World of Crochet Magic
Have you ever held a colorful patchwork blanket and wondered how something so cozy and charming was made? Chances are, it started with a simple granny square. This tiny, timeless crochet motif has been at the heart of handmade creations for generations—blankets, bags, scarves, even entire sweaters. And the best part? You can make one today, even if you’ve never picked up a crochet hook before.
Welcome to Your First Granny Square, your friendly guide into the delightful world of crochet. Whether you’re looking for a relaxing hobby, a creative outlet, or a way to make heartfelt gifts, learning the granny square is the perfect first step. It’s simple, satisfying, and endlessly versatile. Plus, once you master it, you’ll unlock a whole universe of projects.
In this step-by-step tutorial, we’ll walk you through everything you need to know: the basic supplies, the fundamental stitches, and exactly how to create your very first granny square from start to finish. We’ll also share tips for avoiding common mistakes, choosing the right yarn, and turning your single square into something bigger. By the end, you won’t just have a square—you’ll have confidence, creativity, and a new skill you can build on.
So grab a cup of tea, find a comfy chair, and let’s dive in. Your crochet journey begins right here, right now.
Why the Granny Square? A Stitch with a Story
Before we get to the how, let’s talk about the why. Why does the granny square remain one of the most beloved crochet techniques, over a century after it first appeared?
The granny square has roots that stretch back to the 19th century, born out of practicality and thrift. In times when fabric and yarn were precious, women would use leftover scraps to create beautiful, functional blankets. These small, modular squares could be stitched together into larger pieces—perfect for keeping families warm during cold winters.
But beyond its history, the granny square is special because it’s accessible. You don’t need advanced skills or expensive tools. Just a hook, some yarn, and a little patience. It’s often one of the first patterns beginners learn—and for good reason. The repetitive rhythm of the stitches is calming, almost meditative. Many crocheters describe the process as “flow state” crafting: your hands move automatically, your mind unwinds, and before you know it, you’ve completed a square.
Another reason it’s so popular? Customization. You can make a granny square in any color, size, or yarn weight. Use soft pastels for a baby blanket, bold neons for a trendy tote, or earthy tones for a bohemian wall hanging. The design is simple, but the possibilities are endless.
And let’s not forget the community. Crochet has always been a social craft—passed down from grandmothers, shared in online groups, and gifted with love. When you make a granny square, you’re not just creating fabric; you’re connecting to a global tradition of creativity and care.
So yes, it’s just a little square. But it’s also a symbol: of patience, of beauty in simplicity, and of the joy found in making something with your own hands.
What You’ll Need: Simple Supplies for a Big Start
The beauty of crochet is that you don’t need much to get started. In fact, all you really need for your first granny square fits in the palm of your hand.
Here’s your beginner-friendly checklist:
- Crochet Hook (Size H/5.0 mm recommended)
This size works well with medium-weight yarn. Look for an aluminum or ergonomic hook—it’ll feel comfortable after a few minutes of stitching. - Worsted Weight Yarn (Category 4)
Also known as “aran” or “medium” yarn, this is the most common type for beginners. It’s easy to work with and comes in endless colors. Acrylic is affordable and durable; cotton is soft and breathable. - Scissors
Any small pair will do—just make sure they’re sharp enough to cut yarn cleanly. - Yarn Needle (Tapestry Needle)
Used for weaving in loose ends when you’re finished. It has a big eye and a blunt tip, so it won’t split the yarn. - Stitch Marker (optional but helpful)
A small ring or safety pin that marks the beginning of each round. It’s a lifesaver for keeping track of your work.
Pro Tip: If you’re just starting out, pick a light-colored yarn. It’s easier to see your stitches, which helps you learn faster. Avoid dark or fuzzy yarns at first—they can make it hard to spot where to insert your hook.
Now, about that hook and yarn pairing: always check the label on your yarn. It usually recommends a hook size. Stick to that, especially as a beginner. Using a hook that’s too big or too small can make your square too loose or too tight.
And don’t worry about buying expensive materials. For your first project, imperfection is part of the charm. In fact, many crocheters keep their first granny square as a keepsake—proof of where their journey began.
Once you’ve gathered your supplies, find a quiet spot with good lighting. Sit comfortably. Take a deep breath. You’re ready.
Understanding the Basics: Crochet Stitches You Need to Know
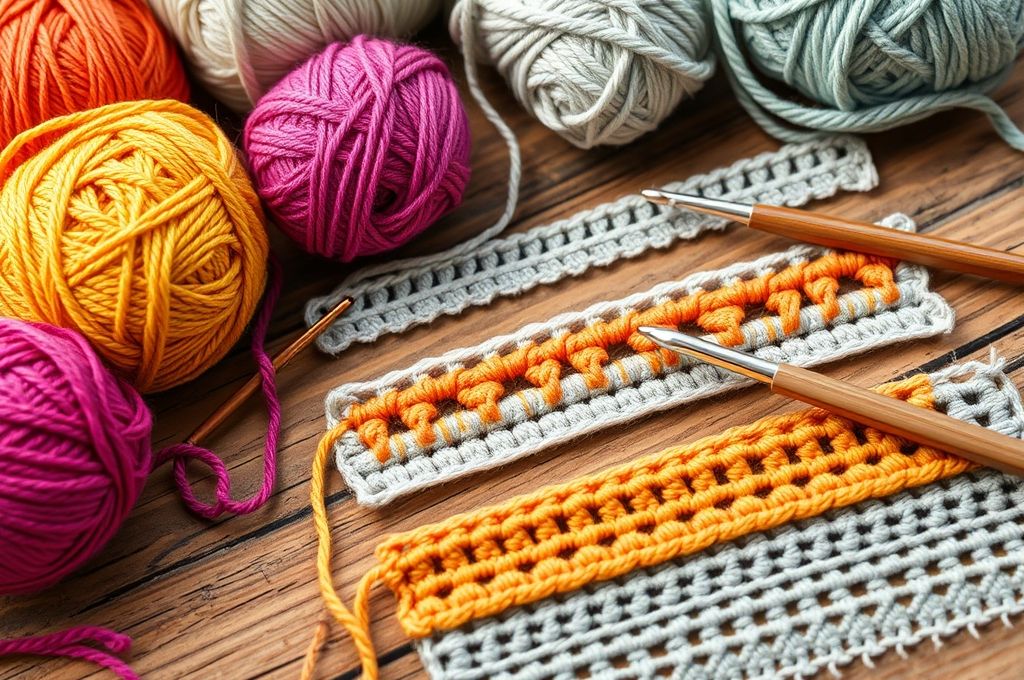
Before we crochet our first square, let’s get familiar with the basic stitches. The granny square is built from just two: the chain stitch (ch) and the double crochet (dc). (Note: In UK terms, this is called a treble crochet, so watch out for pattern differences!)
Let’s break them down:
1. Chain Stitch (ch)
This is your foundation. It’s how you start almost every crochet project.
- Yarn over (wrap the yarn over your hook from back to front).
- Pull the yarn through the loop on your hook.
- Repeat. Each loop you create is a chain.
Practice making a row of 10 chains. It should look like a little ladder.
2. Double Crochet (dc)
This is the main stitch in a granny square. It’s taller than a single crochet, which gives the square its open, lacy look.
Here’s how to do it:
- Yarn over.
- Insert your hook into the stitch.
- Yarn over again and pull up a loop (you’ll have 3 loops on your hook).
- Yarn over and pull through 2 loops (2 loops remain).
- Yarn over and pull through the last 2 loops.
You’ve just made a double crochet!
Practice Tip: Make a small swatch of double crochets in a row. Start with a foundation chain of 12, then work a row of dc into the second chain from the hook and each chain after. This helps you get the rhythm down.
You’ll also use a slip stitch (sl st) later to join rounds. It’s simple: insert your hook, yarn over, and pull through both the stitch and the loop on your hook.
Once you’re comfortable with these stitches, you’re ready for the real magic: combining them into a granny square.
Step-by-Step: Creating Your First Granny Square
Now, the moment you’ve been waiting for—let’s make your first granny square! We’ll go slowly, round by round. Follow each step carefully, and don’t worry if it feels awkward at first. Your hands will catch up with your mind.
Round 1: The Magic Circle
We start with a magic circle (also called a magic ring). It’s a neat way to begin a project in the round, with no hole in the center.
- Make a loop with your yarn, leaving a 6-inch tail.
- Insert your hook, yarn over, and pull up a loop.
- Chain 3 (this counts as your first double crochet).
- Work 2 more double crochets into the loop. You now have 3 dc.
- Chain 2 (this creates the first corner).
- Work 3 more double crochets into the same loop.
- Repeat this pattern two more times: (3 dc, ch 2) three more times.
- You should now have 4 groups of 3 dc, each separated by a ch-2 corner.
- To close the round, slip stitch into the top of the first chain-3.
Gently pull the tail to tighten the center. Voilà! You have a ring with four corners.
Round 2: Growing the Square
Now we’ll build outward, adding stitches to each side and reinforcing the corners.
- Chain 3 (counts as first dc).
- Work 2 more dc into the same ch-2 space (first corner).
- Chain 2.
- In the next ch-2 space, work 3 dc, ch 2, 3 dc (this is your second corner cluster).
- Repeat this in the next two ch-2 spaces: (3 dc, ch 2, 3 dc) for each corner.
- To finish, slip stitch into the top of the initial ch-3.
You now have a perfect little square with eight clusters and four distinct corners.
Round 3 and Beyond
To continue, simply repeat Round 2:
- Start each round in a corner space.
- Work (3 dc, ch 2, 3 dc) in each corner.
- Join with a slip stitch.
Each round will make your square larger. Three rounds is a great size for a coaster or appliqué. Six to eight rounds make a classic blanket square.
Tip: Use a stitch marker to mark the first stitch of each round. It’ll save you from losing your place.
Common Mistakes (and How to Fix Them)
Even experienced crocheters make mistakes. The key is knowing how to spot and correct them early.
Here are the most common issues beginners face—and how to solve them:
1. Gaps in the Center
If your magic circle has a hole, don’t panic. Just pull the tail tighter before starting Round 2. If it’s already too late, weave the tail through the center later to close it.
2. Uneven Corners
Are some corners puffier than others? Make sure you’re working the same number of stitches into each ch-2 space. Count as you go: 3 dc, ch 2, 3 dc—always.
3. Twisted or Wavy Edges
This usually happens when you accidentally add or skip stitches. Double-check that you have exactly 4 corner clusters per round. Also, ensure you’re joining each round properly with a slip stitch.
4. Tension Problems
If your square looks too tight or too loose, relax your grip on the hook and yarn. Crochet should feel smooth, not forced. Practice will even out your tension over time.
5. Wrong Starting Point
A common mistake is starting the next round in the wrong stitch. Always begin in the ch-2 corner space, not in the dc cluster.
Remember: Every crocheter has a “ugly first square.” It’s not about perfection—it’s about practice. If your square isn’t perfect, celebrate it anyway. It’s yours.
Adding Color: How to Change Yarn Mid-Square
One of the most fun parts of the granny square? Color changes. You can make each round a different color for a rainbow effect, or alternate between two shades for a modern look.
Here’s how to change colors at the end of a round:
- Work your last dc of the round until the final yarn over.
- Instead of pulling through with the old color, drop it and pick up the new color.
- Pull the new color through the last two loops on your hook.
- Continue with the new color as usual.
Weave in the old tail later with your yarn needle.
Pro Tip: For a clean join, carry the unused color along the edge by crocheting over it slightly. This avoids cutting and weaving in too many ends.
Want a striped effect? Change color every round. Prefer a bold center? Keep the first two rounds one color, then switch.
And here’s a fun idea: use up leftover yarn scraps! Small pieces can go a long way in a granny square, making it eco-friendly and uniquely colorful.
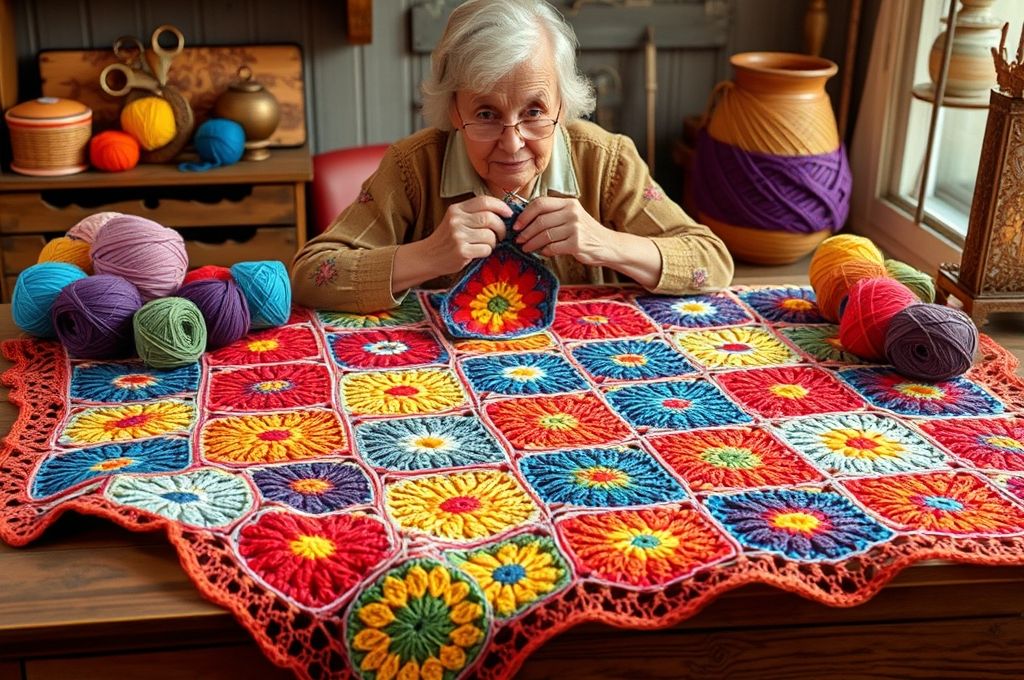
Beyond the Square: What Can You Make?
Now that you’ve made one granny square, what’s next? The answer: almost anything.
These little squares are like building blocks. Stitch them together, and you can create:
- Blankets and Afghans
The classic use. Join squares with a simple slip stitch, single crochet, or decorative join like the “crab stitch.” - Clothing
Think cardigans, skirts, or even swimwear! Designers use granny squares in high-fashion pieces. - Accessories
Turn a square into a clutch, a headband, or a market bag. Add a handle, and you’ve got a stylish tote. - Home Decor
Use squares as coasters, pillow covers, or wall art. Frame a single square like a piece of textile art. - Toys and Gifts
Make a baby blanket, a doll’s dress, or a holiday ornament. Handmade gifts carry love in every stitch.
Idea to Try: Make 9 squares (3×3 grid) and join them into a mini throw. Use coordinating colors for a modern look, or go wild with clashing hues for a vintage vibe.
And don’t forget the power of personalization. Embellish your square with buttons, embroidery, or beads. The only limit is your imagination.
The Joy of Making: Why Handcrafting Matters
In a world of fast fashion and instant downloads, why spend hours crocheting a tiny square?
Because making things by hand is healing.
Studies show that repetitive, mindful activities like crochet can reduce stress, improve focus, and even help with anxiety and depression. The rhythm of the stitches, the texture of the yarn, the quiet concentration—it’s a form of active meditation.
But it’s more than just mental health. It’s about reclaiming creativity. So much of modern life is about consuming: scrolling, shopping, watching. Crochet flips that. You become a creator. You take raw materials and turn them into something meaningful.
And there’s a deep sense of accomplishment in finishing a project. That square in your hands? You made it. No machine, no factory. Just you, your hook, and your time.
Plus, handmade items carry stories. Imagine someone wrapping themselves in a blanket you made. They’re not just feeling warmth—they’re feeling your care, your patience, your love.
In a way, every granny square is a small act of resistance against a throwaway culture. It says: This matters. This was made with intention.
So yes, it’s just a square. But it’s also a statement.
Join the Community: Share, Learn, Grow
One of the best parts of crochet? You’re not alone.
Millions of people around the world love making granny squares. There are Facebook groups, Instagram hashtags (#grannysquare, #crochetalong), and YouTube tutorials for every skill level.
Consider sharing your first square online. Post a photo, tag it, and say, “My first granny square!” You’ll likely get dozens of encouraging comments. Many crocheters remember their own first square and love seeing new people join the craft.
You can also:
- Join a local yarn shop’s crochet circle.
- Attend a craft fair or fiber festival.
- Participate in a “granny square challenge” (make one square a day for a month!).
And if someone teaches you a new stitch or gives you yarn, pay it forward. That’s how this community thrives—through generosity and shared joy.
Remember: every expert was once a beginner holding a wobbly first square. Yours is the start of something beautiful.
Conclusion: Your Journey Begins with a Single Square
You’ve come a long way—from gathering supplies to completing your very first granny square. Whether it’s perfectly symmetrical or delightfully lopsided, it’s yours. And that makes it perfect.
We’ve covered the basics: the stitches, the steps, the tips, and the deeper meaning behind this simple craft. But more than that, we’ve opened a door. A door to creativity, calm, and connection.
Now, what will you do with this new skill?
Will you make a blanket for a loved one? Design a bold fashion piece? Start a daily crochet habit to unwind after work?
The choice is yours. And the journey doesn’t end here. Each square you make will be better than the last. Each project will teach you something new.
So keep your hook handy. Keep your yarn close. And most of all, keep creating.
Because in a world that moves too fast, sometimes the most radical thing you can do is slow down… and make something beautiful with your hands.
Now It’s Your Turn!
Did you make your first granny square? We’d love to see it! Share a photo in the comments, tag us on social media, or tell us about your experience. And if you found this tutorial helpful, please share it with someone who might enjoy it too. Happy crocheting! 🪝💖

Daniele Ferreira is passionate about the world of crochet, dedicating her time to exploring techniques, creating unique pieces, and sharing her knowledge with beginners and aficionados alike. With attention to detail and creativity, she transforms yarn into true works of art, inspiring others to discover the beauty and joy of this manual art.


