
Have you ever opened a drawer only to be met with a colorful avalanche of tangled yarn? Or spent 20 minutes searching for that perfect shade of turquoise you know you bought last spring? If you’re a knitter, crocheter, or fiber artist, you’re not alone. A yarn stash is more than just a collection—it’s a treasure trove of creativity, potential, and sometimes, pure chaos. Whether you have a basket in the corner or an entire craft room dedicated to your hobby, organizing your yarn stash can transform your crafting experience from frustrating to fulfilling.
In this article, we’ll dive into practical, creative, and sustainable ways to store and organize your yarn stash. From assessing your collection to choosing the right storage solutions, we’ll cover everything you need to keep your yarn safe, accessible, and inspiring. You’ll learn how to prevent tangles, protect fibers from damage, and even turn your storage into a beautiful part of your home decor. We’ll also explore eco-friendly options, budget-friendly hacks, and smart systems that grow with your collection.
Whether you’re a beginner with a few skeins or a seasoned crafter with hundreds of colors, this guide is designed to help you reclaim space, reduce stress, and rediscover the joy in your yarn. So grab a cup of tea, take a deep breath, and let’s turn that yarn jungle into a well-organized oasis.
1. Assess Your Yarn Collection: Know What You Have
Before you start organizing, it’s essential to take stock of what you’re working with. Think of this step as a “yarn inventory.” It might sound tedious, but it’s actually one of the most rewarding parts of the process—like rediscovering old friends or realizing how far your crafting journey has come.
Start by gathering all your yarn in one place. Empty drawers, baskets, and bins. Sort through every closet, shelf, and forgotten corner. You might be surprised at what you find—half-used skeins, mystery balls with no labels, or that limited-edition colorway you forgot you bought.
Once everything is out, begin categorizing. A simple way is to group by fiber type: cotton, wool, acrylic, alpaca, blends, etc. This helps you understand what you have and how best to care for each type. For example, wool needs protection from moths, while cotton is more durable but can mildew in damp areas.
Next, sort by weight: lace, fingering, sport, DK, worsted, bulky, and super bulky. This makes it easier to match yarn to patterns later. You can also sort by color, though this works best once you’ve already categorized by weight and fiber.
As you sort, take note of damaged or expired yarn. Skeins with mold, excessive stretching, or rodent damage should be discarded. Also, consider letting go of yarn you no longer love or that doesn’t fit your current style. Donating to craft groups, schools, or charities is a great way to give it new life.
This inventory process does more than organize—it helps you see patterns in your purchases, identify gaps in your stash, and make smarter buying decisions in the future. Knowledge is power, and when it comes to yarn, it’s the first stitch in a beautifully organized project.
2. Choose the Right Storage Solutions for Your Space

Now that you know what you have, it’s time to find the perfect home for it. The best storage solution depends on three things: the size of your stash, the space you have available, and your personal style.
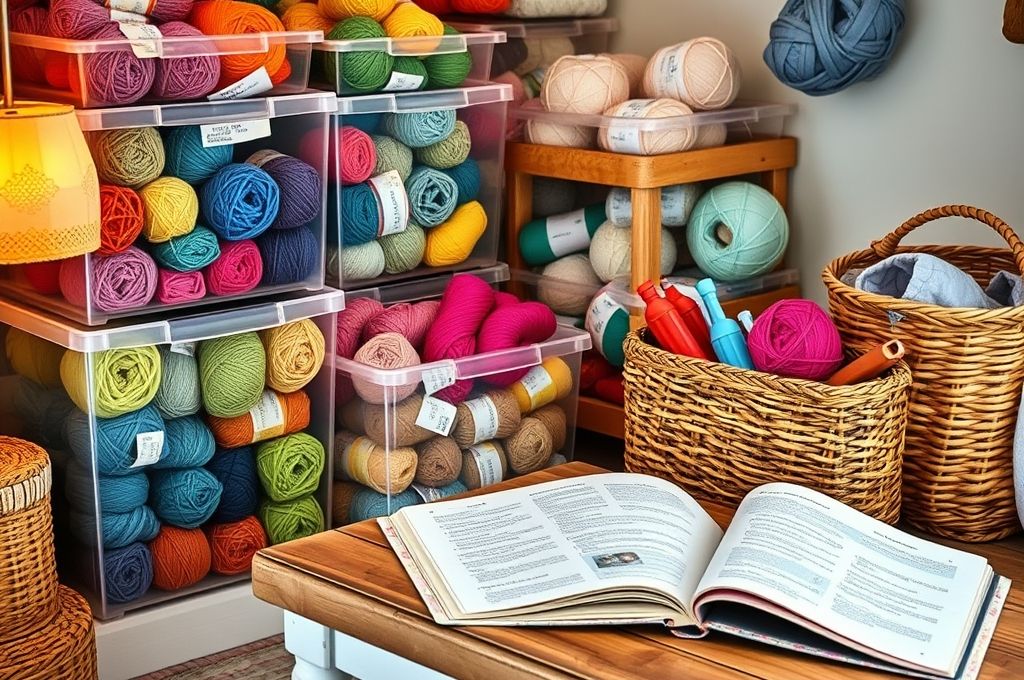
For small stashes (under 20 skeins), simple solutions work best. A decorative basket, a lidded bin, or a repurposed shoebox can keep yarn tidy and out of the way. Look for containers with ventilation to prevent moisture buildup. Woven seagrass baskets or fabric bins with mesh panels are both stylish and functional.
If you have a medium-sized stash (20–100 skeins), consider modular storage. Cube organizers, bookshelves with bins, or rolling carts offer flexibility and visibility. Clear plastic bins let you see contents at a glance, while fabric bins add a soft, cozy touch. Label each bin by category—“Worsted Wool,” “Cotton Dishcloths,” “Reds”—so you can find what you need fast.
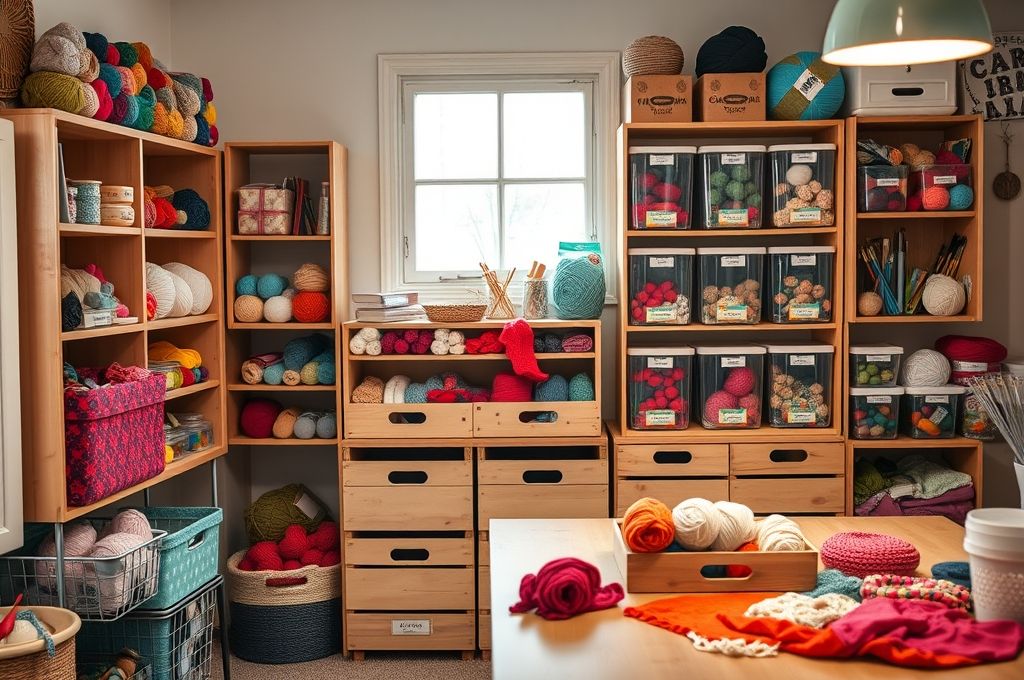
For large collections (100+ skeins), dedicated furniture or room organization may be necessary. A vintage dresser, a wardrobe with shelves, or a rolling industrial cart can become a yarn command center. Some crafters convert unused closets into “yarn rooms,” using adjustable shelving and lighting to create a dreamy, functional space.
Don’t forget about vertical space. Wall-mounted shelves, pegboards, or over-the-door organizers maximize square footage and turn storage into art. Imagine a rainbow gradient displayed on a wall—it’s practical and inspiring.
One pro tip: avoid vacuum-sealed bags for long-term storage. While they save space, they can crush delicate fibers and trap moisture. Instead, use breathable containers and rotate yarn occasionally to prevent compression.
The key is to match your storage to your lifestyle. If you craft daily, keep frequently used yarn within easy reach. If you’re a seasonal crafter, sealed bins in a closet or under the bed might be ideal. The goal isn’t perfection—it’s practicality with a touch of joy.
3. Prevent Tangles and Protect Your Yarn
Nothing kills crafting momentum faster than a knotted mess. Tangles not only waste time but can damage yarn fibers, especially delicate ones like silk or mohair. So how do you keep your stash smooth and tangle-free?
First, store yarn in its original skein or ball whenever possible. If you’ve wound it into a cake, keep it in a yarn bowl or container with a center hole to prevent rolling and unraveling. Yarn bowls are both functional and decorative—ceramic, wooden, or handmade ones add charm to your crafting space.
For loose skeins, consider using yarn ties or paper clips to keep them bunched. You can also place each skein in a resealable plastic bag—this prevents tangling and protects against dust, pests, and humidity. Write the yarn details (brand, color, weight) on a small tag and slip it inside the bag.
Another smart move: use yarn weights or tensioners when working on a project. These simple tools—like a smooth stone or a dedicated yarn guide—keep tension steady and reduce the chance of accidental loops forming.
Now, let’s talk about pests. Moths and carpet beetles love natural fibers, especially wool. To protect your stash:
- Store wool in airtight containers with cedar blocks or lavender sachets.
- Avoid cedar closets unless they’re well-sealed—cedar scent fades over time and needs refreshing.
- Freeze new yarn for 48 hours before adding it to your stash to kill any hidden eggs.
Humidity is another enemy. Damp environments encourage mildew and weaken fibers. Store yarn in a dry, temperature-controlled area—never in basements or attics unless climate-controlled. A dehumidifier or silica gel packets can help in humid climates.
And here’s a gentle reminder: keep yarn away from direct sunlight. UV rays can fade colors and weaken fibers over time. Use curtains or store yarn in opaque containers to preserve vibrancy.
By taking these small protective steps, you’re not just organizing—you’re preserving the life and beauty of your yarn.
4. Organize by Project, Color, or Fiber: What Works Best?
Now comes the fun part: deciding how to organize your stash. There’s no single right answer—only what works best for you. Let’s explore the three most popular methods and their pros and cons.
Organizing by Project
This method is ideal for crafters who work on one project at a time. You gather all yarn, needles, and pattern materials in one kit. Use labeled bins or project bags to keep everything together. The benefit? Everything you need is ready to go. The downside? It’s less efficient if you like to switch projects or reuse yarn across multiple pieces.
Organizing by Color
A rainbow stash is a thing of beauty. Sorting by color—whether in a gradient or broad categories (reds, blues, neutrals)—makes it easy to find the perfect shade for your next project. It’s also highly motivating—seeing a wall of vibrant hues can spark new ideas. However, color sorting can make it harder to locate specific weights or fibers. A hybrid approach—sorting by weight first, then color within each category—can offer the best of both worlds.
Organizing by Fiber Type
This method is practical and safety-conscious. Grouping by fiber (wool, cotton, acrylic, etc.) helps you care for each type properly and choose the right yarn for the job. For example, cotton is great for dishcloths, while wool excels in winter wear. This system also makes it easier to avoid allergens or follow ethical choices (e.g., avoiding animal fibers).
Many crafters use a combination system. For example:
- Main categories by fiber, then
- Subcategories by weight, and
- Color order within each bin
This layered approach offers clarity without sacrificing creativity.
Think of it like a library: the Dewey Decimal System gets you to the right shelf, but you still need to scan the spines to find the exact book. Your yarn system should guide you quickly to the right section, then let you browse with joy.
Try different methods for a week and see what feels natural. The best system is the one you’ll actually use.
5. DIY and Budget-Friendly Storage Ideas
You don’t need to spend a fortune to organize your yarn stash. In fact, some of the best storage solutions are creative, handmade, or repurposed from everyday items.
Start with what you already have. Old shoeboxes, cereal containers, or glass jars can be transformed with wrapping paper, fabric, or paint. Add labels, and suddenly you have stylish, custom bins.
Tissue box organizers are a crafter’s secret weapon. Place one on your shelf, and drop skeins in vertically—labels facing out. It’s like a mini-file system for yarn. You can even stack them for more capacity.
Mason jars are perfect for small quantities or precious hand-dyed yarns. Group similar colors or weights together, and display them on a windowsill or shelf. They’re also great for protecting yarn from dust and pets.
Got an old wine rack? It makes a charming yarn holder. The slots keep skeins upright and visible, and the wood adds warmth to any room. Just make sure the openings aren’t too wide—some skeins might slip through.
For the crafty DIYer, sew your own yarn caddy. Use sturdy fabric and add pockets for patterns, needles, and notions. Add a handle, and you’ve got a portable project kit.
Another clever hack: use a hanging shoe organizer. The clear pockets are perfect for storing skeins by color or project. Hang it on the back of a door or over a closet rod—maximizing space and keeping everything visible.
And don’t overlook thrift stores or garage sales. Vintage suitcases, wooden crates, or apothecary cabinets can become unique, character-filled storage pieces. A little sanding and paint, and you’ve got a one-of-a-kind yarn hub.
The beauty of DIY is that it’s personal. Your storage doesn’t have to match anyone else’s—it just has to work for you. Plus, every time you use a handmade or upcycled solution, you’re adding a little more soul to your crafting space.
6. Make It Beautiful: Storage That Inspires Creativity
Organization isn’t just about function—it’s also about inspiration. Your yarn storage should make you want to create. After all, if your stash is hidden in a dark closet, you’re less likely to reach for it.
Think of your yarn as art. Display it proudly. Use open shelves, glass-front cabinets, or shadow boxes to showcase your collection. A well-organized rainbow wall isn’t just practical—it’s a daily dose of joy.
Lighting matters. Add a small LED strip or a pretty lamp to your crafting area. Good lighting helps you see true colors and reduces eye strain. It also makes the space feel inviting.
Incorporate personal touches. Frame your favorite yarn labels, hang a needlework sampler, or display finished projects nearby. These details turn a storage area into a creative sanctuary.
Consider scent, too. A lavender sachet or a lightly scented candle (used safely, away from flammable materials) can make your crafting corner feel like a retreat.
And don’t forget comfort. Add a cozy chair, a soft rug, or a small side table for your coffee. When your space feels good, you’ll spend more time in it—and create more.
Remember: a beautiful space nurtures creativity. You don’t need a mansion or a designer studio. Even a small corner can become a haven with a little thought and love.
When your yarn is visible, protected, and presented with care, it stops being clutter and starts being inspiration.
7. Maintain Your System: Habits for Long-Term Success
Even the best system will fail without maintenance. The key to lasting organization is building simple, sustainable habits.
Start with a “one in, one out” rule. Every time you buy a new skein, commit to using or donating one from your stash. This keeps your collection from growing uncontrollably and encourages you to actually use what you have.
After finishing a project, put everything away immediately. Return leftover yarn to its proper bin, clean your needles, and file the pattern. A five-minute cleanup saves hours of future frustration.
Schedule a seasonal stash check—every 3 or 6 months. Use this time to reorganize, discard damaged yarn, and reassess your system. You might find you need more bins for cotton or less space for acrylic.
Label everything. Use a label maker, sticky notes, or chalkboard tags. Clear labels save time and make it easier for others (like family members) to help or respect your space.
And finally, be kind to yourself. If your system slips for a week, don’t give up. Organization is a practice, not perfection. Toss a few skeins back in a basket, re-sort when you can, and keep going.
The goal isn’t a spotless, Instagram-worthy shelf—it’s a stash that serves you. One that makes crafting easier, more joyful, and more sustainable.
Conclusion
Organizing your yarn stash isn’t just about tidying up—it’s about honoring your creativity. From assessing your collection to choosing the right storage, protecting fibers, and building lasting habits, each step brings you closer to a crafting space that’s functional, beautiful, and inspiring.
We’ve explored practical tips, budget-friendly hacks, and creative ideas to help you store your yarn in a way that works for your life. Whether you sort by color, fiber, or project, the best system is the one that makes you want to pick up your needles and create.
Now it’s your turn. Take a look at your stash. Is it hidden, tangled, or overflowing? Pick one small step—clear a drawer, label a bin, or display a few skeins beautifully. Progress, not perfection, is the goal.
We’d love to hear from you: What’s your favorite yarn storage solution? Share your tips, photos, or questions in the comments below. Let’s build a community of organized, inspired crafters—one beautiful skein at a time.
Happy crafting! 🧶

Daniele Ferreira is passionate about the world of crochet, dedicating her time to exploring techniques, creating unique pieces, and sharing her knowledge with beginners and aficionados alike. With attention to detail and creativity, she transforms yarn into true works of art, inspiring others to discover the beauty and joy of this manual art.


