
Introduction: Why Learning to Read Crochet Patterns Matters
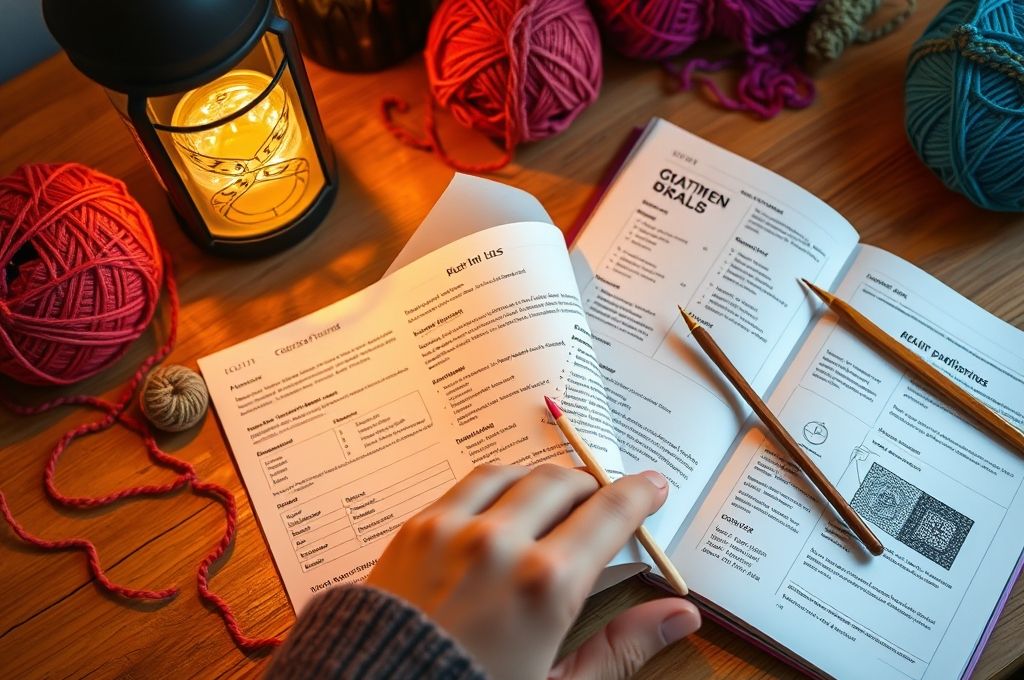
Have you ever picked up a crochet hook and yarn, excited to make something beautiful, only to feel completely lost when you opened a pattern? You’re not alone. Many beginners find themselves staring at a page full of abbreviations, symbols, and instructions that might as well be written in another language. But here’s the good news: reading crochet patterns doesn’t have to be intimidating—in fact, once you understand the basics, it becomes a powerful tool that opens the door to endless creative possibilities.
Crocheting is more than just a craft—it’s a form of self-expression, relaxation, and even mindfulness. From cozy blankets to stylish accessories, the projects you can create are limited only by your imagination. But to bring those ideas to life, you need to understand the roadmap: the pattern. Whether you’re following a free online tutorial or a professional design, knowing how to read a crochet pattern is essential.
In this beginner-friendly guide, we’ll break down everything you need to know about crochet patterns—from common abbreviations and symbols to understanding row counts and gauge. We’ll walk you through real examples, offer practical tips, and show you how to avoid common mistakes. By the end, you’ll feel confident tackling your first (or next) project with clarity and excitement. So grab your favorite hook, settle in, and let’s decode the language of crochet together.
What Is a Crochet Pattern, and Why Does It Matter?
At its core, a crochet pattern is a set of step-by-step instructions that guide you in creating a specific item—like a scarf, hat, or amigurumi toy. Think of it like a recipe: just as a cake recipe tells you the ingredients, amounts, and baking steps, a crochet pattern tells you the yarn type, hook size, stitches needed, and sequence of actions.
Patterns come in many forms: printed books, downloadable PDFs, blog posts, or even video tutorials. But no matter the format, most written patterns follow a standard structure designed to make the process clear and repeatable. Understanding this structure is the first step toward mastering crochet.
Why does this matter? Because without understanding the pattern, even the simplest project can turn into a tangled mess. Imagine trying to knit a sweater without knowing what “k2, p2” means—you’d quickly lose your way. The same applies to crochet. But once you learn the “language” of patterns, you gain independence. You can choose any design you love, follow it accurately, and even modify it to suit your style.
The best part? You don’t need to be a genius or a native English speaker to understand patterns. Most use standardized abbreviations and symbols recognized worldwide. And with a little practice, you’ll be reading them like a pro in no time.
Breaking Down the Structure of a Typical Crochet Pattern
Before diving into stitches and abbreviations, it helps to know what a crochet pattern usually includes. Most well-written patterns follow a predictable format, making it easier to find the information you need. Let’s take a look at the common sections:
- Project Title & Photo
This gives you a visual idea of what you’re making. Always check the photo carefully—it can help you understand stitch texture, color changes, and overall shape. - Designer & Source
Who created the pattern? This is important for giving credit and finding more designs from the same creator. - Finished Measurements
How big will your project be? A baby blanket isn’t the same size as a throw, so this helps you plan. - Materials List
Includes yarn weight, brand, color, hook size, and sometimes notions like stitch markers or tapestry needles. - Gauge (Tension)
A small swatch measurement that ensures your project will be the correct size. We’ll dive deeper into this later. - Abbreviations & Special Stitches
A cheat sheet explaining what each symbol or short form means (e.g., “sc” = single crochet). - Pattern Instructions
The main body of the pattern, broken into sections like foundation chain, rows, rounds, shaping, and finishing. - Notes & Tips
Helpful reminders, such as “work in the back loop only” or “join with a slip stitch.”
Understanding this layout helps you navigate patterns more efficiently. For example, if your project isn’t turning out the right size, you’ll know to check the gauge section first. If you’re confused by a step, you can refer back to the abbreviations list.
Pro Tip: Always read the entire pattern before starting. This helps you anticipate tricky parts and gather all necessary materials upfront.
Cracking the Code: Common Crochet Abbreviations and Symbols
One of the biggest hurdles for beginners is the sea of abbreviations in crochet patterns. It can feel like decoding a secret message. But don’t worry—there’s a method to the madness.
Crochet uses standardized abbreviations to save space and make patterns universal. While some variations exist between US and UK terms (more on that later), most English-language patterns use US crochet terms.
Here are the most common US abbreviations you’ll encounter:
| ch | Chain | The foundation of most projects |
| sl st | Slip stitch | Used to join or move yarn |
| sc | Single crochet | A short, dense stitch |
| hdc | Half double crochet | Taller than sc, shorter than dc |
| dc | Double crochet | One of the most common stitches |
| tr | Treble crochet | Taller and looser |
| inc | Increase | Work two stitches in one |
| dec | Decrease | Join two stitches into one |
| rep | Repeat | Do the same sequence again |
| [ ] or ( ) | Repeat instructions within | e.g., [sc, ch 1] 3 times |
Many patterns also use symbols in charts, especially for complex designs like lace or colorwork. A crochet chart is like a visual map, where each symbol represents a stitch. For example:
- A T-shaped symbol = double crochet
- A small oval = chain
- A plus sign = treble crochet
While charts may seem overwhelming at first, they’re incredibly useful once you learn the key. Many designers include both written instructions and charts, so you can double-check your work.
Practice Tip: Try writing out a simple pattern using only abbreviations. Then “translate” it back into full words. This builds familiarity and confidence.
US vs. UK Terms: The Great Crochet Translation Challenge
Here’s where things can get confusing: US and UK crochet terms are different—even though they describe the same stitches. If you’re following a pattern from another country, this can lead to serious sizing issues.
For example:
- A US single crochet (sc) is called a double crochet (dc) in the UK.
- A US double crochet (dc) is a treble crochet (tr) in the UK.
Yes, it’s confusing. But here’s a quick reference guide:
| Single Crochet (sc) | Double Crochet (dc) | Short |
| Half Double Crochet (hdc) | Half Treble (htr) | Medium-short |
| Double Crochet (dc) | Treble (tr) | Medium-tall |
| Treble Crochet (tr) | Double Treble (dtr) | Tall |
So how do you know which system a pattern uses? Check the abbreviations section. If it defines “sc” as single crochet, it’s using US terms. If “dc” means double crochet, it’s UK.
Why does this matter? Because using the wrong stitch height changes your gauge—which affects the size and drape of your project. Imagine making a hat with taller stitches than intended—it might end up too big or too loose.
Solution: Always verify the terminology before starting. If you’re used to one system, consider converting the pattern or practicing the alternate terms with a swatch.
Understanding Gauge: The Secret to Perfect Fit
You’ve picked your yarn, chosen your hook, and started crocheting—only to realize your blanket is half the size it should be. What went wrong? Chances are, you skipped the gauge.
Gauge (or tension) refers to how tightly or loosely you crochet. It’s measured by making a small sample (a swatch) and counting how many stitches and rows fit into a 4-inch (10 cm) square.
For example, a pattern might say:
Gauge: 16 sc x 20 rows = 4” x 4” (10 x 10 cm)
If your swatch has more stitches in that space, your tension is too tight. If it has fewer, you’re crocheting too loosely.
Why is gauge important?
- Ensures your project fits correctly (especially for garments)
- Helps yarn estimation—avoid running out mid-project
- Maintains the intended drape and texture
But I hate making swatches!
We get it. Swatches feel like extra work. But think of them as a test drive. Would you build a house without checking the blueprint? A 10-minute swatch can save hours of frustration later.
How to check your gauge:
- Chain the number suggested (e.g., 20 chains).
- Work in the stitch pattern for at least 4 inches.
- Measure with a ruler. Use blocking if needed.
- Adjust hook size if necessary—larger hook for looser gauge, smaller for tighter.
Remember: yarn, hook size, and your personal style all affect gauge. Don’t assume your usual hook will work for every project.
Following Rows and Rounds: Knowing Where You Are
One of the most common frustrations in crochet is losing your place. Did you just complete Row 5 or Row 6? Are you supposed to turn or go in a circle? Let’s clarify the difference between rows and rounds.
Rows are used for flat pieces like scarves or dishcloths. After each row, you turn your work and crochet back in the opposite direction. Patterns will say things like:
- Row 1: Ch 2, dc in 4th ch from hook, dc in each ch across. (12 dc)
- Row 2: Ch 2, turn, dc in first dc, dc in each dc across.
Notice the “turn” command and the chain at the beginning (which counts as the first stitch).
Rounds, on the other hand, are for circular or tubular items like hats or amigurumi. You do not turn—you work in a continuous spiral or join each round with a slip stitch. For example:
- Rnd 1: Ch 2, 6 sc in 2nd ch from hook. (6 sc)
- Rnd 2: 2 sc in each sc around. (12 sc)
Many patterns use stitch markers to mark the beginning of a round. Move the marker up as you go.
Tip: Count your stitches at the end of each row or round. If the number doesn’t match the pattern, you’ve likely missed a stitch or added an extra one.
Also, pay attention to phrases like:
- “Work even” = continue without increasing or decreasing
- “Sc in each stitch across” = one single crochet per stitch
- “Skip next stitch” = do not crochet into that stitch
These small details keep your project on track.
Decoding Pattern Instructions: A Real-Life Example
Let’s walk through a simple pattern together to see how everything fits. Here’s a basic coaster pattern:
Materials:
- Worsted weight cotton yarn
- Size H/5.0 mm hook
Gauge: 12 sc x 13 rows = 4” x 4”
Abbreviations:
ch = chain, sc = single crochet, sl st = slip stitchInstructions:
Rnd 1: Ch 4, join with sl st to form a ring. Ch 1, 8 sc in ring. Join with sl st to first sc. (8 sc)
Rnd 2: Ch 1, 2 sc in each sc around. Join with sl st. (16 sc)
Rnd 3: *Sc in next sc, 2 sc in next sc; rep from * around. Join with sl st. (24 sc)
Fasten off and weave in ends.
Now, let’s break it down:
- Rnd 1: You start by chaining 4 and joining into a circle. Then chain 1 (this doesn’t count as a stitch), and make 8 single crochets into the ring. Finally, slip stitch to the first sc to close the round.
- Rnd 2: You’re increasing—2 sc in each stitch means you double the count to 16.
- Rnd 3: The asterisks mean “repeat this sequence.” So you’ll do: 1 sc, then 2 in the next, and repeat all the way around. This creates a smooth increase.
Notice how each round builds on the last, forming a flat circle. If you didn’t increase correctly, your coaster would curl or pucker.
Takeaway: Always read instructions slowly. If you see parentheses, they usually show the expected stitch count—use them to check your work.
Common Pitfalls and How to Avoid Them
Even experienced crocheters make mistakes. Here are some common issues—and how to fix them:
- Miscounting Stitches
It happens to everyone. Solution: Use stitch markers every 10 stitches or at the end of each row. Count at the end of each round. - Forgetting to Turn or Join
Easy to overlook. Always check the last line of each row. Did it say “turn”? Did you slip stitch to close the round? - Working in the Wrong Loop
Most patterns work in both loops unless specified. If your edges look uneven, check if you should be working in the front loop only (FLO) or back loop only (BLO). - Skipping the First Stitch
In rows, the turning chain often counts as the first stitch. Don’t crochet into it again unless the pattern says to. - Ignoring Gauge
Leads to ill-fitting projects. Always test your gauge, especially for wearables. - Using the Wrong Yarn Weight
Substituting yarn? Check the weight symbol. A bulky yarn won’t work in a fingering-weight pattern.
Pro Tip: Keep a crochet journal. Note which hook and yarn you used, your gauge, and any adjustments. It’s a lifesaver for future projects.
Customizing Patterns: Making Them Your Own
Once you’re comfortable reading patterns, the real fun begins: modifying them. Want a longer scarf? Add more chains. Prefer a tighter fabric? Use a smaller hook.
Here are simple ways to personalize:
- Change colors: Use stripes, gradients, or color blocks.
- Adjust size: Increase or decrease rounds for hats or blankets.
- Swap stitches: Replace dc with hdc for a denser texture.
- Add embellishments: Buttons, tassels, or embroidery.
But be cautious: some changes affect structure. For example, turning a flat circle into a bowl requires shaping and increases.
Also, always save the original pattern before editing. That way, you can return to it if needed.
Inspiration: Many designers start by altering free patterns. Over time, they develop their own style. You can too!
Resources and Tools to Boost Your Confidence
You don’t have to learn everything at once. Here are helpful tools:
- Printable Abbreviation Charts: Keep one taped to your project bag.
- YouTube Tutorials: Visual learners benefit from watching stitch techniques.
- Crochet Apps: Some apps decode patterns or track your rows.
- Online Communities: Reddit’s r/crochet or Facebook groups offer support.
- Stitch Markers & Row Counters: Physical tools that prevent mistakes.
And don’t underestimate the power of practice. Make a swatch of every stitch type. Try a simple dishcloth to build muscle memory.
Conclusion: Your Crochet Journey Starts Here
Learning to read crochet patterns is like learning a new language—one that lets you create warmth, beauty, and joy with just a hook and yarn. We’ve covered the essentials: understanding structure, decoding abbreviations, mastering gauge, and avoiding common mistakes. You now have the tools to approach any beginner pattern with confidence.
Remember, every expert crocheter was once a beginner who didn’t know what “sc” stood for. Progress comes with patience and practice. Don’t be afraid to make mistakes—they’re part of the process.
So what’s next? Pick a simple pattern—maybe a coaster or a headband—and give it a try. Use this guide as your companion. And when you finish, take a moment to admire what you’ve made. It’s not just a project; it’s proof of your growing skill.
Now we’d love to hear from you: What’s the first pattern you’re excited to try? Share it in the comments below, or tag us on social media with your creation. Happy crocheting! 🪝🧶

Daniele Ferreira is passionate about the world of crochet, dedicating her time to exploring techniques, creating unique pieces, and sharing her knowledge with beginners and aficionados alike. With attention to detail and creativity, she transforms yarn into true works of art, inspiring others to discover the beauty and joy of this manual art.


