
Have you ever spent hours—or even days—crafting a beautiful crochet blanket, only to feel disappointed when the photos don’t do it justice? You’re not alone. In today’s digital world, how your handmade creations look in pictures can make all the difference—whether you’re sharing them on Instagram, selling them online, or simply preserving memories of your work. Great photography isn’t just for professionals with expensive gear; it’s a skill every crocheter can learn and master.
This article is all about helping you take stunning photos of your crochet projects—without needing a photography degree or a studio setup. We’ll walk through simple, practical techniques that anyone can use, from choosing the right lighting to styling your shots like a pro. You’ll discover how a few thoughtful tweaks can transform a flat, dull image into one that captures texture, color, and the soul of your handmade piece.
Whether you’re a hobbyist who loves to share your progress or a small business owner building a brand, learning to photograph your work well will boost your confidence and your reach. So grab your latest project, your phone or camera, and let’s dive into the art of making your crochet shine—literally and figuratively.
Why Photography Matters for Crocheters
You’ve probably heard the saying, “A picture is worth a thousand words.” For crocheters, that couldn’t be truer—especially in the age of social media and online marketplaces. A well-taken photo doesn’t just show your project; it tells a story. It invites people to feel the softness of a baby blanket, imagine the warmth of a hand-knit scarf, or appreciate the intricate stitch pattern of a doily.
Think about it: when you browse Etsy or Instagram, what catches your eye first? It’s not the product description or the price—it’s the image. Studies show that high-quality photos increase engagement, trust, and sales. In fact, according to a 2023 Shopify report, listings with professional-looking images see up to 60% more clicks than those with poor-quality photos.
But here’s the good news: you don’t need a fancy DSLR or a photo studio to create beautiful images. Most of us already have what we need—our smartphones. With the right techniques, even a simple phone camera can produce gallery-worthy shots. The key is understanding the basics: lighting, composition, and presentation.
And it’s not just about selling. Capturing your projects well helps you track your progress, celebrate your growth, and inspire others in the crafting community. Every photo becomes a little piece of your creative journey.
So, whether you’re documenting your first granny square or launching a crochet brand, investing time in learning photography is an investment in your craft.
Lighting: Your Secret Weapon for Stunning Photos
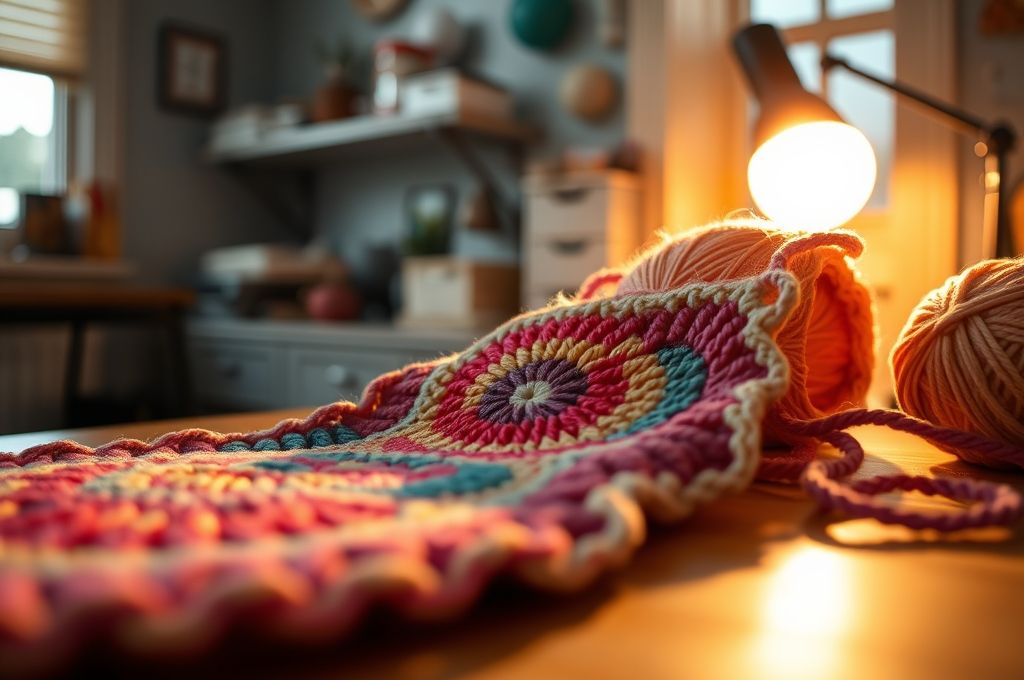
If there’s one thing that can make or break a photo, it’s lighting. The right light enhances colors, reveals texture, and gives your project a professional glow. The wrong light? It can wash out details, create harsh shadows, or make your yarn look nothing like it does in real life.
Natural light is your best friend. Soft, diffused daylight—like the kind that comes through a window on a cloudy day or in the early morning—is ideal for photographing crochet. It’s gentle, even, and brings out the true colors of your yarn. Avoid direct sunlight, especially midday, as it creates harsh contrasts and glare that can obscure stitch details.
Try setting up your shoot near a large window with sheer curtains. The fabric diffuses the sunlight, creating a soft, flattering glow. If you don’t have a good window, you can mimic natural light with a daylight-balanced LED panel or a simple ring light (many affordable options are available online).
Here’s a quick tip: place your project so the light falls on it from the side or slightly in front. This creates subtle shadows that highlight texture—perfect for showing off cables, bobbles, or lace patterns.
Avoid using your phone’s flash. It tends to create hotspots and flatten the image, making your crochet look flat and lifeless. Instead, if the room is too dark, add a second light source opposite the main one to balance the shadows.
And remember: consistency matters. If you’re taking multiple photos for a series (like a step-by-step tutorial), try to shoot them all at the same time of day to keep the lighting uniform.
With a little attention to light, your photos will go from “meh” to “wow” in no time.
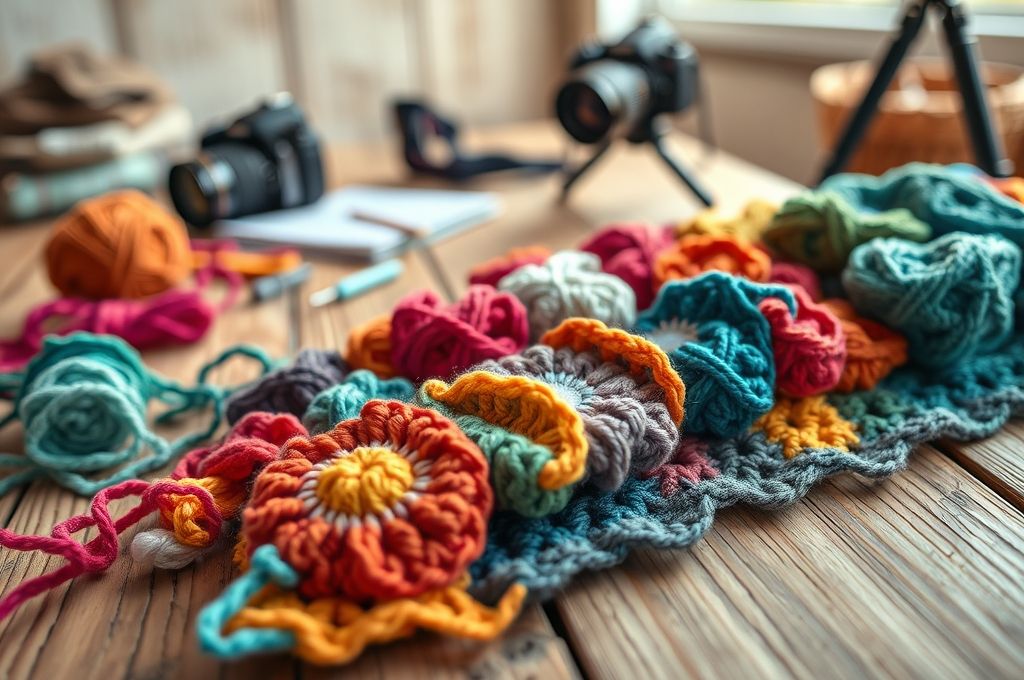
Styling Your Shot: Creating a Story Around Your Work
Now that you’ve nailed the lighting, let’s talk about what you’re photographing—and how you’re presenting it. Styling is where your personality and creativity really come through. It’s not just about the finished piece; it’s about the mood, the context, and the story you want to tell.
Imagine two photos of the same crochet beanie. In one, it’s lying flat on a white table. In the other, it’s worn by a child playing in a park, leaves falling around them, a scarf and mittens nearby. Which one pulls you in more? The second one, right? That’s the power of styling.
You don’t need a full photoshoot setup to create compelling images. Start with a clean, simple background—a wooden table, a neutral wall, or a folded linen sheet. These provide contrast without distracting from your project.
Then, add a few props that complement your piece. For a baby blanket, include a tiny stuffed animal or a pair of baby booties. For a cozy winter scarf, pair it with a mug of hot cocoa or a stack of books. These small details help viewers imagine how your item fits into real life.
Another powerful styling technique? Show your project in use. A model wearing a sweater, a basket holding a crocheted market bag, or a blanket draped over a couch all make your work feel more relatable and desirable.
And don’t forget the flat lay. This popular style involves arranging your project and props on a flat surface, shot from directly above. It’s perfect for showing off stitch patterns and color combinations. Use a tripod or ask someone to hold your phone straight above the scene to keep the shot level.
The goal isn’t perfection—it’s authenticity. Let your space, your hands, or even a pet paw sneak into the frame. Those little imperfections make your photos feel real, warm, and inviting.
Camera Settings and Angles: Framing Your Masterpiece
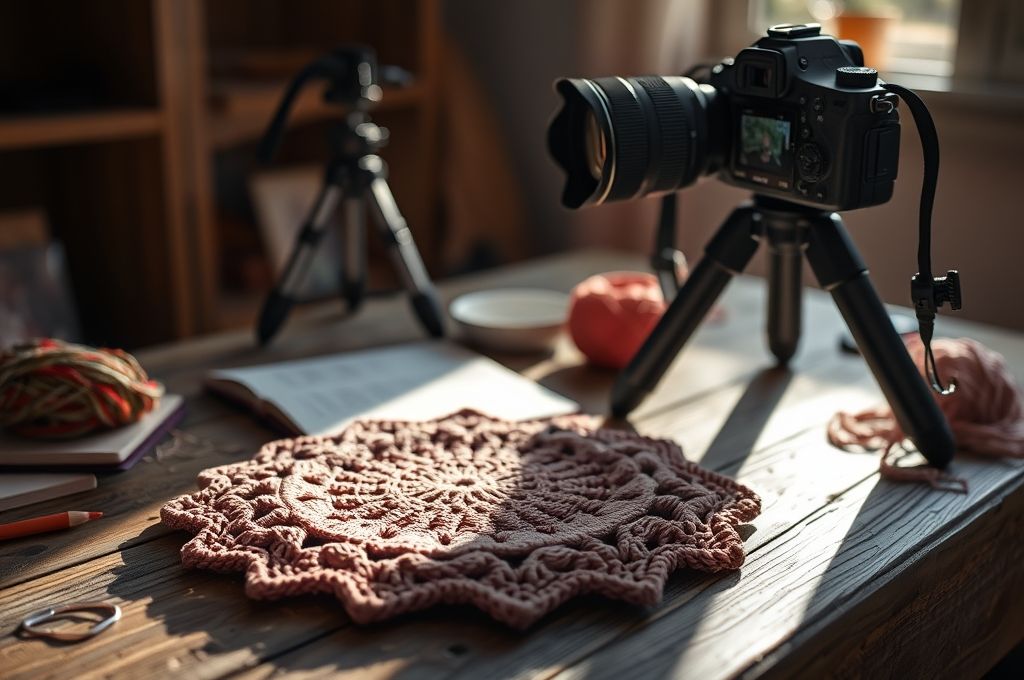
Even with great lighting and styling, the way you frame your shot can dramatically affect the final image. Choosing the right angle and understanding basic camera settings can help you highlight the best features of your crochet work.
Let’s start with angles. The most common mistake? Shooting from too high or too low. A straight-on shot—where the camera is level with the project—works well for garments or wearable items. It shows shape and fit without distortion.
For texture-focused pieces like afghans or dishcloths, try a 45-degree angle. This side view creates depth and makes stitches pop. It’s especially effective for cables, popcorns, or any 3D elements in your work.
Flat lays, as mentioned earlier, are shot from directly above. Make sure your phone or camera is perfectly centered to avoid skewed lines. Use a small tripod or stack of books to stabilize your device.
Now, let’s talk about your camera. Most smartphones today have excellent cameras with manual settings. Open your camera app and look for options like exposure, focus, and HDR.
Tap on your screen to set the focus point—this tells your camera where to sharpen the image. If your project looks too dark or too bright, slide your finger up or down to adjust the exposure. You want enough light to see every stitch, but not so much that colors wash out.
Use HDR (High Dynamic Range) mode when there’s a mix of light and shadow. It blends multiple exposures to preserve detail in both bright and dark areas—perfect for window-light photography.
If you’re using a DSLR or mirrorless camera, shoot in RAW format when possible. It gives you more flexibility in editing later. Use a wide aperture (like f/2.8) for a blurred background (bokeh), or a smaller one (f/8 or higher) for sharp focus across the entire piece.
And here’s a pro tip: clean your lens! A smudge or fingerprint can ruin an otherwise perfect shot.
With these techniques, you’ll be able to capture your work from every angle—literally and figuratively.
Editing: The Final Polish
You’ve taken the photo. The lighting is soft, the styling is on point, and the angle shows off your stitches perfectly. Now, a little editing can take it from great to gorgeous.
Editing doesn’t mean heavy filters or unrealistic changes. It’s about subtle adjustments that enhance what’s already there—like ironing a finished garment before wearing it.
Most smartphones come with built-in editing tools. Apps like Snapseed, VSCO, or Lightroom Mobile offer more advanced features and are free to download.
Start with basic adjustments:
- Brightness: Make sure your project is well-lit but not overexposed.
- Contrast: A slight boost can make colors and textures stand out.
- Saturation: Adjust yarn colors to match reality. Don’t oversaturate—realistic is better than flashy.
- White Balance: This corrects color tones. If your photo looks too yellow or blue, tweak this setting until whites look neutral.
Be careful not to over-edit. The goal is to make your photo look better, not different. Your audience will notice if the yarn color in the photo doesn’t match the real item—that can hurt trust, especially if you’re selling.
Cropping is another powerful tool. Use it to remove distractions, center your subject, or create a consistent look across your feed. For social media, stick to standard ratios: 1:1 for Instagram posts, 9:16 for Stories, and 16:9 for YouTube thumbnails.
And always save the original! Keep a backup of the unedited photo in case you want to try a different style later.
Remember: editing should enhance, not disguise. Your crochet is already beautiful—editing just helps the world see it clearly.
Common Mistakes (And How to Avoid Them)
Even experienced crafters make photography mistakes. The good news? Most are easy to fix once you know what to look for.
Mistake #1: Busy backgrounds. A cluttered table or a messy room pulls attention away from your project. Solution: simplify. Use a solid-colored backdrop or a clean surface. A plain sheet, a piece of craft foam, or even a large book can work.
Mistake #2: Dirty or wrinkled projects. Dust, pet hair, or creases can ruin an otherwise perfect photo. Always steam or gently press your piece before shooting. A handheld steamer or iron on low (with a cloth barrier) works wonders.
Mistake #3: Inconsistent style. If your Instagram feed jumps from dark moody shots to bright flat lays, it can feel disjointed. Develop a consistent look—whether it’s warm tones, minimalist styling, or natural settings. This builds a recognizable brand.
Mistake #4: Ignoring the details. Close-up shots of stitch patterns are just as important as full-project photos. Use macro mode or get close with your phone to capture texture. These shots are especially useful for pattern designers or sellers.
Mistake #5: Not using a tripod. Holding your phone can lead to shaky, crooked photos. A small tabletop tripod (under $15) keeps your camera steady and frees your hands for styling.
Mistake #6: Forgetting the human touch. While flat lays are clean and professional, photos with hands holding a project or a model wearing it add warmth and scale. Include a few of these to balance your portfolio.
By avoiding these common pitfalls, your photos will look more polished and professional—without requiring extra time or money.
Sharing Your Work: From Camera Roll to Community
Now that you’ve taken beautiful photos, it’s time to share them with the world. And this is where your photography truly pays off.
Social media platforms like Instagram, Pinterest, and TikTok are visual-first spaces—perfect for showcasing handmade crafts. A stunning photo can attract followers, spark conversations, and even lead to sales.
When posting, write a caption that tells a story. Instead of “Just finished this blanket,” try “This cozy ripple blanket took 30 hours and three cups of tea—but seeing it wrapped around my niece made it all worth it.” People connect with stories, not just products.
Use relevant hashtags like #crochetlove, #handmadewithlove, or #yarnaddict to reach your community. On Pinterest, create eye-catching pins with clear titles and keywords—“Easy Crochet Baby Hat Pattern” performs better than “Cute Hat.”
If you’re selling online, use multiple photos per listing: one flat lay, one in use, one close-up of the stitch, and one showing scale (like a hand holding the item). This builds trust and reduces return requests.
And don’t forget to credit yourself. Add a small watermark or signature in the corner if you’re sharing patterns or designs. It’s a gentle way to protect your work while staying professional.
Every photo you share is a chance to inspire someone else. Maybe your striped shawl encourages a beginner to try their first color change. Maybe your styled flat lay gives another crafter a new idea for props. Your images don’t just document your work—they contribute to a larger creative community.
Inspiration from Real Crocheters
Still not sure where to start? Look to the vibrant community of crocheters who’ve already mastered the art of photography.
Take @TheYarnCircle on Instagram, for example. Her photos are simple but stunning—often shot on a wooden porch with morning light. She uses neutral props like clay mugs and linen napkins, letting her colorful crochet pieces stand out. Her secret? “I shoot at the same time every day. The light is always consistent, and I don’t have to think too hard.”
Or consider @HookedByKari, a crochet designer who uses flat lays to showcase her patterns. She arranges yarn skeins, hooks, and project notes in artistic compositions. “It’s not just about the finished item,” she says. “It’s about the whole process—the tools, the inspiration, the joy.”
Then there’s small business owner Maria Lopez, who sells crochet home goods on Etsy. She credits her sales growth to switching from phone snapshots to styled, well-lit photos. “I started using a $20 ring light and a white foam board. My conversion rate doubled in two months.”
These crocheters aren’t professionals. They’re crafters like you, using simple tools and consistent effort to make their work shine.
You don’t need a huge following or a fancy setup to start. Just a willingness to learn, experiment, and share.
Final Thoughts: Let Your Craft Speak Volumes
Photography isn’t just a technical skill—it’s an extension of your creativity. When you learn to photograph your crochet projects well, you’re not just capturing an object. You’re preserving a moment, sharing a passion, and connecting with others who love handmade things.
Every stitch you make is a labor of love. It deserves to be seen in the best possible light—literally and figuratively. With the tips in this article, you now have the tools to make that happen.
Start small. Try one new technique this week—maybe it’s shooting near a window, or adding a simple prop. Take a few extra minutes to style your shot or adjust the exposure. Over time, these small choices will add up to a big difference.
And remember: perfection isn’t the goal. Connection is. A slightly crooked photo of your first amigurumi bunny, taken with love, means more than a flawless but soulless image.
So go ahead—pull out your latest project, find a patch of soft light, and take that photo. Share it with pride. Because your work matters. And now, the world can see it clearly.
Your Turn: Shine a Light on Your Craft
Now it’s your turn. What’s one photography tip you’ll try this week? Have you had a “before and after” moment when a better photo changed how people responded to your work? Share your story in the comments—we’d love to hear from you.
And if you found this guide helpful, don’t keep it to yourself. Share it with a fellow crocheter who’s ready to make their projects shine. After all, creativity grows best when it’s shared.
Happy hooking—and happy shooting! 📸🧶

Daniele Ferreira is passionate about the world of crochet, dedicating her time to exploring techniques, creating unique pieces, and sharing her knowledge with beginners and aficionados alike. With attention to detail and creativity, she transforms yarn into true works of art, inspiring others to discover the beauty and joy of this manual art.


