
Introduction: The Magic of Layered Stitches
Have you ever looked at a crochet piece and felt like it was alive? Not because it moved, but because it seemed to breathe with color, depth, and texture—like a whisper of wind across a knitted scarf or the gentle ripple of waves in a crocheted blanket? That magic often comes from a technique known as overlay crochet.
Overlay crochet is more than just another stitch pattern—it’s an art form that transforms flat fabric into something dynamic and dimensional. By layering stitches over others, crocheters can create bold textures, intricate colorwork, and stunning visual effects without relying on complex tapestry techniques or multiple yarns at once. Whether you’re crafting a cozy throw, a statement shawl, or even wearable art, overlay crochet opens up a world where color and texture dance together in harmony.
In this article, we’ll dive deep into the vibrant world of overlay crochet. You’ll discover how this technique works, why it’s become a favorite among modern fiber artists, and how you can use it to elevate your own projects. From understanding the basics to exploring creative applications and troubleshooting common challenges, we’ll cover everything you need to start layering with confidence. Along the way, you’ll find practical tips, inspiring examples, and a fresh perspective on how simple stitches can create extraordinary results.
So grab your hook, pick your favorite yarn, and let’s unravel the beauty of overlay crochet—one textured row at a time.
What Is Overlay Crochet?
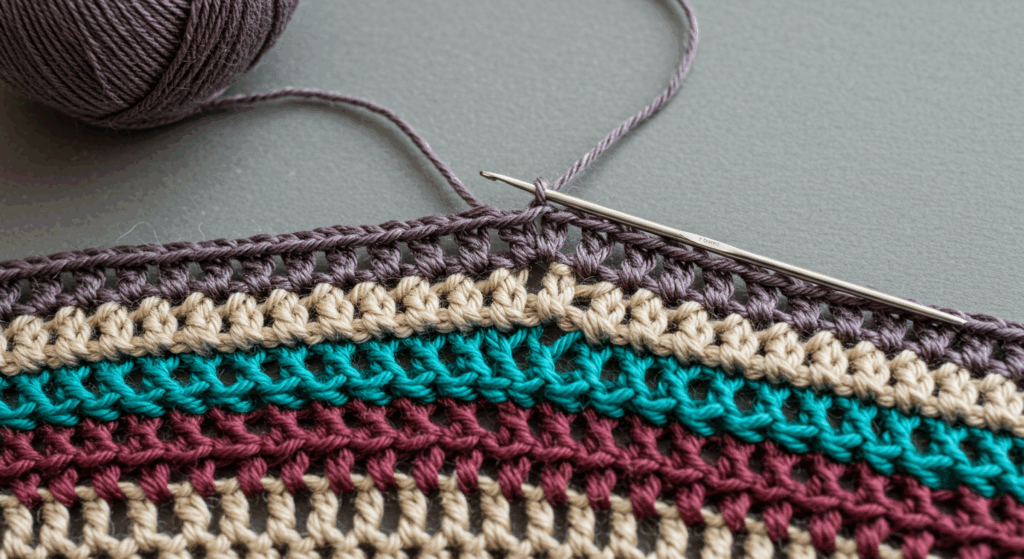
At its core, overlay crochet is a method of creating texture and color contrast by working stitches over existing ones, rather than into them. Unlike traditional crochet, where each stitch is worked directly into the fabric below, overlay techniques involve skipping certain stitches and crocheting over them—often using a different color—to produce raised lines, shadow effects, or bold geometric patterns.
There are two main types: front post overlay and back post overlay, depending on which side of the skipped stitch you work over. These posts act like pillars, and when you crochet around them (or over them), they create ridges and valleys that catch the light differently, giving your piece a three-dimensional feel.
One of the biggest advantages of overlay crochet is its ability to mimic cable knitting or woven textures—without requiring advanced skills. For example, instead of learning how to cable knit with a crochet hook (which can be tricky), you can achieve a similar look by overlaying single or double crochets in a contrasting color over a base layer.
This technique is especially popular in modern crochet design because it allows for bold graphic patterns and color blocking without the hassle of carrying multiple yarns or dealing with tangled floats (as in fair isle knitting). Designers like Dedri Uys and Rachel Choi have popularized overlay crochet through stunning blankets and shawls that look almost too intricate to be handmade.
And here’s the best part: you don’t need special tools or expensive yarns to get started. Just a basic hook, some worsted-weight yarn, and a willingness to experiment.
Why Overlay Crochet Stands Out
So why has overlay crochet gained such a loyal following in recent years? The answer lies in its versatility and visual impact.
First, consider texture. Most crochet patterns rely on post stitches (like front post double crochet) to create ribbing or cables. But overlay crochet takes this a step further by leaving stitches unworked and building over them, which creates a floating effect—almost like embroidery stitched directly into the fabric. This gives your work a sculptural quality that’s both modern and timeless.
Second, there’s the color dimension. Because overlay stitches are often done in a contrasting hue, they “pop” against the background. Imagine a charcoal gray blanket with bright coral lines weaving across it like sunbeams—that kind of drama is easy to achieve with overlay techniques.
But it’s not just about looks. Overlay crochet also offers functional benefits. Since the base layer remains intact, the fabric stays warm and dense, making it ideal for winter wearables. At the same time, the overlay adds minimal bulk, so your finished piece won’t feel stiff or heavy.
Another reason this technique stands out? It’s surprisingly accessible. While it may look complex, overlay crochet uses familiar stitches—single crochet, double crochet, slip stitches—arranged in clever ways. Once you understand the rhythm of skipping stitches and working over them, the patterns begin to make sense, almost like solving a puzzle one row at a time.
And let’s not forget creativity. Overlay crochet invites experimentation. Want to try a rainbow gradient? Layer different colors in successive rows. Prefer minimalist elegance? Use subtle tonal shifts to create shadow effects. The technique adapts to your style, whether you’re drawn to bohemian flair or Scandinavian simplicity.
In short, overlay crochet isn’t just another trend—it’s a bridge between tradition and innovation, offering crafters a way to express themselves while mastering a skill that feels both fresh and deeply satisfying.
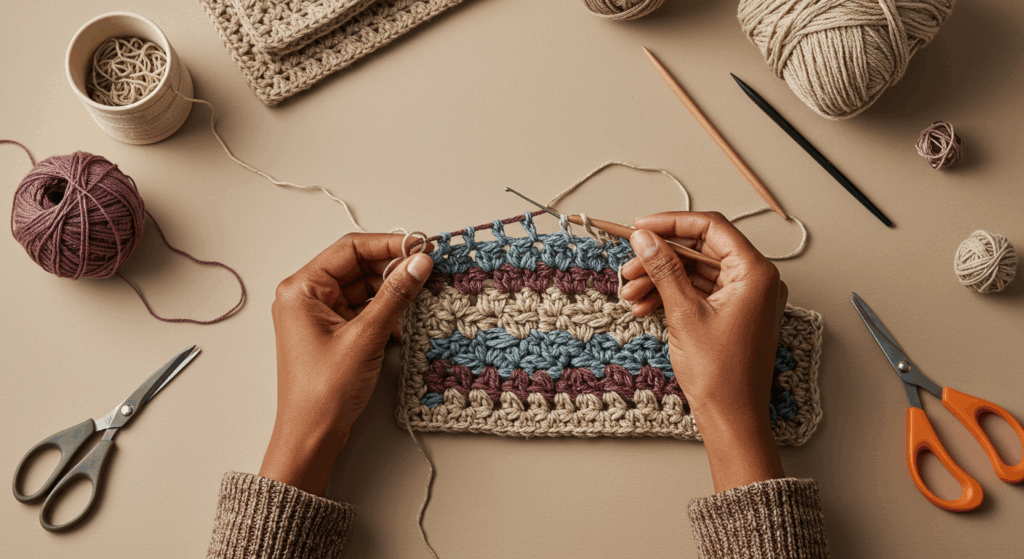
Getting Started: Tools and Techniques You’ll Need
Before diving into your first overlay project, let’s go over the essentials. The good news? You probably already have most of what you need.
1. Yarn:
Choose medium-weight (worsted) yarn for your first attempts. It’s sturdy enough to hold structure but soft enough to work with comfortably. Cotton blends or acrylics are great for beginners. For maximum contrast, pair a light background color with a darker overlay—or vice versa.
2. Hook Size:
Use a hook size recommended for your yarn (usually 5.0–5.5 mm for worsted weight). Some crocheters prefer going up a half-size to keep tension loose, especially since overlay stitches can tighten the fabric.
3. Stitch Markers:
These little helpers are invaluable. Place them at the beginning or end of pattern repeats to keep track of your rows, especially when working large motifs.
4. Scissors and Tapestry Needle:
For weaving in ends—because you’ll likely be changing colors frequently.
Now, let’s talk technique.
The foundation of overlay crochet is the skip-and-overlay motion. Here’s a simple example:
- Work a row of double crochets.
- On the next row, skip the first stitch, then work a double crochet over the next stitch (not into it).
- Continue: skip one, overlay one.
- At the end of the row, turn and repeat.
The skipped stitches remain untouched, forming a “ghost layer” beneath the overlay. When done in a contrasting color, these overlays create diagonal stripes, zigzags, or even floral motifs, depending on the pattern.
A key tip: maintain consistent tension. Overlay stitches can pull the fabric tighter, so avoid yanking the yarn too hard. Think of it like drawing with thread—smooth, even strokes create the best results.
Also, pay attention to row alignment. Since you’re skipping stitches, it’s easy to lose count. Count your stitches every few rows, and don’t hesitate to frog (rip out) a row if something looks off. Perfection isn’t the goal—progress is.
Once you’ve mastered the basic skip-and-overlay rhythm, you can explore variations like:
- Alternating overlays (left vs. right slant)
- Stacked overlays (building layers on top of previous overlays)
- Color blocking (using multiple overlay colors in one piece)
Start small—a 6”x6” swatch is perfect for testing ideas. You might be surprised how quickly the technique clicks.
Creative Applications: From Blankets to Wearables
Now that you’ve got the basics down, let’s talk about what you can actually make with overlay crochet.
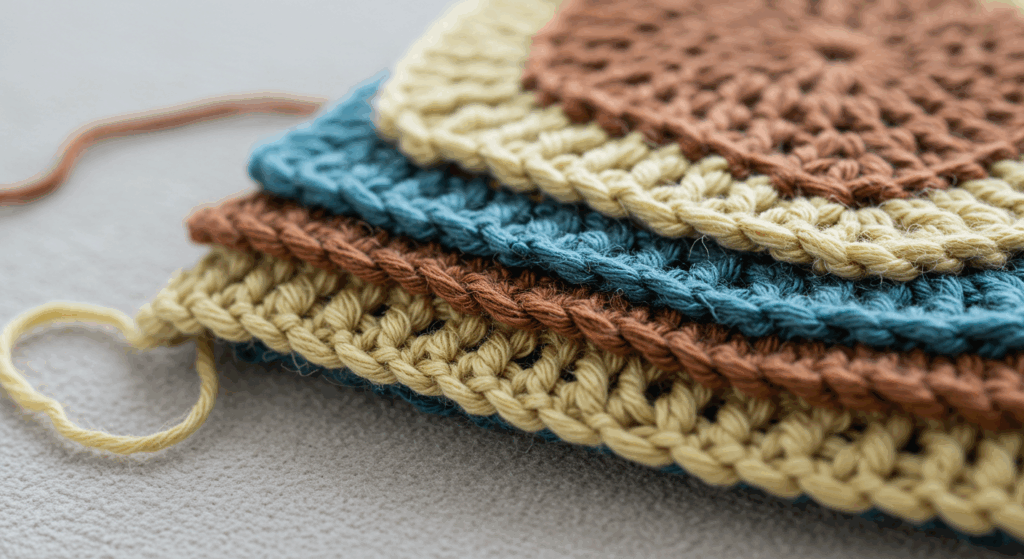
The most popular application? Blankets. And for good reason. Large projects like afghans give you plenty of space to play with patterns, color gradients, and layered textures. A well-designed overlay blanket becomes a centerpiece—something that draws people in from across the room.
Take the Moss Stitch Overlay Blanket, for example. It uses alternating front and back loop stitches overlaid in a second color to create a subtle, quilted effect. From afar, it looks like woven fabric; up close, you can see the careful handwork behind every ridge and groove.
But don’t stop at blankets.
Shawls and scarves are excellent canvases for overlay crochet. The flowing shape allows for dramatic diagonal overlays that mimic water ripples or mountain ranges. Try using a gradient yarn for the base and overlay with a solid color for a striking contrast.
For wearable art, consider cardigans or vests. Overlay crochet can be used along the edges, down the front panels, or even across the shoulders to add visual interest without compromising comfort. A denim-blue cardigan with mustard-yellow overlays, for instance, instantly becomes a statement piece.
Home decor is another exciting frontier. Think:
- Pillows with geometric overlay patterns
- Table runners featuring seasonal motifs (like snowflakes or leaves)
- Wall hangings that blend overlay crochet with tassels and fringe
And here’s a fun idea: customize existing items. Ever have a plain crochet hat or bag that feels a little too simple? Add a few overlay stripes or symbols in a contrasting color to give it new life. It’s like embroidery, but integrated into the fabric itself.
Even amigurumi (crocheted toys) can benefit from overlay details. Use thin overlay stitches to add facial features, clothing lines, or decorative patterns without sewing on separate pieces.
The possibilities are limited only by your imagination—and maybe your yarn stash.
Overlay Crochet vs. Other Textured Techniques
With so many ways to add texture in crochet, you might wonder: How does overlay crochet compare to other methods?
Let’s break it down.
1. Post Stitches (Front Post/Back Post):
These are the go-to for ribbing and cables. They create texture by crocheting around a stitch from the row below, making it pop forward or backward. While effective, post stitches can make fabric stiffer and harder to work with over large areas. Overlay crochet, on the other hand, leaves the original stitch untouched and builds over it, resulting in a smoother backside and more flexibility.
2. Tapestry Crochet:
This involves carrying two or more colors in a single row to create images or patterns. While beautiful, tapestry can be fiddly, with loose floats on the back and a higher chance of mistakes. Overlay crochet simplifies colorwork by working one color at a time, reducing tangling and making corrections easier.
3. Intarsia Crochet:
Similar to tapestry, but with separate yarn bobbins for each color block. Great for large solid-color sections, but cumbersome for intricate designs. Overlay crochet avoids this by layering color on top, eliminating the need for multiple strands.
4. Embroidery on Crochet:
Some crafters add texture by stitching designs onto finished pieces. While this works, it adds extra steps and can look less integrated. Overlay crochet is built into the fabric as you go, creating a seamless, unified look.
5. Filet Crochet:
Uses open and solid mesh patterns to form images. It’s elegant but limited to lace-like designs. Overlay crochet offers denser texture and works well in both lace and solid fabrics.
So, which technique is best? It depends on your project. But if you want bold texture, easy color changes, and a modern aesthetic, overlay crochet often comes out on top.
That said, the real magic happens when you combine techniques. Imagine a blanket with filet sections, bordered by overlay stripes, and accented with embroidered details. Now that’s fiber art.
Tips for Success: Avoiding Common Mistakes
Even the most experienced crocheters run into hiccups with overlay crochet. But don’t worry—most issues are easy to fix once you know what to look for.
1. Uneven Tension
Problem: Your overlay rows look tighter than the base.
Solution: Relax your grip on the yarn. Practice maintaining the same tension as your foundation rows. Going up a hook size for overlay rows can also help.
2. Misaligned Patterns
Problem: The diagonal lines wobble or shift.
Solution: Count your stitches carefully. Use stitch markers every 10 stitches to stay on track. Make sure you’re consistently skipping and overlaying the correct number of stitches per repeat.
3. Twisted or Warped Fabric
Problem: The piece curls at the edges.
Solution: This often happens when overlay stitches pull too tightly. Try blocking your finished piece—wet it lightly, pin it flat, and let it dry. This evens out the tension and smooths the fabric.
4. Color Bleeding or Pilling
Problem: Contrasting yarns look messy after washing.
Solution: Always pre-wash your yarn if you’re mixing brands or fiber types. Stick to high-quality, colorfast yarns, especially for items that will be washed often.
5. Difficulty Reading the Pattern
Problem: You lose your place in complex charts.
Solution: Highlight the current row you’re working on. Use sticky notes or a row counter. If following a written pattern, read ahead a few rows to anticipate changes.
Bonus Tip: Keep a crochet journal. Note which hook size, yarn, and tension worked best for each project. Over time, you’ll build a personal reference guide that speeds up future creations.
Remember: every “mistake” is just a learning opportunity. Some of the most beloved crochet textures started as happy accidents.
Inspiring Projects to Try
Ready to put your skills to the test? Here are five beginner-friendly overlay crochet projects to spark your creativity:
1. The Sunset Ripple Shawl
A semi-circular shawl using gradient yarn for the base and deep purple overlays in wavy lines. Perfect for spring evenings.
2. Geometric Pillow Cover
Create a modern accent pillow with bold black overlays on a cream background. Use triangular or hexagonal patterns for a contemporary look.
3. Layered Beanie
Work a simple ribbed beanie, then add horizontal overlay stripes in a contrasting color near the brim. Quick, stylish, and great for gifts.
4. Heartfelt Baby Blanket
Use soft pastel yarn with white base and delicate pink overlay hearts scattered throughout. Ideal for baby showers.
5. Color-Block Tote Bag
Crochet a sturdy tote with vertical overlay panels in three different colors. Functional, fashionable, and totally customizable.
Each of these projects teaches a different aspect of overlay crochet—from color blending to pattern alignment—while resulting in something beautiful and usable.
And if you’re feeling adventurous, try designing your own pattern. Sketch a simple motif (like waves or stars), map it onto a grid, and translate it into overlay rows. You might just create your next masterpiece.
The Emotional Craft: Why Overlay Crochet Feels So Rewarding
Beyond the stitches and yarn, there’s something deeply satisfying about overlay crochet.
It’s not just about making something pretty—it’s about the process. The rhythmic repetition of skip, overlay, skip, overlay becomes meditative. Your hands move almost on autopilot, while your mind unwinds. Studies have shown that repetitive crafts like crochet can reduce stress, improve focus, and even boost mood by releasing dopamine—the brain’s “feel-good” chemical.
But overlay crochet adds an extra layer (pun intended) of engagement. Because you’re constantly making decisions—Which color next? Should this line slant left or right? How many stitches to skip?—your brain stays active and curious. It’s like a creative puzzle that evolves with every row.
And then there’s the surprise factor. Often, the full impact of an overlay design doesn’t reveal itself until several rows later. You’re crocheting blind, trusting the pattern, and suddenly—there it is. The hidden image emerges. The texture comes alive. That moment of discovery is pure joy.
Many crocheters describe overlay projects as “addictive” not because they’re hard, but because they’re rewarding. Each row feels like progress. Each color change is a celebration. And when you finish, you’re left with more than a blanket or scarf—you have a tangible record of time, care, and creativity.
In a world that moves fast and often feels impersonal, overlay crochet is a quiet rebellion. It says: I made this. By hand. With intention.
How Overlay Crochet Fits Into Modern Craft Culture
Crochet isn’t just a hobby anymore—it’s a movement.
Today, crafters are reclaiming handmade traditions as acts of self-expression, sustainability, and mindfulness. Overlay crochet fits perfectly into this cultural shift.
First, it supports slow fashion. Instead of buying mass-produced decor or clothing, people are choosing to make their own—with unique designs that reflect their personality. An overlay crochet sweater isn’t just warm; it tells a story.
Second, it promotes sustainability. By reusing yarn scraps or upcycling old projects with overlay details, crafters reduce waste and breathe new life into forgotten pieces.
Third, it fosters community. Online groups, Instagram hashtags like #overlaycrochet, and YouTube tutorials have created global networks where beginners and experts share tips, patterns, and encouragement. It’s not about perfection—it’s about connection.
Designers are also embracing overlay crochet for its artistic potential. Exhibitions now feature crocheted installations with layered textures that challenge the boundary between craft and fine art. What was once seen as “just a craft” is now celebrated in galleries and design magazines.
And let’s not forget mental wellness. In a time of digital overload, hands-on activities like overlay crochet offer a digital detox—a chance to unplug, focus, and create something real.
Whether you’re 18 or 80, new to crochet or a seasoned pro, overlay techniques invite you to slow down, pay attention, and make something meaningful.
Conclusion: Weave Your Own Story
Overlay crochet is more than a technique—it’s a way of seeing. It teaches us that beauty often lies in the layers, in the spaces between, in the quiet moments where one color meets another and something new is born.
Throughout this article, we’ve explored how overlay crochet adds depth, color, and emotion to handmade pieces. We’ve looked at tools, techniques, and projects that bring this method to life. Most importantly, we’ve seen how something as simple as skipping a stitch can lead to extraordinary results.
Now it’s your turn.
Pick up your hook. Choose two colors that speak to you. Start with a swatch. See what happens when you layer one stitch over another. You might surprise yourself.
And when you do—share it. Post a photo, write a note, gift it to someone you love. Let your creation be part of a larger story: one of creativity, resilience, and human connection.
Because in the end, every overlay stitch is a reminder:
We are all works in progress, beautifully layered, one row at a time.
What will your next layer be?
👉 We’d love to hear from you! Have you tried overlay crochet? What patterns or colors inspire you? Leave a comment below or tag us in your project photos. Let’s grow this creative community together.

Daniele Ferreira is passionate about the world of crochet, dedicating her time to exploring techniques, creating unique pieces, and sharing her knowledge with beginners and aficionados alike. With attention to detail and creativity, she transforms yarn into true works of art, inspiring others to discover the beauty and joy of this manual art.


