
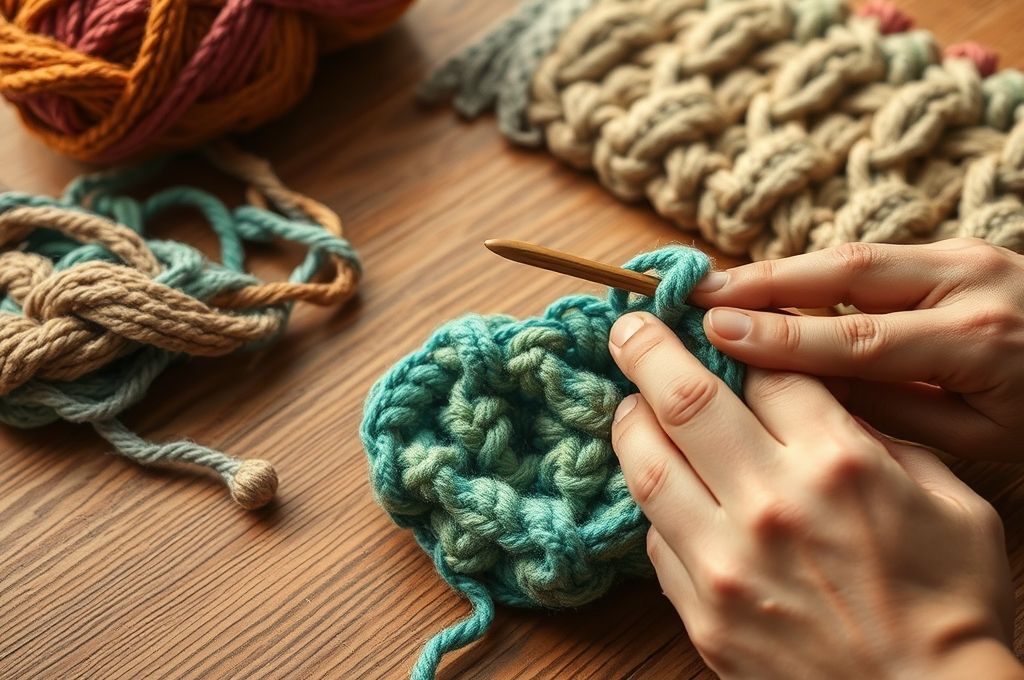
Have you ever run your fingers over a cozy blanket or a warm sweater and marveled at the intricate swirls and raised patterns that seem almost sculpted into the fabric? Chances are, you were touching the beautiful handiwork of cable crochet—a technique that transforms simple stitches into stunning, three-dimensional designs. More than just a decorative flair, cable crochet adds depth, warmth, and personality to any project. Whether you’re a seasoned crocheter or just starting to explore the world of yarn crafts, mastering cable crochet opens up a whole new dimension of creative possibilities.
In this article, we’ll dive deep into the art of cable crochet, exploring what makes it so unique, why it’s worth learning, and how you can incorporate it into your projects with confidence. From understanding the basic mechanics behind cable stitches to choosing the right yarn and tools, we’ll cover everything you need to get started. You’ll also discover practical tips, common pitfalls to avoid, and inspiring project ideas that showcase the true beauty of textured crochet. Along the way, we’ll share real-life examples and easy-to-follow guidance so you can move from admiration to creation.
By the end of this journey, you won’t just know how to crochet cables—you’ll understand why they work and how to use them creatively in your own designs. So grab your hook, pick out a soft skein of yarn, and let’s unravel the magic of texture and dimension in cable crochet.
What Is Cable Crochet and Why Does It Matter?
At its core, cable crochet is a technique that mimics the look of knitted cables—those twisting, rope-like patterns often seen in Aran sweaters—but achieved entirely through crochet stitches. Instead of knitting needles and complex bobbles, cable crochet uses simple stitches like double crochets (UK treble crochets) rearranged in a specific order to create the illusion of cables crossing over and under each other.
The magic happens when you skip stitches and work into earlier rows, creating a crossover effect. For example, a basic cable might involve working two sets of double crochets: one set into the current row, and another set pulled from two or three rows below. When these stitches are grouped together and alternated, they form a raised braid-like design that stands out beautifully from the background fabric.
But why go through the extra effort? Because texture tells a story. A flat piece of crochet fabric may be functional, but a cabled piece feels alive. It invites touch, catches light differently, and adds visual interest that elevates even the simplest patterns. Think of a plain beanie versus one with vertical cables spiraling up its sides—the latter instantly feels more luxurious, intentional, and handmade.
Cable crochet also offers practical benefits. The added density from the twisted stitches makes garments and accessories warmer and more durable, ideal for winter wear like scarves, hats, and cardigans. Plus, because the technique relies on manipulating existing stitches rather than adding complexity, it’s surprisingly accessible once you understand the logic behind it.
In short, cable crochet isn’t just about aesthetics—it’s about crafting with intention, turning ordinary yarn into something extraordinary.
The Building Blocks: Understanding Cable Stitches
Before you start weaving intricate braids into your work, it helps to understand the foundational elements of cable crochet. Unlike traditional crochet, where stitches build upward in a linear fashion, cable crochet plays with depth and timing—literally reaching back into previous rows to alter the structure of the fabric.
The most common type of cable stitch is the front post double crochet (FPDC) and back post double crochet (BPDC). These aren’t new stitches per se, but variations of the standard double crochet where you wrap the yarn around the post (the vertical part) of a stitch from a prior row instead of inserting the hook into the top loops.
- FPDC: You crochet in front of the target stitch, wrapping the post from right to left.
- BPDC: You crochet behind the stitch, wrapping from left to right.
When alternated in sequence—say, FPDC, FPDC, BPDC, BPDC—you create a raised ridge that appears to twist, forming the basis of a cable.
Another method involves crossed double crochets (XDC) or crossover stitches, where you skip a stitch, work a double crochet into a stitch from two rows below, then complete the next stitch in the current row. This creates a diagonal crossover effect without needing post stitches.
For beginners, XDCs are often easier to grasp, while post stitches offer more precision and are better for continuous cable patterns. Both techniques require a bit of patience and attention to stitch count, but once mastered, they become second nature.
Pro Tip: Use stitch markers to highlight where cables should begin and end. This helps maintain alignment, especially in larger projects like blankets or sweaters.
Understanding these building blocks empowers you to read patterns, modify designs, and even invent your own cable motifs. And the best part? You don’t need special hooks or tools—just your regular crochet kit and a willingness to experiment.
Tools and Materials: Setting Yourself Up for Success
Even the most skilled crocheter can struggle if their tools aren’t up to the task. Cable crochet, with its layered stitches and frequent skipping, demands a little extra thought when selecting materials. Get this part right, and your project will flow smoothly. Skip it, and you might end up with a tangled mess.
Let’s start with hook size. While you can technically use any hook, a slightly larger hook than recommended for your yarn weight can make a big difference. Why? Because cable stitches pull the fabric tighter, sometimes causing it to pucker or curl. A larger hook loosens the tension just enough to keep your work flat and flexible.
For example:
- If your yarn label suggests a 5.0 mm hook, try going up to 5.5 mm.
- For bulky yarns, consider a 6.5–7.0 mm hook to maintain drape.
Next, yarn choice is crucial. Not all yarns show texture equally. Smooth, medium-weight worsted acrylic or wool blends are ideal because they hold stitch definition well without being too slippery. Avoid fuzzy or novelty yarns (like mohair or eyelash) for your first cable project—they obscure the details and make it hard to see where to place your hook.
Here’s a quick guide:
| Worsted Acrylic | ✅ Yes | Affordable, durable, shows texture clearly |
| Cotton | ⚠️ Moderate | Less elasticity; can make cables stiff |
| Wool/Wool Blends | ✅ Yes | Natural bounce helps cables pop |
| Mohair/Fuzzy | ❌ No | Hides stitch definition |
| Variegated | ⚠️ Use with care | Color changes can distract from pattern |
Also, consider lighting and visibility. Since cable crochet requires tracking stitches across multiple rows, good lighting is essential. Natural daylight or a bright LED lamp reduces eye strain and helps you spot mistakes early.
Finally, don’t underestimate the power of stitch markers, row counters, and a notebook. Marking the start of each cable panel saves hours of unraveling later. A row counter keeps you on track with repeating patterns, and jotting down adjustments helps you replicate success in future projects.
With the right setup, cable crochet stops feeling intimidating and starts feeling like a joyful challenge.
Step-by-Step: Creating Your First Cable Stitch
Ready to try your hand at cable crochet? Let’s walk through a simple 4-stitch cable using the crossed double crochet (XDC) method. This beginner-friendly technique creates a clean, braided look without requiring post stitches—perfect for scarves, dishcloths, or pillow covers.
You’ll need:
- Worsted weight yarn
- 5.5 mm crochet hook
- Scissors and yarn needle
- Stitch marker (optional)
Pattern: 4-Stitch Cable (worked over 6 rows)
- Foundation Row: Chain 20 (or any multiple of 4 + 2). Double crochet (DC) in the 4th chain from the hook and in each chain across. Turn. (18 DC)
- Row 1–3: Chain 3 (counts as first DC), DC in each stitch across. Turn.
- Row 4 (Cable Row): Chain 3, skip the next stitch, XDC in the next stitch (see instructions below), DC in the skipped stitch, repeat from * to end. Turn.
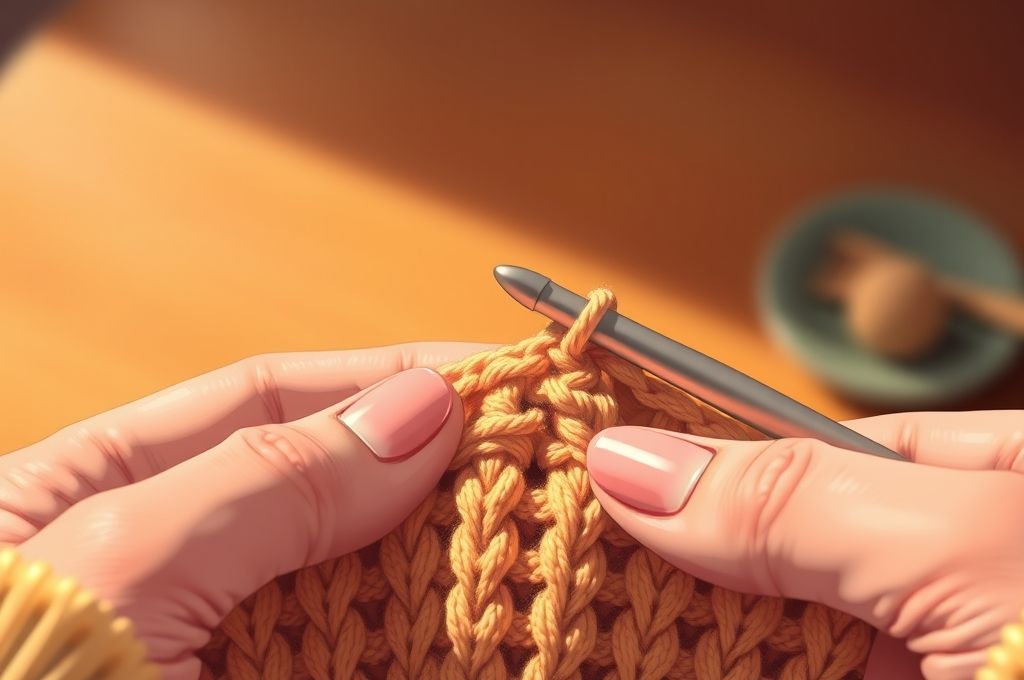
How to make an XDC:
- Skip one stitch.
- Insert hook from front to back around the post of the DC two rows below (in the same position).
- Yarn over and pull up a loop (you’ll have 2 loops on hook).
- Complete the double crochet as usual (yarn over, pull through 2 loops twice).
- Then, go back and complete the skipped stitch with a regular DC.
- Row 5–6: Repeat Rows 1–2.
Repeat Rows 1–6 for a continuous cable effect.
At first, the XDC might feel awkward—like you’re “cheating” the fabric. But as you continue, you’ll see the cable emerge, twisting gently across your work. It’s like magic revealed stitch by stitch.
Common Mistake Alert: Forgetting to complete the skipped stitch after the XDC. This creates gaps and distorts the pattern. Always finish both parts of the crossover.
Once you’ve mastered this basic cable, try spacing them apart (e.g., 6 plain stitches between cables) or grouping them for a bolder look. You can even reverse the crossover direction on alternate rows to create an infinity braid effect.
This small project builds muscle memory and confidence—your gateway to more advanced cable designs.
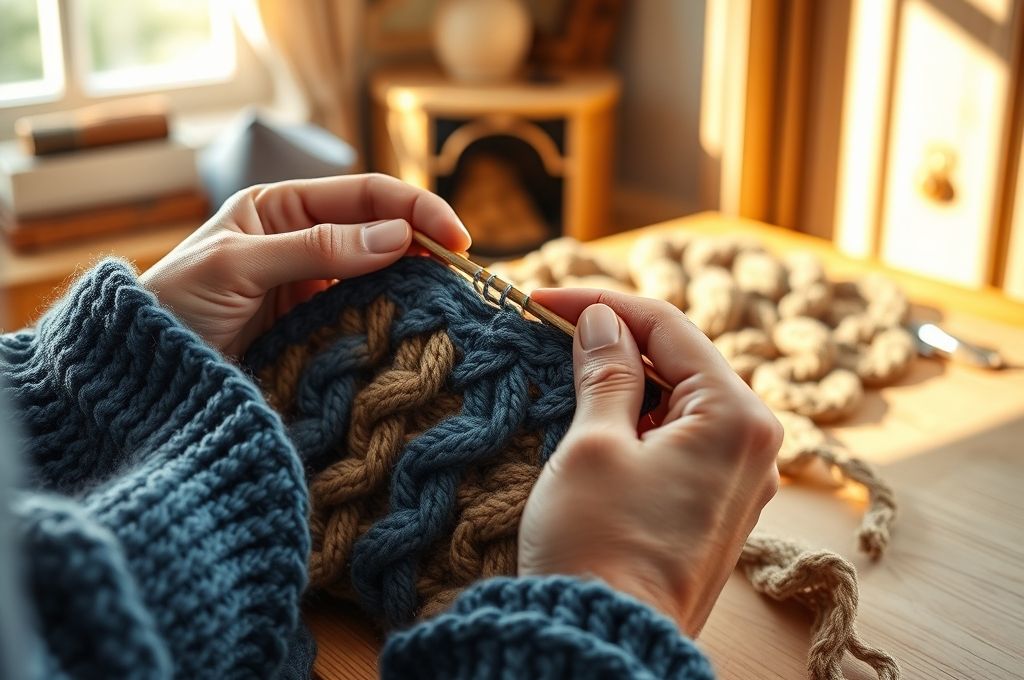
From Scarves to Sweaters: Creative Projects That Shine
Now that you’ve got the basics down, let’s talk inspiration. Cable crochet isn’t just for show—it’s incredibly versatile. From wearable fashion to home décor, textured stitches add elegance and warmth to a wide range of items.
1. Infinity Scarf with Braided Cables
Imagine a cozy loop of soft wool, wrapped snugly around your neck, with thick cables winding like vines. This project uses alternating FPDC and BPDC stitches to create a raised braid that spirals endlessly. Add tassels or fringe for a bohemian touch.
2. Cabled Beanie
A classic beanie gets a stylish upgrade with vertical cables radiating from the crown. Perfect for gifting or selling at craft fairs, this hat combines warmth with craftsmanship. Use a contrasting color for the cables to make them pop.
3. Throw Blanket with Celtic Knot Motifs
For ambitious crocheters, a large blanket featuring interwoven cable patterns mimics traditional Celtic knots. Work in panels, then seam together. Choose neutral tones for a modern look or rich earth colors for a rustic vibe.
4. Textured Pillow Covers
Small projects pack a big punch. A square pillow with a central cable medallion or geometric grid adds depth to any living space. Use cotton yarn for easy washing and durability.
5. Cardigan with Cable Panels
Take it to the next level with a custom sweater. Design side panels with vertical cables running from hem to cuff, flanking a simple stockinette-style body. This blend of texture and simplicity keeps the project manageable while looking high-end.
The key to success? Start small, scale up gradually. Master a single cable before attempting complex lace-cable hybrids. And remember: even pros make mistakes. Frogging (ripping out) a few rows is part of the process.
Fun Fact: The iconic Aran sweaters of Ireland, famous for their cable patterns, were originally worn by fishermen. Each family had a unique design—almost like a coded sweater ID!
Today, you can honor that tradition by personalizing your cables—maybe weaving in initials or meaningful symbols through stitch placement.
Troubleshooting Common Cable Crochet Challenges
Even with the best preparation, cable crochet can throw curveballs. Here are some common issues and how to fix them—before they ruin your project.
Problem 1: Fabric is Too Tight or Curling
Cables naturally pull the fabric inward. If your work is puckering or rolling at the edges, your hook may be too small or your tension too tight.
✅ Solution: Go up a hook size or two. Also, add a border of single crochets or shell stitches after finishing to stabilize the edges.
Problem 2: Cables Aren’t Visible
If your beautiful braid looks flat or blurry, it could be your yarn or lighting.
✅ Solution: Switch to a smoother, solid-color yarn. Check your work under bright light to ensure stitches are properly formed.
Problem 3: Losing Count or Misaligning Cables
It’s easy to miss a skipped stitch or forget where a cable starts—especially on large pieces.
✅ Solution: Use stitch markers at the beginning and end of each cable panel. Count stitches every few rows. Highlight cable rows on your pattern with a highlighter.
Problem 4: Uneven Tension in Crossover Stitches
XDCs can look sloppy if the loops are too loose or too tight.
✅ Solution: Practice the motion slowly. Keep consistent yarn tension, and don’t yank the hook when pulling up loops from previous rows.
Problem 5: Difficulty Working Into Previous Rows
As your project grows, reaching back two rows can become tricky, especially with thick yarn.
✅ Solution: Use a crochet hook with a pointed tip for better precision. Or, switch to surface slip stitching for decorative cables on finished fabric.
Remember: every mistake is a learning opportunity. Even experienced crocheters frog entire sections. What matters is persistence and patience.
Beyond the Basics: Designing Your Own Cable Patterns
Once you’re comfortable with existing patterns, why not create your own? Designing custom cables is easier than it sounds—and deeply rewarding.
Start by sketching a simple grid on graph paper (or use free software like Stitch Fiddle). Each square represents a stitch. Plan your cable path by “crossing” stitches diagonally across rows. For example:
- A right-slanting cable: Move 2 stitches to the right every 4 rows.
- A left-slanting cable: Move 2 stitches to the left.
Then, translate this into stitches:
- Use XDCs to simulate the crossover.
- Fill gaps with regular DCs or trebles.
- Alternate cable rows with plain rows to let the texture breathe.
You can also combine cables with other elements:
- Lace panels between cables for contrast.
- Color changes to highlight certain sections.
- Reversible cables using mirrored FPDC/BPDC sequences.
Design Tip: Limit your first custom pattern to 1–2 cable types. Too many variations can overwhelm the eye.
As you experiment, keep a swatch journal. Crochet small samples (about 4” x 4”) of each design, label them, and note what worked. Over time, you’ll build a library of original motifs you can use in future projects.
This creative freedom is what makes cable crochet so special—it’s not just following instructions, but telling your own story through texture.
The Joy of Slow Crafting in a Fast-Paced World
In an age of instant gratification—where we expect answers in seconds and packages the next day—cable crochet offers something rare: the beauty of slowness. Each stitch is deliberate. Each cable takes time to form. There’s no rush, no algorithm pushing you forward. Just you, your hook, and the rhythm of creation.
This isn’t just crafting—it’s mindfulness. Studies have shown that repetitive, hands-on activities like crocheting reduce stress, improve focus, and even help manage anxiety. The act of making something tangible with your hands grounds you in the present moment. And when you’re working on a textured piece like a cable project, the sensory feedback—seeing the pattern emerge, feeling the ridges form—adds an extra layer of satisfaction.
Moreover, cable crochet connects us to a long tradition of handmade artistry. Before mass production, garments were painstakingly crafted by hand, each stitch a testament to care and skill. By choosing to make something textured and complex, you’re honoring that legacy.
So the next time you feel pressured to do more, faster, remember: there is power in pausing. In a world that values speed, taking the time to master a cable stitch is a quiet act of resistance—and a deeply personal form of expression.
Conclusion: Weaving More Than Yarn—Weaving Meaning
Cable crochet is more than a technique—it’s a journey into texture, patience, and creativity. From the first time you pull a loop from a previous row to the moment you hold a finished cabled blanket in your hands, you’re not just making something beautiful. You’re building confidence, focus, and a deeper connection to the craft.
In this article, we’ve explored what cable crochet is, how to execute it, and why it matters—not just for your projects, but for your well-being. We’ve walked through tools, troubleshooting, and even designing your own patterns. Most importantly, we’ve seen how this art form blends practicality with artistry, tradition with innovation.
Now it’s your turn. Pick up your hook. Choose a yarn that speaks to you. Try a simple cable swatch, or dive into a full project. Don’t worry about perfection—worry about progress. Every twisted stitch is a step forward.
And when you’re done, share it. Post a photo, gift it to someone you love, or simply admire it with quiet pride. Because in a world full of mass-produced items, a handmade cable piece carries something unique: your time, your care, your soul.
So what will you create? A cozy scarf for winter? A baby blanket with gentle braids? Or maybe your very first cabled sweater?
Whatever it is—we can’t wait to see it. Drop a comment below and tell us about your cable crochet journey. Share your wins, your challenges, and your dreams. Let’s grow this community of makers, one textured stitch at a time.
Happy crocheting! 🪝🧶

Daniele Ferreira is passionate about the world of crochet, dedicating her time to exploring techniques, creating unique pieces, and sharing her knowledge with beginners and aficionados alike. With attention to detail and creativity, she transforms yarn into true works of art, inspiring others to discover the beauty and joy of this manual art.


