
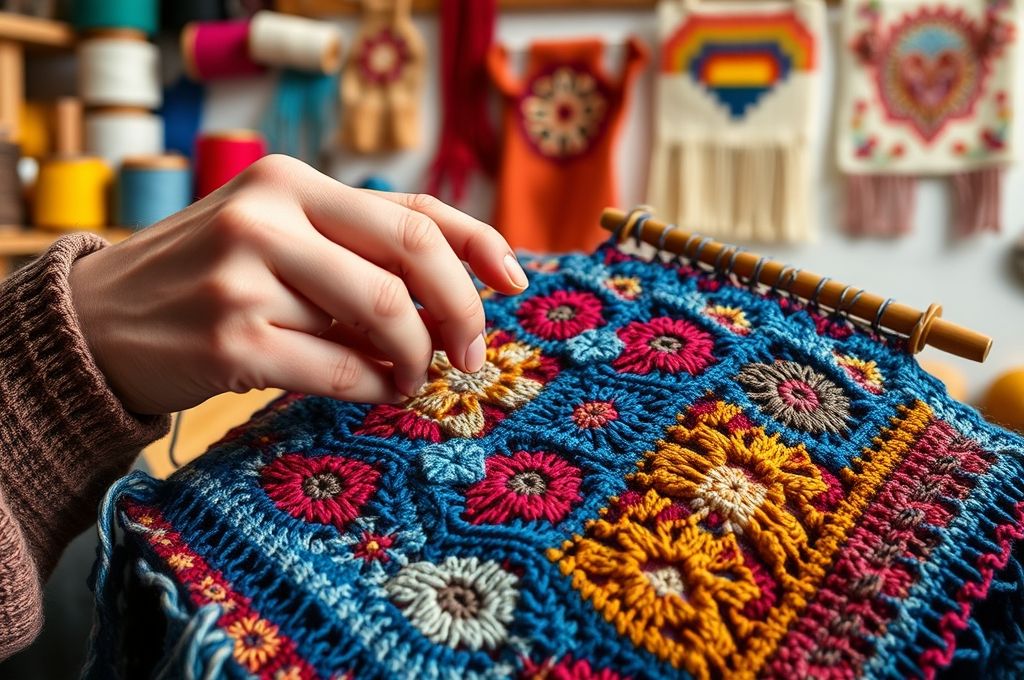
The Art of Color in Crochet
Have you ever looked at a beautifully patterned crochet blanket and wondered, “How did they do that?” The answer often lies in two powerful techniques: intarsia and tapestry crochet. These colorwork methods transform simple stitches into stunning visual stories—whether it’s a geometric throw, a whimsical amigurumi, or a wearable piece bursting with personality.
Crocheting with multiple colors isn’t just about aesthetics—it’s a creative superpower. It allows crafters to express themselves, personalize projects, and elevate their skills beyond basic single-color work. But let’s be honest: diving into colorwork can feel intimidating. Tangled yarns, messy backs, and confusion over which technique to use are common frustrations.
That’s exactly why this masterclass exists. Whether you’re a beginner eager to try your first color change or an experienced crocheter looking to refine your technique, we’ll break down intarsia and tapestry crochet in a way that’s clear, practical, and inspiring. We’ll explore how they differ, when to use each, and how to avoid common pitfalls—all while keeping your work neat and your creativity flowing.
By the end of this guide, you won’t just understand these techniques—you’ll be ready to create vibrant, professional-looking pieces with confidence. So grab your hook, pick your favorite yarns, and let’s dive into the colorful world of crochet colorwork.
What Is Colorwork Crochet?
Before we jump into the specifics of intarsia and tapestry, let’s define what colorwork crochet really means.
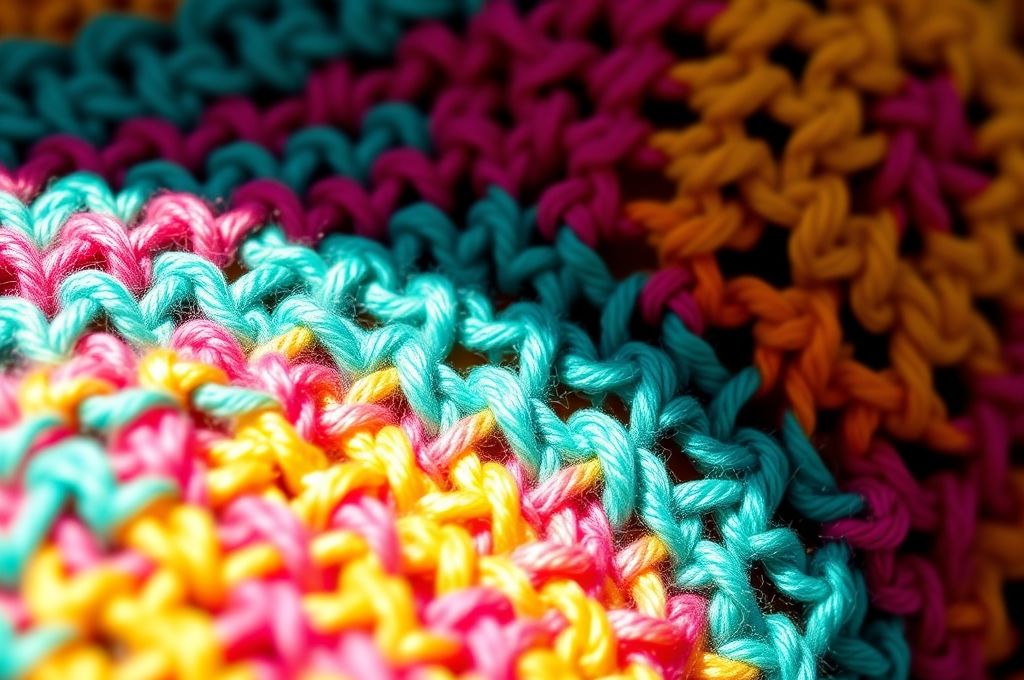
In its simplest form, colorwork crochet involves using more than one color of yarn in a single project to create patterns, pictures, or designs. Think of it like painting—but instead of a brush, you’re using a crochet hook and yarn as your medium.
There are several ways to achieve color changes in crochet, but two of the most popular and effective methods are intarsia and tapestry crochet. While both allow for intricate color patterns, they work differently and serve different purposes.
Imagine you’re making a sweater with a large red heart on a white background. If you use intarsia, you’d work only with red yarn where the heart appears and white yarn elsewhere, switching between separate balls of yarn as needed. This keeps the back of your work clean and minimizes excess yarn.
On the other hand, if you use tapestry crochet, you’d carry both the red and white yarns throughout each row, even when not actively using them. This creates a denser fabric—great for items like bags or coasters that need extra durability.
Understanding the difference between these techniques is crucial because choosing the wrong one can lead to frustration, bulkiness, or wasted materials. But once you know how each works, you gain the freedom to choose the best method for your project—and unlock endless design possibilities.
In the following sections, we’ll take a deep dive into both techniques, step by step.
Intarsia Crochet: Precision and Clean Backs
Let’s start with intarsia crochet, a technique borrowed from knitting but adapted beautifully for crochet.
Intarsia is ideal when you want to create large blocks of color that don’t repeat across the row. For example, if you’re making a blanket with a big sun in the corner or a tote bag with a bold logo, intarsia lets you work each color section independently.
Here’s how it works: instead of carrying unused yarn along the back of your work, you switch between separate yarn strands only when needed. Each color block has its own ball or bobbin of yarn. When you reach the edge of a color section, you drop one yarn and pick up the next.
This results in a clean, flat back with minimal yarn waste—perfect for garments or projects where the inside will be visible.
One of the biggest advantages of intarsia is precision. Because you’re only using the yarn you need at any given moment, your fabric stays lightweight and flexible. It’s also excellent for complex shapes and asymmetrical designs.
However, intarsia does come with a learning curve. Managing multiple yarns without tangling them requires organization. Many crocheters use yarn bobbins—small plastic or wooden spools—to keep each color neat and tangle-free.
Another tip: always twist the two yarns together at the color change point to prevent gaps. This small step ensures a seamless transition and a polished finish.
While intarsia takes a bit more setup, the payoff is worth it. Imagine a baby blanket with a rainbow arc—each color vibrant and distinct, with no long floats on the back. That’s the magic of intarsia.
Now that you understand the basics, let’s look at its counterpart—a technique built for repetition and rhythm.
Tapestry Crochet: Rhythm, Repetition, and Durability
If intarsia is the precision artist, tapestry crochet is the rhythmic storyteller.
This technique involves carrying multiple yarn colors throughout each row, even when not actively using them. The unused yarn is “floated” along the back of the stitches, hidden beneath the active color. This makes tapestry perfect for repeating patterns, like stripes, checkerboards, or traditional motifs such as Aztec or Fair Isle designs.
Tapestry crochet is especially popular in amigurumi (crocheted stuffed toys) and accessories like hats, scarves, and bags. Why? Because the carried yarn creates a thicker, more durable fabric that resists stretching and wear.
For example, if you’re making a crocheted pencil case with a polka dot pattern, tapestry allows you to alternate between background and dot colors seamlessly, row after row, without cutting and rejoining yarn.
One of the biggest benefits of tapestry is efficiency. You don’t have to weave in dozens of ends because you’re not constantly cutting yarn. Instead, you manage two (or more) strands at once, carrying them across the row.
But there’s a trade-off: the back of your work will have visible floats—the strands of unused yarn running behind the stitches. If too long, these can snag or distort the fabric. That’s why tapestry works best with small color changes (typically 1–5 stitches wide). For wider color blocks, the floats become bulky and impractical.
To keep floats taut but not tight, crochet over them gently as you go. Some crocheters even trap the float by inserting the hook under both the working loop and the carried yarn, securing it in place.
With practice, tapestry becomes almost meditative—the rhythm of switching colors, the growing pattern emerging stitch by stitch. It’s a favorite among designers who love symmetry and repetition.
But how do you decide which technique to use? Let’s compare them side by side.
Intarsia vs. Tapestry: Choosing the Right Technique
So, how do you know whether to use intarsia or tapestry crochet?
The answer depends on three key factors: pattern complexity, fabric needs, and your personal preferences.
Let’s break it down:
| Best for | Large, isolated color blocks (e.g., logos, animals) | Repeating patterns (e.g., stripes, geometric designs) |
| Yarn Management | Multiple bobbins or balls; yarn cut at color changes | Two or more continuous strands; yarn carried across rows |
| Back of Work | Clean and flat | Has floats; slightly bulkier |
| Fabric Weight | Lighter and more drapey | Denser and sturdier |
| End Weaving | More ends to weave in | Fewer ends, but floats to manage |
| Skill Level | Intermediate (requires organization) | Beginner-friendly once rhythm is learned |
Use intarsia when:
- You’re working on a one-of-a-kind design with big, non-repeating color sections.
- You want a lightweight fabric with no bulk on the back.
- The project will be worn or displayed where the reverse side might show.
Use tapestry when:
- You’re creating repeating patterns like chevrons, stars, or lettering.
- You need a sturdy, warm fabric (ideal for winter wearables or home decor).
- You prefer fewer yarn tails and don’t mind a slightly thicker back.
For example, if you’re making a baby blanket with a large owl in the center, intarsia would give you clean color blocks and a soft back. But if you’re crocheting a cozy beanie with alternating colored stripes, tapestry would save time and create a snug fit.
Some advanced crocheters even combine both techniques in a single project—using intarsia for the main image and tapestry for the border.
The key is to match the technique to your design goals. There’s no “better” method—only the one that suits your project best.
Now that you know the differences, let’s look at how to get started with each.
Getting Started: Tools and Tips for Success
Ready to try intarsia or tapestry crochet? Here’s what you’ll need and some pro tips to make your first project a success.
Essential Tools:
- Crochet hooks (size appropriate for your yarn)
- Yarn in multiple colors (same weight for consistency)
- Yarn bobbins or small clips (for intarsia organization)
- Tapestry needle (for weaving in ends)
- Stitch markers (to mark pattern repeats)
- Pattern or chart (preferably color-coded)
For Intarsia:
- Use bobbins to hold each color. Wind about 3–5 yards of yarn onto each bobbin. This prevents tangling and keeps your workspace tidy.
- Always twist yarns at color changes to close gaps. Do this on the right side of the work unless your pattern says otherwise.
- Keep tension even. Sudden pulls can pucker the fabric.
For Tapestry:
- Carry the unused yarn behind your work, not in front. This keeps it out of the way.
- Don’t pull too tightly on the carried yarn—floats should lie flat, not pucker the fabric.
- Every few stitches, crochet over the float to secure it, especially in tight tension.
General Tips:
- Start with a simple pattern—maybe a square with a heart or a striped coaster.
- Use high-contrast colors so you can clearly see your stitches.
- Practice on a swatch before starting a big project.
- Keep your yarn tails long enough (6–8 inches) to weave in later.
And remember: mistakes are part of the process. If your colors don’t line up perfectly or a float gets too tight, it’s fixable. The more you practice, the more intuitive it becomes.
Now, let’s explore how to read patterns designed for these techniques.
Reading Colorwork Charts: Your Roadmap to Success
One of the most empowering skills in colorwork crochet is reading charts.
Unlike written patterns, which describe each stitch in words, charts are visual maps that show exactly where each color goes. They’re especially useful for intarsia and tapestry projects.
A typical chart looks like a grid:
- Each square represents one stitch.
- Colors in the squares match the yarn colors to use.
- Rows are read from right to left on right-side rows, and left to right on wrong-side rows (for flat projects).
- For circular work (like hats or doilies), charts are read clockwise from the center out.
Here’s how to use a chart effectively:
- Identify the key: Most charts include a legend showing which symbol or color corresponds to each yarn.
- Mark your progress: Use a sticky note or ruler to cover rows you haven’t worked yet, revealing one row at a time.
- Highlight your current row: A highlighter or colored pencil can help you track where you are.
- Count stitches regularly: Miscounting can throw off the entire design, so double-check every few rows.
For tapestry, charts often repeat every few rows, making them predictable and easy to memorize after a few rounds.
For intarsia, charts help you see where to pick up a new color and when to set one aside.
If you’re new to charts, start with a small 10×10 grid project. You’ll quickly see how much faster and clearer they are than written instructions.
And don’t worry—many patterns come with both written and charted versions, so you can cross-reference as you learn.
Now that you can read the map, let’s talk about choosing the right yarn.
Choosing the Right Yarn for Colorwork
Yarn choice can make or break a colorwork project.
The best yarns for intarsia and tapestry are:
- Same weight and fiber content across all colors (to maintain even tension)
- Smooth and not too fuzzy (so color changes are crisp)
- Good stitch definition (you want your pattern to pop!)
Cotton and acrylic are top choices for beginners. They’re affordable, widely available, and hold their shape well. Cotton is especially great for tapestry because it’s less stretchy, reducing distortion.
Wool works beautifully too, especially for wearable items, but it can felt or stretch if not blocked properly.
Avoid eyelash yarn, chenille, or super bulky textures for colorwork—they obscure the pattern and make it hard to see where to change colors.
Color selection is just as important. High-contrast combinations (like black and white, navy and yellow) make patterns stand out. Low-contrast colors (like cream and beige) create subtle, elegant effects but may blend together if not carefully spaced.
Pro tip: Make a swatch with your chosen yarns before starting. This helps you test tension, color clarity, and overall look.
Also, buy extra yarn—especially for intarsia, where you can’t always predict how much of each color you’ll use.
With the right materials, your project will not only look better but be more enjoyable to make.
Common Mistakes and How to Avoid Them
Even experienced crocheters make mistakes in colorwork. The good news? Most are easy to fix.
Here are the top 5 pitfalls and how to avoid them:
- Twisted Yarns (Tangling)
Problem: Yarns twist around each other, making it hard to work.
Solution: Let your work hang freely every few rows to untwist. Use bobbins for intarsia to minimize tangling. - Gaps at Color Changes
Problem: Small holes appear where colors meet.
Solution: Twist the old and new yarns together at the back of the work before making the first stitch with the new color. - Uneven Tension
Problem: Some areas feel tighter or looser than others.
Solution: Practice consistent hook grip and relax your hands. Swatch first to adjust tension. - Long Floats Snagging (Tapestry)
Problem: Carried yarn on the back is too long and catches on things.
Solution: For floats longer than 3–4 stitches, weave the yarn through the back of stitches every few stitches to secure it. - Miscounting Stitches
Problem: Pattern gets misaligned.
Solution: Use stitch markers at pattern repeats. Count stitches at the end of each row.
Remember: crochet is forgiving. If you spot a mistake early, you can usually frog (rip out) a few rows and fix it. If it’s minor, it may not even be noticeable in the final piece.
The key is patience and practice. Every mistake teaches you something valuable.
Creative Applications: From Wearables to Wall Art
Now that you’ve mastered the basics, let’s get inspired.
Colorwork crochet isn’t just for blankets. Here are creative ways to use intarsia and tapestry:
- Tote bags with bold logos (intarsia for crisp lettering)
- Hats with geometric patterns (tapestry for warmth and style)
- Pillows with pixel-art animals (a fun mix of both techniques)
- Wall hangings with mandalas or quotes (intarsia for large color fields)
- Baby booties with tiny stars (tapestry for repeating motifs)
- Coasters and placemats (great for practicing color changes)
Designers are pushing the boundaries—using colorwork to create optical illusions, 3D effects, and even portraits in crochet.
You can even design your own patterns using graph paper or free online tools like ChartMkr or KnitPro. Start with a simple image, pixelate it, and turn each square into a stitch.
The possibilities are limited only by your imagination.
And don’t forget: colorwork can be therapeutic. The focus required helps quiet the mind, making it a form of mindful creativity.
Sustainability and Mindful Crafting
In a world of fast fashion and mass production, crochet offers something rare: slow, intentional creation.
When you make a colorwork piece by hand, you’re not just crafting an object—you’re investing time, care, and emotion into something unique.
Using leftover yarn scraps for intarsia bobbins or tapestry accents is a sustainable way to reduce waste. Many crocheters keep a “scraps bin” for small colorwork projects like keychains or ornaments.
You can also upcycle old garments by unraveling wool sweaters and reusing the yarn for new colorwork designs.
Beyond materials, colorwork encourages mindful making. The rhythm of switching colors, the focus on the chart, the gradual emergence of a design—it all fosters presence and patience.
In this way, crochet becomes more than a hobby. It’s a practice of creativity, sustainability, and self-expression.
So the next time you pick up your hook, remember: you’re not just making something beautiful. You’re participating in a tradition of handmade care that spans generations.
Conclusion: Your Colorful Journey Begins Now
We’ve covered a lot in this masterclass—from the technical differences between intarsia and tapestry crochet to practical tips, pattern reading, and creative inspiration.
You now know:
- How intarsia gives you clean, lightweight color blocks.
- How tapestry creates durable, rhythmic patterns.
- How to choose the right technique for your project.
- How to avoid common mistakes and organize your yarn like a pro.
But more importantly, you’ve seen that colorwork isn’t just a skill—it’s a gateway to self-expression, mindfulness, and joy.
So don’t wait for the “perfect” project. Start small. Try a coaster. Make a swatch. Experiment with two colors and see what happens.
Every expert was once a beginner holding a hook and wondering, “Can I do this?” The answer is yes.
Your colorful journey begins with a single stitch.
Now we’d love to hear from you:
👉 Have you tried intarsia or tapestry before? What project are you dreaming of making? Share your thoughts in the comments below—we’d love to cheer you on!
And if you found this guide helpful, please share it with a fellow crafter. Let’s keep the art of handmade alive, one stitch at a time.
Happy crocheting! 🌈🧶

Daniele Ferreira is passionate about the world of crochet, dedicating her time to exploring techniques, creating unique pieces, and sharing her knowledge with beginners and aficionados alike. With attention to detail and creativity, she transforms yarn into true works of art, inspiring others to discover the beauty and joy of this manual art.


