
Introduction
Ever opened a crochet pattern and felt like you were staring at hieroglyphics? You’re not alone. While written instructions can be confusing—especially with abbreviations like “dc2tog” or “ch-3 sp”—crochet diagrams offer a visual roadmap that many crafters find clearer, faster, and even more intuitive.
And here’s the best part: you don’t need to be an artist or a math whiz to understand them. Crochet diagrams are designed with symbols, arrows, and repetition markers that, once decoded, can actually speed up your projects and boost your confidence—especially with complex lace, garments, or international patterns.
In this beginner-friendly guide, we’ll break down exactly how to read crochet diagrams step by step. You’ll learn the most common symbols, how to follow rows or rounds visually, and why diagrams are especially helpful for visual learners or non-native English speakers. We’ll also share tips for practicing with simple projects and troubleshooting when things look “off.”
Whether you’ve avoided diagrams out of fear or you’ve peeked at one and felt lost, this article will give you the tools to unlock a whole new way of crocheting—one symbol at a time.
1. Why Crochet Diagrams Exist (And Why You Should Give Them a Try)
Before diving into “how,” let’s talk about “why.”
Crochet diagrams were developed to transcend language barriers. A pattern published in Japan, Brazil, or Sweden might use completely different written terms—but the diagram symbols are (mostly) universal, thanks to standards set by groups like the Craft Yarn Council.
But even if you only crochet from English patterns, diagrams offer real advantages:
- Visual clarity: You can see the stitch placement, shaping, and repeats instead of parsing dense text.
- Fewer misreads: It’s harder to skip a “skip next st” instruction when the diagram clearly shows an empty space.
- Better spatial understanding: Diagrams show how stitches connect and flow, which is invaluable for lace, motifs, or garments with shaping.
Think of it like GPS vs. written directions. “Turn left after the gas station, then go 1.3 miles” can be confusing—but a map with a highlighted route? Instant clarity.
Bonus: Many advanced patterns (like doilies, shawls, or amigurumi) include only diagrams—no written instructions at all. Learning this skill opens doors to thousands of beautiful designs you’d otherwise miss.
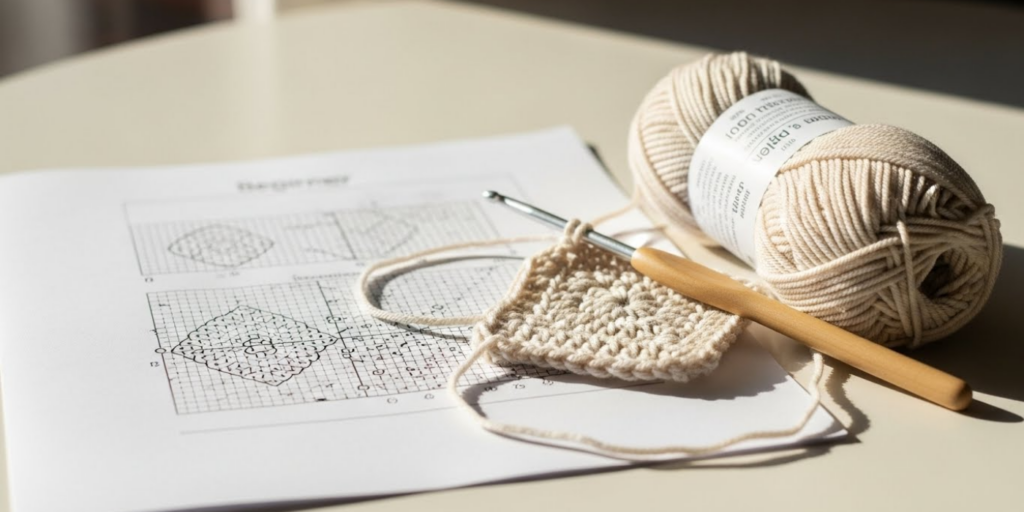
2. Understanding the Basic Symbols and Layout
Every crochet diagram is built from a small set of standardized symbols. Once you know them, you’ll recognize them everywhere.
Here are the most common (with US terms):
- Chain (ch): A small oval or circle
- Single crochet (sc): A cross or plus sign (+)
- Half double crochet (hdc): A T-shape
- Double crochet (dc): A T with one horizontal bar
- Treble crochet (tr): A T with two horizontal bars
- Slip stitch (sl st): A small dot or filled circle
- Stitch markers or repeats: Brackets [ ] or dashed lines enclosing a section
How the diagram flows:
- Flat pieces (worked back and forth): Row 1 starts at the bottom. Odd-numbered rows go right to left; even-numbered rows go left to right (just like your actual crocheting).
- In-the-round pieces: Rounds start at the center and spiral outward. Arrows often show direction.
Reading tip: Always check the key or legend first! Some designers use slight variations (e.g., a filled square for dc), so the key ensures you’re interpreting correctly.
Pro beginner move: Print a free symbol cheat sheet (many are available online) and keep it next to your project. Within a few uses, you’ll memorize the basics without thinking.
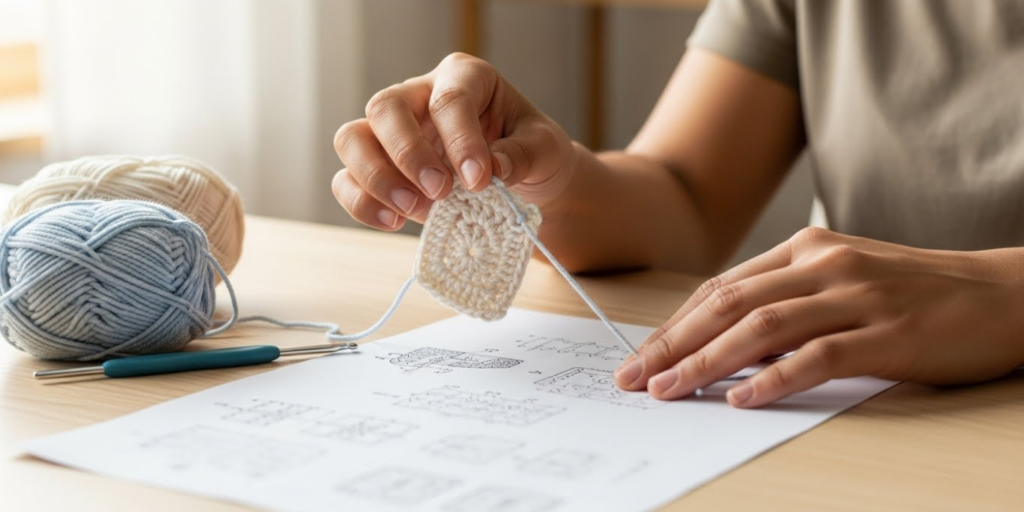
3. Following Rows, Rounds, and Repeats Step by Step
Now, let’s walk through a simple example. Imagine a diagram for a basic granny square:
- You start with a ring (shown as a small circle).
- Round 1 shows 3 dc grouped together (a “cluster”), separated by ch-2 spaces. Each cluster is drawn as three vertical bars close together.
- Dashed lines or brackets indicate the section you repeat around the ring (e.g., “(3 dc, ch 2) 4 times”).
How to follow it:
- Place your finger (or a highlighter) on the first symbol.
- Work that stitch into your piece.
- Move to the next symbol, just as you’d move to the next stitch in real life.
- When you hit a repeat bracket, do everything inside it the number of times shown.
Common pitfalls—and how to avoid them:
- Confusing stitch direction: Remember—diagrams show stitches as they face you, not from the hook’s perspective.
- Missing the starting point: Always locate “Row 1” or “Rnd 1” clearly marked at the bottom or center.
- Forgetting turning chains: Some diagrams include the turning chain in Row 1; others don’t. Check the written notes!
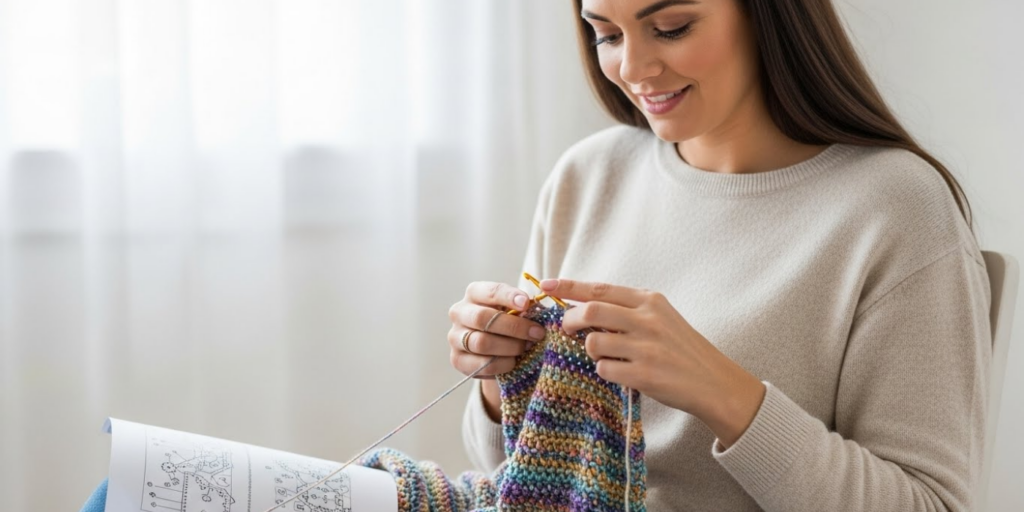
Practice idea: Try a dishcloth or coaster pattern that includes both written and diagram instructions. Work from the diagram first, then check the written version if you get stuck. This builds confidence fast.
4. Tips for Troubleshooting and Building Confidence
Even with the best diagram, things can go sideways. Here’s how to stay on track:
1. Count your stitches
After each row or round, count your stitches against the diagram. If you have too few or too many, you likely missed a repeat or added an extra stitch.
2. Use stitch markers liberally
Place a marker at the start of each round or at repeat sections. This helps you spot errors early.
3. Work slowly at first
Don’t rush. Say the stitch name out loud as you make it (“double crochet… chain two… double crochet…”). This links the symbol to the action.
4. Compare with a photo
Many patterns include a finished photo. If your piece looks nothing like it by Round 3, pause and recheck the diagram.
5. Start small
Don’t attempt a 50-round lace shawl on your first try. Begin with motifs, coasters, or simple scarves—projects with clear, repetitive structures.
Remember: It’s normal to feel slow or unsure at first. Even seasoned crocheters double-check symbols! The goal isn’t perfection—it’s progress. Every time you read a diagram, you’re building a skill that will save you hours (and frustration) down the road.
5. Why Learning Diagrams Empowers Your Crochet Journey
Mastering crochet diagrams isn’t just about following patterns—it’s about claiming creative freedom.
Once you’re comfortable with symbols, you can:
- Design your own patterns by sketching simple diagrams first.
- Modify existing projects more easily (e.g., “I’ll add two more repeats here—how does that look in the diagram?”).
- Join global crochet communities without language barriers.
- Work faster because you’re not constantly re-reading paragraphs of text.
Moreover, reading diagrams trains your brain to see crochet spatially—you start anticipating how stitches will behave, how lace will drape, or how a sleeve will shape. This intuition is what separates “following a pattern” from truly understanding your craft.
Think back to learning to read words: at first, you sounded out each letter. Now, you read whole sentences at a glance. Diagram literacy works the same way. With practice, those symbols stop being abstract marks—and start becoming your crochet language.
Conclusion
Crochet diagrams might look intimidating at first glance, but they’re actually one of the most powerful tools in a maker’s toolkit. By learning to recognize basic symbols, understanding how rows and rounds flow, practicing with simple projects, and troubleshooting with patience, you’ll unlock a clearer, more intuitive way to crochet.
We’ve covered why diagrams exist, how to decode their visual language, step-by-step reading strategies, and practical tips to build confidence. Most importantly, we’ve seen how this skill can open doors to global patterns, personal design, and deeper understanding of your craft.
So don’t let those little symbols scare you off. Print a cheat sheet, grab a ball of scrap yarn, and try your first diagram-based coaster this week.
👉 What’s the first diagram pattern you’d like to try? Or do you have a favorite tip for reading visual instructions? Share your thoughts in the comments—we’re all learning together!
And remember: every expert was once a beginner staring at a page of mysterious symbols. You’ve got this—one stitch, and one symbol, at a time. 🧶✨

Daniele Ferreira is passionate about the world of crochet, dedicating her time to exploring techniques, creating unique pieces, and sharing her knowledge with beginners and aficionados alike. With attention to detail and creativity, she transforms yarn into true works of art, inspiring others to discover the beauty and joy of this manual art.


