
The Joy of Starting Something New
Have you ever watched someone effortlessly pull yarn through loops, turning a simple strand into a cozy blanket or a whimsical amigurumi toy, and thought, “I wish I could do that”? If so, you’re not alone. Crocheting has seen a major resurgence in recent years — not just as a craft, but as a therapeutic escape, a creative outlet, and even a small business opportunity. In fact, according to a 2023 report by Craft Yarn Council, over 27 million Americans engage in crochet, with beginners making up a growing portion of that number.
But where do you start? With so many tools, patterns, and types of yarn out there, it’s easy to feel overwhelmed before you even pick up a hook. That’s exactly why we’re here. This article is your friendly, no-judgment zone guide to the essential crochet tools every newbie should have — nothing more, nothing less. We’ll walk you through the must-haves, explain why each tool matters, and help you avoid common beginner pitfalls (like buying ten hooks when you only need two!).
Whether you’re picking up a crochet hook for the first time or dusting off one from your grandma’s old craft box, this guide will set you up for success. Let’s dive in and turn that yarn curiosity into real, stitch-by-stitch progress.
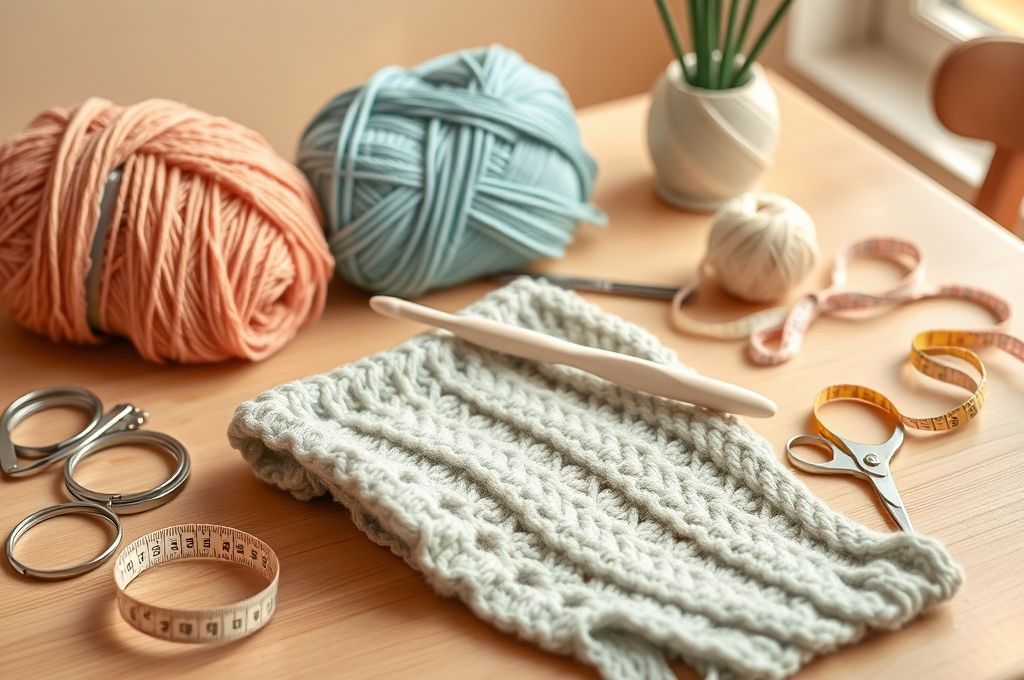
1. The Crochet Hook: Your New Best Friend
Let’s start with the most obvious — but most important — tool in your arsenal: the crochet hook.
Think of your hook like a magic wand. It’s the instrument that transforms loose yarn into beautiful, textured creations. But not all hooks are created equal. As a beginner, choosing the right one can make the difference between frustration and flow.
Crochet hooks come in a variety of materials: aluminum, bamboo, plastic, and ergonomic designs. For newbies, aluminum hooks are often recommended because they’re smooth, lightweight, and affordable. They glide easily through yarn, which is especially helpful when you’re still getting the hang of tension and stitch consistency.
Hook sizes are labeled in both letters (like H-8 or I-9) and millimeters (5.0 mm, 5.5 mm). As a beginner, a 5.5 mm (I-9) hook is a great all-around size. It works well with medium-weight (worsted) yarn, which is the most beginner-friendly type. This combo gives you stitches that are easy to see and correct — a big win when you’re just learning.
Pro Tip: Start with just one or two hooks. You don’t need a full set right away. As you gain confidence, you can expand your collection based on the projects you love.
And here’s a little secret: your hook choice affects your comfort. If you’re crocheting for long stretches, consider an ergonomic hook with a soft grip. They’re designed to reduce hand strain — a thoughtful upgrade if you plan to make crocheting a regular habit.
Remember: the hook isn’t just a tool — it’s an extension of your hand. Find one that feels good, works with your yarn, and makes you excited to start stitching.
2. Yarn: The Heartbeat of Your Project

You’ve got your hook — now what about the yarn? This is where things get colorful — literally.
Yarn is the lifeblood of any crochet project. It comes in endless colors, textures, and thicknesses. But for beginners, the key is simplicity. You don’t want to start with slippery silk or fuzzy mohair. Instead, go for medium-weight (worsted) acrylic yarn in a light, solid color.
Why this combo?
- Worsted weight is thick enough to see your stitches clearly, but not so bulky that it becomes unwieldy.
- Acrylic is affordable, durable, and widely available. It’s also machine-washable — perfect for dishcloths, scarves, or baby blankets that will get real use.
- A light solid color (like cream, light gray, or pastel pink) makes it easy to see each loop and stitch. Dark or variegated yarns can hide your work, making it harder to spot mistakes.
Brands like Lion Brand Yarn, Red Heart Super Saver, and Caron Simply Soft are excellent starter choices. They’re budget-friendly, consistent in quality, and come in a rainbow of colors.
Fun fact: Did you know that yarn weight is standardized? The Craft Yarn Council uses a numbering system from 0 (lace) to 7 (jumbo). For beginners, #4 (worsted) is the sweet spot.
And don’t forget to check the label! It tells you the recommended hook size, care instructions, and how much yardage is in the ball. This info is gold when you’re starting out.
Quick Tip: Buy one extra skein of yarn for your first project. Running out mid-scarf is the worst — and it happens more often than you’d think!
3. Scissors and Yarn Tails: The Little Things That Matter
You might think scissors are just… scissors. But in the crochet world, they’re a critical finishing tool.
Every project ends with cutting the yarn. A clean, sharp cut ensures a tidy finish and prevents fraying. But not all scissors are cut out for yarn duty (pun intended).
As a beginner, look for small, sharp embroidery scissors. They’re precise, easy to control, and perfect for snipping yarn tails without damaging your work. Avoid using kitchen or school scissors — they’re often dull or too bulky for delicate tasks.
But here’s something most new crocheters don’t realize: how you cut and secure your yarn matters. When you finish a project, you’ll “fasten off” by pulling the yarn tail through the last loop. Then, you’ll trim the excess — but leave about 4–6 inches. Why? Because you’ll need that tail to weave in later.
Weaving in ends keeps your project neat and secure. If you cut it too short, you risk the yarn unraveling. Too long, and you’ll have a messy tangle. It’s a small detail, but it makes a big difference in the final look.
Bonus Tool: A yarn needle (also called a tapestry needle) is your partner in this process. It has a large eye and a blunt tip, making it easy to thread yarn and weave through stitches without splitting them.
So yes — scissors and needles may seem minor, but they’re the unsung heroes of a polished, professional-looking piece.
4. Stitch Markers: Your Secret Navigation System
Imagine driving through a new city without GPS. You could do it, but you’d probably get lost a few times. That’s what crocheting without stitch markers can feel like.
Stitch markers are small, removable rings that clip onto your work to mark specific points — like the beginning of a round, a pattern repeat, or a shaping point. They’re especially helpful when working in the round (like making a hat or amigurumi) or following complex patterns.
As a beginner, you might think, “I can count my stitches!” And you can — sometimes. But when you’re distracted, tired, or just learning, it’s easy to lose track. A stitch marker acts like a visual anchor, so you always know where you are.
There are two main types:
- Locking stitch markers (plastic or metal clips that open and close)
- Ring markers (simple circles that slide onto the stitch)
For new crocheters, locking markers are more versatile. They stay put and are easy to move as your project grows.
Real-life example: Let’s say you’re making a granny square. Without a marker, you might forget where Round 1 ends and Round 2 begins. But with a marker clipped to the first stitch of each round, you’ll always know where to start — no counting stress.
And the best part? Stitch markers are inexpensive and reusable. A $3 pack can last you dozens of projects.
So, while they’re not technically essential, they’re a game-changer for confidence and accuracy. Think of them as your crochet GPS — small, simple, and totally worth it.
5. Measuring Tools: Size Matters (Even in Crochet)
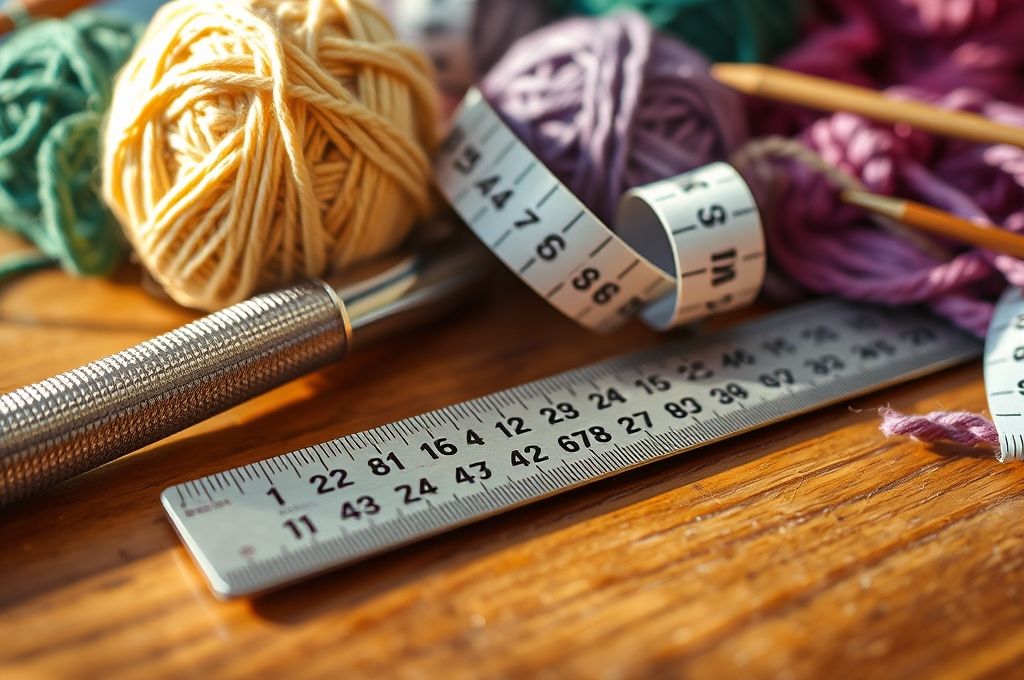
You’ve probably heard the phrase “measure twice, cut once.” In crochet, it’s more like: “measure often, avoid frustration.”
Whether you’re making a hat, a blanket, or a pair of slippers, size matters. And the only way to know if your project is on track is to measure it.
Enter the ruler and tape measure.
A flexible tape measure (like the kind used in sewing) is ideal for crochet. It bends around curves and fits snugly against your work. Use it to check:
- The length of a scarf
- The diameter of a hat
- The width of a sleeve
But there’s another kind of measurement that’s just as important: gauge.
Gauge refers to how many stitches and rows you make in a 4-inch (10 cm) swatch. It sounds tedious, but it’s crucial — especially if you’re following a pattern. If your gauge is off, your finished item could be too big, too small, or misshapen.
Example: A pattern might say, “14 stitches = 4 inches.” If you make 16 stitches in that space, your project will end up smaller than intended. Yikes!
To check gauge:
- Crochet a small square (about 6×6 inches) using the recommended hook and yarn.
- Lay it flat and measure how many stitches fit in 4 inches.
- Adjust your hook size if needed (smaller hook = tighter stitches, larger hook = looser stitches).
Pro Tip: Don’t skip the gauge swatch. It’s the foundation of a well-fitting project.
And if you’re just practicing or making something where size isn’t critical (like a dishcloth), feel free to skip it. But when you’re ready to level up, gauge is your friend.
6. Project Bags and Organization: Keep Your Craft Calm
Crochet is relaxing — until you can’t find your hook, your yarn is tangled, and you’re missing a stitch marker.
That’s where organization comes in.
As a beginner, you don’t need a fancy craft room. But a simple project bag can make a huge difference in your experience. It keeps your tools together, protects your work from pets and kids, and lets you crochet on the go.
Look for a bag with:
- Zippered pockets (for small items like hooks and needles)
- A main compartment (big enough for yarn and a current project)
- Durability (so it doesn’t rip when you toss it in your car)
You can use a makeup bag, pencil case, or tote — whatever works for you. The goal is to have everything in one place.
But organization isn’t just about storage. It’s also about mindset.
When your tools are easy to access and your space is clutter-free, you’re more likely to pick up your hook and stitch. It reduces friction and makes crocheting a habit, not a chore.
Try this: At the end of each session, take two minutes to tidy up. Wind loose yarn, store your hook, and clip on a stitch marker. It’s a small ritual that sets you up for success next time.
And if you’re feeling crafty, personalize your bag with a patch or embroidery. Make it yours.
7. Pattern Holder and Lighting: Seeing Is Believing
Here’s a truth many new crocheters learn the hard way: poor lighting ruins stitches.
If you can’t see your work clearly, you’ll miss stitches, twist loops, and make mistakes that are hard to fix. And squinting for long periods? That leads to eye strain and frustration.
So, good lighting is non-negotiable.
Natural light is ideal — try sitting near a window during the day. But when that’s not possible, use a desk lamp with a daylight bulb (5000K–6500K). These mimic natural sunlight and reduce shadows, making your stitches pop.
Pair that with a pattern holder — a simple tool that keeps your instructions visible and hands-free. You can use a tablet stand, a binder clip on the edge of a table, or even a magnetic phone holder stuck to a metal surface.
Why this matters: Most beginner patterns are read line by line. Without a holder, you’ll constantly be flipping pages or scrolling, which breaks your flow and increases errors.
Real benefit: With good lighting and a held pattern, you’ll crochet faster, more accurately, and with less fatigue.
And if you’re using a digital pattern, increase the font size. Your eyes will thank you.
8. Extras That Elevate Your Experience
By now, you’ve got the essentials: hook, yarn, scissors, needle, markers, measuring tools, and organization. But a few bonus tools can take your crocheting from good to great.
Let’s talk about them:
Row counters – These little gadgets (digital or manual) help you keep track of how many rows you’ve completed. Perfect for blankets or garments with specific row counts. A $5 click counter can save you from losing count — and your sanity.
Yarn bowls or organizers – Ever had your yarn roll off your lap and pick up lint? A yarn bowl has a hole in the center to feed the yarn through, keeping it contained and tangle-free. It’s a small luxury that makes a big difference.
Tension tools – If you struggle with tight or loose stitches, a yarn guide or tension ring can help regulate your yarn flow. These are especially helpful for people with arthritis or hand fatigue.
Stitch dictionaries – Once you’ve mastered the basics, a book or app with stitch patterns opens up endless creative possibilities. From popcorn stitches to lacework, these resources inspire your next project.
You don’t need all of these right away. But as you grow, they’ll become trusted allies in your craft journey.
9. The Most Important Tool: Patience (and a Growth Mindset)
After all the hooks, yarn, and gadgets, there’s one tool that matters more than any other: your mindset.
Crocheting is a skill — and like any skill, it takes time, practice, and patience. Your first stitches might be uneven. You might drop a loop or forget to chain. That’s not failure — it’s learning.
Think of your early projects as practice, not perfection. That lopsided coaster? It’s proof you showed up. That scarf with one twisted row? It’s a story you’ll laugh about later.
And here’s the beautiful part: every mistake teaches you something. Did your project curl? Maybe your tension was too tight. Did you run out of yarn? Now you know to buy extra next time.
Growth mindset tip: Instead of saying, “I’m bad at this,” try, “I’m getting better at this.”
Celebrate small wins: finishing your first row, mastering the double crochet, or completing a whole project. These moments build confidence.
And don’t compare your Chapter 1 to someone else’s Chapter 10. Everyone starts somewhere.
So be kind to yourself. Take breaks. Watch tutorial videos. Join a crochet group online. You’re not just learning a craft — you’re building creativity, focus, and resilience.
10. Putting It All Together: Your First Project Awaits
Now that you know the essential tools, it’s time to take action.
Here’s a simple starter project to try:
- Beginner Dishcloth (uses worsted yarn, 5.5 mm hook, basic stitches)
- Pattern: Chain 30, single crochet in each stitch across (29 sc), turn. Repeat for 30 rows. Fasten off and weave in ends.
It’s practical, quick, and gives you hands-on experience with all your new tools.
As you work, notice how each tool plays a role:
- The hook guides the yarn
- The scissors trim the end
- The needle weaves in the tail
- The measuring tape checks your progress
You’re not just making a dishcloth — you’re building a foundation.
And when you’re done? Make another. Then try a scarf. Then a beanie. The possibilities are endless.
Conclusion: Your Crochet Journey Starts Now
Crocheting is more than a hobby — it’s a journey of creativity, mindfulness, and self-expression. And like any journey, it begins with the right tools.
In this guide, we’ve covered the essential crochet tools for newbies: from the humble hook to the often-overlooked stitch marker, from yarn choices to the power of patience. These aren’t just items on a list — they’re your companions in creating something beautiful, one stitch at a time.
Remember, you don’t need everything at once. Start small. Focus on the basics. Let your skills grow naturally.
And most importantly — enjoy the process. The wobbly stitches, the “oops” moments, the quiet rhythm of hook and yarn — these are all part of the magic.
So grab your hook, pick a color of yarn that makes you smile, and take that first step. Your first project is waiting.
Now, we’d love to hear from you: What will you make first? Share your plans in the comments, tag us on social media, or post a photo of your first creation. Let’s build a community of beginners cheering each other on.
Happy crocheting! 🪝🧶

Daniele Ferreira is passionate about the world of crochet, dedicating her time to exploring techniques, creating unique pieces, and sharing her knowledge with beginners and aficionados alike. With attention to detail and creativity, she transforms yarn into true works of art, inspiring others to discover the beauty and joy of this manual art.


