
The Magic of Making What You Wear
Imagine slipping into a sweater you designed—stitched with care, shaped to fit your body perfectly, and colored in hues that speak to your soul. Not bought from a store, not mass-produced, but uniquely yours. That’s the magic of designing your own crochet garments.
Crocheting has long been cherished as a craft passed down through generations, often associated with cozy blankets and holiday gifts. But today, it’s experiencing a renaissance as a powerful form of self-expression and sustainable fashion. More people are turning away from fast fashion and embracing handmade clothing—not just for its beauty, but for the connection it fosters between creator and creation.
Designing your own crochet garments goes beyond following patterns. It means choosing every stitch, every silhouette, and every detail with intention. Whether you’re a seasoned crocheter or just starting out, this article will guide you through the rewarding process of creating wearable art that reflects your personality, fits your lifestyle, and stands the test of time.
We’ll explore the essentials—from understanding fit and fabric drape to sketching ideas and selecting yarns. You’ll learn how to translate inspiration into reality, avoid common pitfalls, and even modify existing patterns to suit your vision. By the end, you’ll feel empowered to pick up your hook and start designing something truly one-of-a-kind.
So grab a cup of tea, your favorite hook, and let’s dive into the world of custom crochet fashion.
Why Design Your Own Crochet Garments?
In a world flooded with ready-to-wear clothes, designing your own crochet garments might seem like a bold choice. But there’s something deeply satisfying—and surprisingly practical—about making what you wear.
First, custom fit. Ready-made clothing often fails to accommodate unique body shapes. Have you ever loved a sweater but found the sleeves too short or the shoulders too tight? When you design your own garment, you control the measurements. You can adjust the bust, length, armhole depth, and neckline to match your exact proportions. No more alterations or compromises.
Second, creative freedom. Crochet allows endless possibilities in texture, color, and pattern. Want a cardigan with floral motifs on the back and ribbed panels on the sides? Go for it. Dream of a dress with lace sleeves and a structured bodice? You can make it happen. Designing your own pieces lets you blend styles, mix stitches, and create something no one else owns.
Third, sustainability. The fashion industry is one of the largest polluters globally. By crafting your own clothes, you reduce waste, avoid synthetic fabrics, and support slow fashion. Plus, handmade garments tend to be cherished longer, reducing the cycle of consumption.
And finally, mindfulness and joy. The process of designing and crocheting is meditative. Each row becomes a moment of presence. Studies have shown that repetitive handcrafts like crochet can reduce stress and improve mental well-being. When you wear something you made, you carry that peace with you.
So yes—designing your own crochet garments isn’t just about fashion. It’s about reclaiming creativity, embracing individuality, and building a wardrobe with meaning.
Understanding Fit and Proportions: The Foundation of Great Design
Before you even pick up a hook, successful garment design starts with one crucial step: understanding your body and how clothing fits.
It might sound obvious, but many crocheters jump straight into stitching without measuring themselves—or worse, rely on outdated or guessed measurements. This often leads to frustration when the final piece doesn’t fit as expected.
Start by taking accurate body measurements. Use a soft measuring tape and record key areas: bust, waist, hips, shoulder width, armhole depth, sleeve length, and desired garment length. Don’t forget to measure around the fullest part of your bust and hips, and keep the tape level and snug—but not tight.
Once you have your numbers, consider ease—the difference between your body measurements and the garment’s finished size. Positive ease means the garment is larger than your body (common in cozy sweaters), while negative ease means it’s smaller (for a snug fit). For example, a loose-fitting cardigan might have 4–6 inches of positive ease, while a fitted top may have only 1–2 inches.
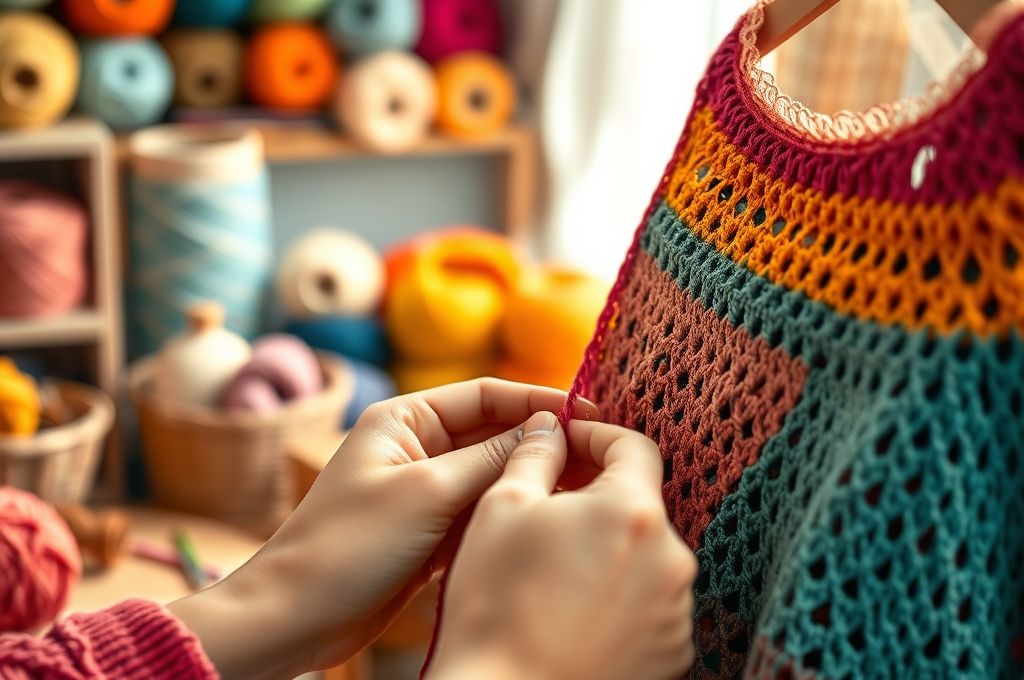
Also, think about drape. Crochet fabric behaves differently than knitted or woven textiles. Some stitch patterns are stiff; others are fluid. A dense basketweave stitch won’t drape like a delicate filet crochet lace. Test swatches with your chosen yarn and hook to see how the fabric hangs before committing to a full garment.
And remember: crochet stretches. Unlike knitting, crochet tends to grow with wear, especially in openwork patterns. Design with this in mind—sometimes going down a size or reinforcing seams can prevent sagging over time.
By mastering fit and fabric behavior early, you set the stage for garments that not only look great but feel amazing to wear.
From Inspiration to Sketch: Turning Ideas into Blueprints
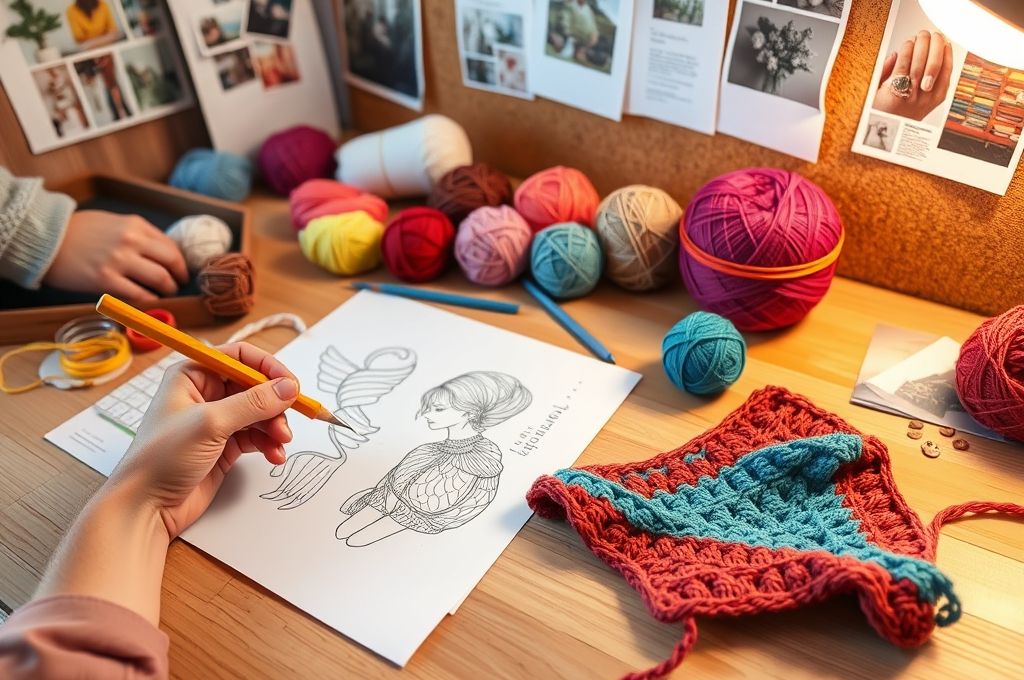
Now that you understand fit, it’s time to bring your vision to life. Every great garment starts with inspiration—maybe it’s a vintage photo, a flowing kimono, or the texture of tree bark. The key is capturing that spark before it fades.
Begin by gathering visual references. Create a mood board using Pinterest, Instagram, or a physical notebook. Collect images of silhouettes, necklines, sleeve styles, and stitch textures that resonate with you. Ask yourself: What makes this piece appealing? Is it the shape? The color? The way it moves?
Next, sketch your idea. You don’t need to be an artist—simple line drawings work perfectly. Start with a basic body outline or use a croquis (a standard fashion figure). Draw the overall shape: Is it A-line? Fitted? Asymmetrical? Then add details: boat neck, dolman sleeves, button front, side slits?
Label your sketch with notes:
- Desired length
- Sleeve type (bell, cap, raglan)
- Front vs. back differences
- Stitch patterns for different sections
For example, you might write: “Front: solid double crochet; Back: lace panel from shoulders to hem.”
This sketch becomes your design blueprint. It doesn’t have to be perfect—it just needs to communicate your intent. Over time, you’ll develop a personal style, whether minimalist, bohemian, or avant-garde.
And here’s a pro tip: start small. Instead of jumping into a full dress, try designing a cropped top or a simple vest. Each project builds your confidence and skills.
When you hold that first sketch in your hands, you’re no longer just a crafter—you’re a designer.
Choosing the Right Yarn and Hook: The Heart of Your Garment
Even the most beautiful design can fall flat with the wrong materials. Yarn and hook choice are everything in crochet garment design.
Yarn isn’t just about color and softness—it affects drape, weight, durability, and even how your stitches look. Consider these factors:
- Fiber content: Cotton is breathable but heavy; wool is warm and elastic; acrylic is affordable and durable; blends offer balance. For garments, many designers prefer natural fibers or high-quality blends for comfort and longevity.
- Weight: DK and worsted weight yarns are most common for wearables. Lace or fingering weight works for delicate shawls or summer tops, while bulky yarns create quick, cozy pieces.
- Texture: Smooth yarns show off stitch definition, while tweed or bouclé adds visual interest but can obscure intricate patterns.
Your hook size also plays a major role. Always check the yarn label for recommended hook sizes, but don’t be afraid to go smaller or larger to achieve your desired gauge. A smaller hook creates tighter, stiffer fabric; a larger one gives looser, drapier results.
And speaking of gauge—this is non-negotiable. Gauge refers to how many stitches and rows you make per inch. Even a half-stitch difference can result in a sweater that’s 4 inches too big or too small.
Here’s how to test gauge:
- Crochet a 6” x 6” swatch using your chosen yarn and hook.
- Let it rest overnight (crochet can stretch or shrink after blocking).
- Measure stitches and rows per inch.
- Adjust hook size if needed.
Remember: your tension matters. Some people crochet loosely; others tightly. Only a swatch reveals the truth.
Investing time in material selection pays off. The right yarn and hook transform your design from a concept into a wearable masterpiece.
Mastering Stitch Patterns and Construction Techniques
Now comes the fun part: deciding how your garment will be made. This involves choosing stitch patterns and construction methods—two elements that define both the look and function of your piece.
Stitch patterns do more than decorate—they shape the fabric. For example:
- Single crochet creates a dense, warm fabric ideal for structured garments.
- Double crochet offers moderate drape and works well for everyday wear.
- Filet crochet uses open and filled spaces to form lace-like designs.
- Tunisian crochet gives a knitted appearance with excellent vertical stability.
Mixing stitches adds dimension. Imagine a sweater with a ribbed lower edge, a lace yoke, and solid sleeves. This kind of contrast keeps the eye moving and enhances the silhouette.
But stitch choice also affects construction—how the garment is assembled. There are three main approaches:
- Top-down: Start at the neckline and work down. Great for trying on as you go and adjusting length. Ideal for raglan or yoke designs.
- Bottom-up: Begin at the hem and work upward. Easier for beginners, but harder to adjust sleeve or shoulder fit later.
- Seamed pieces: Crochet flat panels (front, back, sleeves) and sew them together. Offers precision and clean lines, especially for tailored looks.
Each method has pros and cons. Top-down allows real-time fitting but requires planning for increases and decreases. Seamed garments take longer to assemble but are more stable and easier to modify.
Also consider shaping techniques:
- Increase stitches to widen sections
- Decrease to taper sleeves or define waists
- Short rows to shape shoulders or bust areas
And don’t forget finishing touches—button bands, edgings, or decorative borders. These details elevate your garment from handmade to high-fashion.
With the right stitch and structure, your design doesn’t just hang on a hanger—it moves, breathes, and lives.
Customizing Patterns vs. Designing from Scratch
You might be wondering: Do I need to design everything from zero? The answer is no—and yes.
Many crocheters start by modifying existing patterns, and that’s a smart, practical approach. It’s like learning to cook by tweaking recipes before writing your own.
Say you love a cardigan pattern but want longer sleeves or a deeper V-neck. You can adjust the pattern by adding rows or changing the shaping. This teaches you how garment pieces fit together and how small changes affect the whole.
But eventually, you may want to create something entirely original. That’s when designing from scratch comes in.
Start by breaking down a basic garment into parts:
- Back panel
- Front panels (or one piece)
- Sleeves
- Collar or neckline edging
Calculate how many stitches you need based on your gauge and desired width. Then determine row count for length. Use graph paper or digital tools (like Stitch Fiddle or Crochet Charts) to map out stitch patterns visually.
For example, if your gauge is 4 stitches per inch and you want a 20-inch back panel, you’ll need 80 stitches across.
Then, plan shaping:
- Decrease 2 stitches at each end every 10th row to taper the waist
- Add increases under the arms for sleeve caps
Designing from scratch gives you total control—but it requires patience and testing. Always make a swatch, and consider crocheting a mock-up in inexpensive yarn before committing to expensive fibers.
Whether you’re customizing or creating, each project builds your design intuition. And that’s where true craftsmanship begins.
Common Pitfalls (and How to Avoid Them)
Even experienced designers make mistakes. The good news? Most are avoidable with a little foresight.
1. Skipping the swatch.
We’ve said it before, but it bears repeating: always swatch. Without it, you risk poor fit, uneven drape, or mismatched pieces. Don’t assume your tension matches the pattern’s. Test, block, and measure.
2. Ignoring yarn substitution.
Swapping yarns without checking weight, fiber, or yardage can ruin a project. A bulky yarn in place of worsted will make a garment too heavy. Use tools like YarnSub.com to find equivalents.
3. Underestimating yardage.
Running out of yarn halfway through a sweater is heartbreaking. Always buy extra—especially if the dye lot matters. For large garments, purchase at least 10–15% more than estimated.
4. Forgetting about blocking.
Crochet stretches and settles after washing. Blocking evens out stitches, opens lace, and sets the final shape. Never skip this step, especially for garments.
5. Poor seam finishing.
Sloppy seams can make a beautiful piece look amateurish. Use invisible join techniques, whip stitch, or slip stitch seams for clean finishes. Press seams gently with a steam iron (if fiber allows).
6. Overcomplicating the design.
It’s tempting to add every stitch you know into one garment. But clutter distracts. Focus on one or two standout features—like a textured yoke or scalloped hem—and let the rest support it.
7. Not trying it on.
If you’re working top-down or in pieces, try the garment on periodically. Pin seams or use stitch markers to simulate fit. This prevents surprises at the end.
Learning from mistakes isn’t failure—it’s growth. Every “oops” makes you a better designer.
The Joy of Personalization: Making It Uniquely Yours
At its core, designing crochet garments is an act of self-expression. It’s not just about covering your body—it’s about telling your story through texture, color, and form.
Personalization can be subtle or bold. Maybe you incorporate your favorite color into a hidden lining. Or perhaps you embroider your initials inside the collar. Some crocheters weave in symbolic motifs—hearts for love, waves for travel, stars for dreams.
Color is one of the most powerful tools. Monochrome designs feel modern and sleek. Ombre gradients add movement. Bold contrasts make a statement. Consider using color theory to choose palettes that reflect your mood or season.
You can also personalize through details:
- Buttons from a family heirloom
- Pockets in unexpected places
- Asymmetrical hems or uneven sleeve lengths for an edgy look
And don’t forget wearability. Design with your life in mind. If you’re always on the go, opt for easy-care yarns and simple closures. If you love layering, make open-front cardigans or long vests.
The most beautiful garment is one that feels right—not just in style, but in spirit.
When you wear something you designed, you’re not just showing off your skills. You’re sharing a piece of who you are.
Sustainability and Slow Fashion: Why Handmade Matters
In an age of disposable fashion, designing your own crochet garments is a quiet rebellion.
The average person buys 60% more clothing than they did 15 years ago—but keeps each item half as long. Fast fashion relies on cheap labor, synthetic fabrics, and massive waste. It takes about 2,700 liters of water to produce one cotton t-shirt—enough for one person to drink for 2.5 years.
Crochet offers a different path.
When you make your own clothes:
- You use only what you need
- You choose eco-friendly fibers
- You create pieces meant to last
- You reduce packaging and shipping emissions
Even better, handmade garments foster emotional durability. Because you invest time and care into them, you’re more likely to repair, reuse, and cherish them for years.
And if you ever tire of a piece? Deconstruct it and reuse the yarn. Many crocheters “frog” old projects (rip them out) to reclaim yarn for new ones—a practice affectionately called “yarn recycling.”
By designing your own wardrobe, you join a growing movement of mindful makers who value quality over quantity, creativity over convenience, and connection over consumption.
Your hook becomes a tool of change—one stitch at a time.
Conclusion: Your Wardrobe, Your Canvas
Designing your own crochet garments is more than a craft—it’s a journey of self-discovery, sustainability, and artistic expression. From the first sketch to the final stitch, you’re not just making clothes. You’re crafting identity, confidence, and connection.
We’ve covered the essentials: understanding fit, choosing materials, mastering construction, avoiding pitfalls, and infusing your work with personal meaning. But the most important lesson isn’t technical—it’s this: you are capable.
You don’t need a fashion degree. You don’t need expensive tools. You just need curiosity, a willingness to learn, and the courage to try.
So why not start today? Sketch a simple top. Modify a free pattern. Make a swatch in your favorite color. Every expert designer was once a beginner holding a hook for the first time.
And when you wear your creation—whether it’s a cozy cardigan, a breezy dress, or a bold jacket—know that you’ve made something no machine ever could: a piece of art born from your hands and heart.
Now, we’d love to hear from you: What’s the first garment you’d love to design? Share your dream project in the comments, tag us on social media, or post a photo when you finish. Let’s build a community of creators, one stitch at a time.
Happy crocheting! 🪝✨

Daniele Ferreira is passionate about the world of crochet, dedicating her time to exploring techniques, creating unique pieces, and sharing her knowledge with beginners and aficionados alike. With attention to detail and creativity, she transforms yarn into true works of art, inspiring others to discover the beauty and joy of this manual art.


