
Introduction
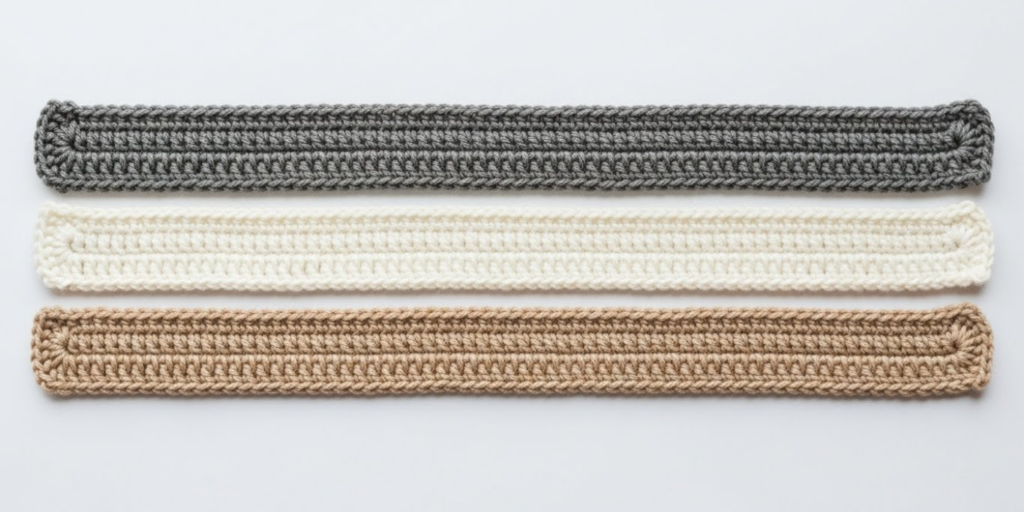
Ever finished a crochet project only to hold it up and notice that one side looks wavy, the other side slants like a wonky fence, and the corners look like they’re folding in on themselves? You’re not alone—and you’re definitely not doing anything wrong. Uneven edges are one of the most common frustrations for beginner crocheters, and they can make even the coziest blanket or cutest scarf feel “off.”
The good news? With a few key techniques and a little awareness, you can create clean, straight, professional-looking edges—even as a total beginner. It’s not about perfection; it’s about consistency.
In this article, we’ll break down exactly why edges get uneven, how turning chains, stitch counts, and tension play a role, and—most importantly—what you can do about it. You’ll learn practical tips like how to count stitches correctly, when (and when not) to work into the turning chain, and how to use stitch markers like a pro. We’ll also share beginner-friendly pattern adjustments and mindset shifts that turn frustration into confidence.
Whether you’re working on a dishcloth, scarf, or baby blanket, these strategies will help your projects look polished, hang evenly, and—above all—make you proud to show them off.
1. Why Do Crochet Edges Get Uneven in the First Place?
Before we fix uneven edges, it helps to understand what causes them. Most issues come down to three common culprits: inconsistent stitch counts, misunderstood turning chains, and uneven tension.
Let’s start with stitch count. If you accidentally add or skip a stitch in a row, your work will start to flare out or pull in. Over several rows, that small mistake multiplies—leading to ripples or slants. For example, if your pattern calls for 20 stitches per row but you work 21 one time and 19 the next, your fabric won’t stay straight.
Next, the turning chain. Many beginners don’t realize that the chain you make at the start of a new row often counts as the first stitch of that row—especially with taller stitches like double crochet. If you treat it as a separate step and then also work a stitch into the first stitch below, you’ve just added an extra stitch without knowing it.
Finally, tension changes. Maybe your grip loosens when you’re tired, or you pull tighter when concentrating. This creates subtle variations in stitch height and width, making edges look jagged or stair-stepped—even if your stitch count is correct.
Here’s the key insight: even edges aren’t about being “neat.” They’re about consistency. And consistency is a skill you can absolutely learn.
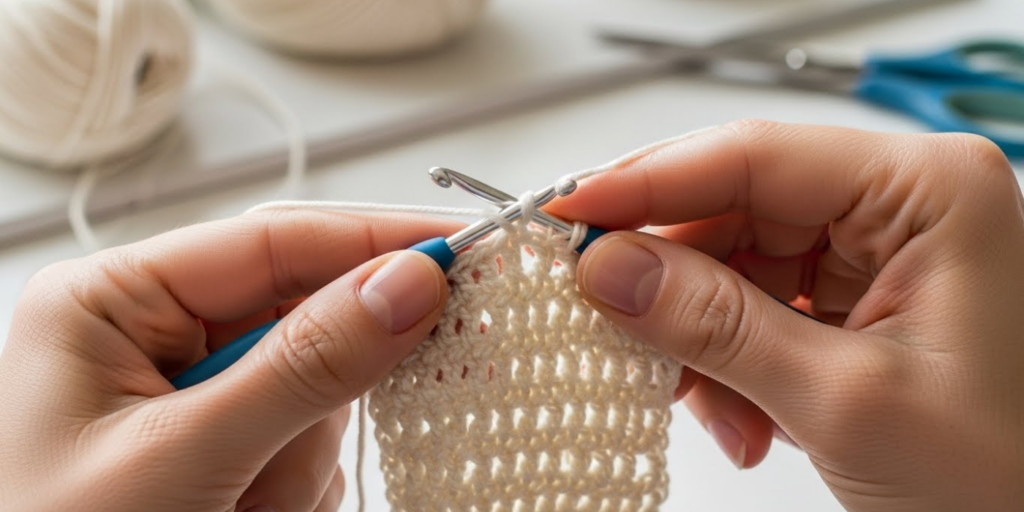
2. Master the Turning Chain: Your Secret Weapon for Straight Sides
The turning chain is often the #1 reason edges slant or stair-step. But once you understand how it works, it becomes your best friend for clean lines.
Here’s the rule of thumb:
- Single crochet (sc): The turning chain (usually ch 1) does NOT count as a stitch. Always work your first sc into the very first stitch of the row below.
- Half double crochet (hdc): The turning chain (ch 2) usually does NOT count—but check your pattern! Some designers treat it as a stitch.
- Double crochet (dc): The turning chain (ch 3) almost always COUNTS as the first dc. So you skip the first stitch of the row below and work your next dc into the second stitch.
Why this matters: If you ignore whether the chain counts, you’ll either lose a stitch (causing the edge to pull inward) or gain one (making it flare outward).
Pro tip: When learning a new pattern, read the “special stitches” or “notes” section first. Many patterns clarify: “Ch 3 at beginning of row counts as first dc.”
To avoid confusion, try this visual trick: place a stitch marker in the top of your turning chain at the end of each row. That way, when you start the next row, you’ll clearly see whether that chain is meant to be your first stitch or just a placeholder.
Also, always count your stitches at the end of every row—especially in your first few projects. Yes, it feels tedious. But it builds muscle memory and prevents big mistakes down the road.
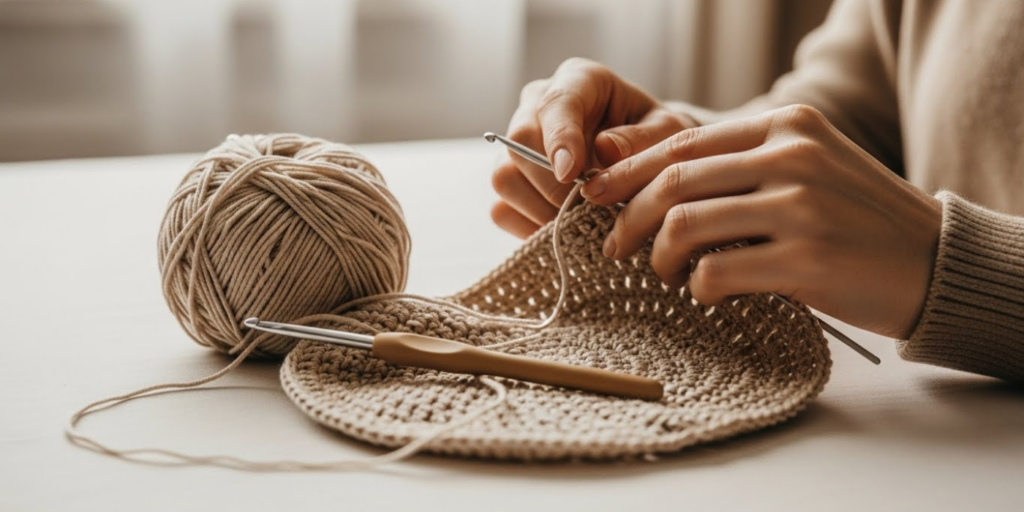
3. Use Stitch Markers Like a Pro (Even as a Beginner)
Many beginners think stitch markers are only for fancy lace or amigurumi. But they’re incredibly helpful for keeping edges straight, especially on simple rectangles like scarves or blankets.
Here’s how to use them effectively:
- Mark the first and last stitch of every row. Use a different color for each if you like. This helps you spot if you’ve accidentally skipped or added a stitch at either end.
- Clip a locking marker into the turning chain (as mentioned above) so you remember whether it “counts.”
- For projects worked in the round, use a marker to denote the beginning of the round—this prevents spiral drift that can distort edges over time.
Don’t have fancy markers? No problem! Use bobby pins, paper clips, or even contrasting yarn scraps tied loosely around the stitch. The goal isn’t elegance—it’s clarity.
Real-life example: Mia, a beginner crocheter from Ohio, struggled with wavy dishcloths for weeks. Then she started marking her first and last stitches. “Suddenly, I could see where I was going wrong,” she says. “My next cloth came out perfectly square!”
Over time, as your confidence grows, you’ll rely on markers less. But in the beginning, they’re like training wheels—they give you the stability to learn without frustration.
4. Tension Control and the Power of Blocking
Even with perfect stitch counts, uneven tension can make edges look messy. Maybe your stitches get looser at the end of a row, or tighter after a color change. This is completely normal—especially when you’re still building hand coordination.
So what can you do?
First, slow down. Speed often sacrifices consistency. Try working a few rows while focusing only on keeping your yarn tension even—imagine you’re feeding the yarn through your fingers like water from a gentle stream.
Second, practice with smooth, light-colored yarn. Textured or dark yarns hide mistakes, but they also hide your progress. A smooth cotton in white or cream shows every stitch clearly, helping you spot tension issues early.
But here’s the game-changer most beginners overlook: blocking.
Blocking is the process of gently washing or steaming your finished piece and pinning it into shape as it dries. It relaxes the fibers, evens out stitches, and straightens edges—even if your tension wasn’t perfect during construction.
For acrylic yarn: Use steam blocking (hover a steamer or iron on steam setting above the piece—never touch it).
For cotton or wool: Wet block by soaking in cool water, gently squeezing out excess, then pinning to a foam mat.
Important: Always block a swatch first to see how your yarn reacts. Some synthetic blends don’t hold shape well, while natural fibers bloom beautifully.
Blocking won’t fix a missing stitch—but it will transform a slightly wobbly edge into a clean, professional finish. Think of it as the “magic eraser” of crochet!
5. Mindset Matters: Progress Over Perfection
Let’s be honest: no one’s edges are perfectly even on their first project. Even experienced crocheters have off days.
What separates frustrated beginners from confident makers isn’t skill—it’s mindset. Instead of thinking, “My edges are messy,” try, “I’m learning how fabric behaves.” Every wavy scarf teaches you something about yarn, hook size, or your own rhythm.
Also, remember that function often trumps form. A slightly uneven baby blanket won’t matter to a newborn—they’ll just feel the love stitched into it. And many imperfections disappear once a piece is used, washed, or gifted.
That said, aiming for better edges isn’t about vanity—it’s about pride in your craft. When your work hangs straight and looks intentional, you feel more confident trying new patterns, selling your creations, or teaching others.
So celebrate small wins:
- “I counted every row!”
- “I didn’t skip the last stitch this time!”
- “My blocking made it look store-bought!”
Progress in crochet isn’t linear. But with consistent practice and these simple strategies, your edges will improve—often faster than you expect.
Conclusion
Creating even edges in crochet isn’t a mysterious talent reserved for experts—it’s a set of learnable habits rooted in awareness, consistency, and care. By understanding how turning chains work, using stitch markers strategically, managing your tension, and embracing the power of blocking, you can transform your projects from “almost there” to “absolutely polished.”
Remember: every crocheter you admire once struggled with slanting sides or accidental increases. What they did differently was keep going, apply small fixes, and trust the process.
So the next time you start a new rectangle project—whether it’s a potholder, scarf, or lap blanket—try just one of these tips. Maybe you’ll count stitches religiously. Or maybe you’ll finally block your finished piece. Whatever you choose, you’re taking a step toward cleaner, more confident crochet.
Now we’d love to hear from you! What’s your biggest edge struggle? Have you tried any of these tips—or discovered your own trick? Share your story in the comments below, and don’t forget to encourage a fellow beginner. Together, we’re all stitching toward better edges—one row at a time. 🧶✨

Daniele Ferreira is passionate about the world of crochet, dedicating her time to exploring techniques, creating unique pieces, and sharing her knowledge with beginners and aficionados alike. With attention to detail and creativity, she transforms yarn into true works of art, inspiring others to discover the beauty and joy of this manual art.


