
Have you ever held a handmade amigurumi and marveled at how lifelike it feels—its rounded cheeks, its perky ears, or the way its body seems to sit just right on a shelf? What if you could create that magic yourself? Amigurumi, the Japanese art of crocheting small stuffed animals and characters, has captured hearts worldwide. But beyond just following patterns, there’s a deeper layer that turns cute into captivating: sculpting through shaping and stuffing.
While many beginners focus on mastering stitches, the true artistry of amigurumi lies in how you shape and stuff your creations. It’s not just about filling a crocheted shell with fiberfill—it’s about crafting form, personality, and dimension. Whether you’re making a wobbly penguin, a fluffy bunny, or a wide-eyed fox, the techniques you use to sculpt your piece can make the difference between “adorable” and “absolutely unforgettable.”
In this article, we’ll dive deep into the often-overlooked world of amigurumi sculpting. You’ll learn how strategic increases, decreases, and stitch placement influence shape, discover the secrets of stuffing for structure and softness, and explore advanced techniques like wire armatures and layered stuffing. We’ll also cover common pitfalls and how to fix them—because even the most experienced crocheters have had a lopsided head or a floppy limb. By the end, you’ll have the tools to bring your amigurumi to life, one sculpted stitch at a time.
The Foundation of Form: How Shaping Begins with Stitches
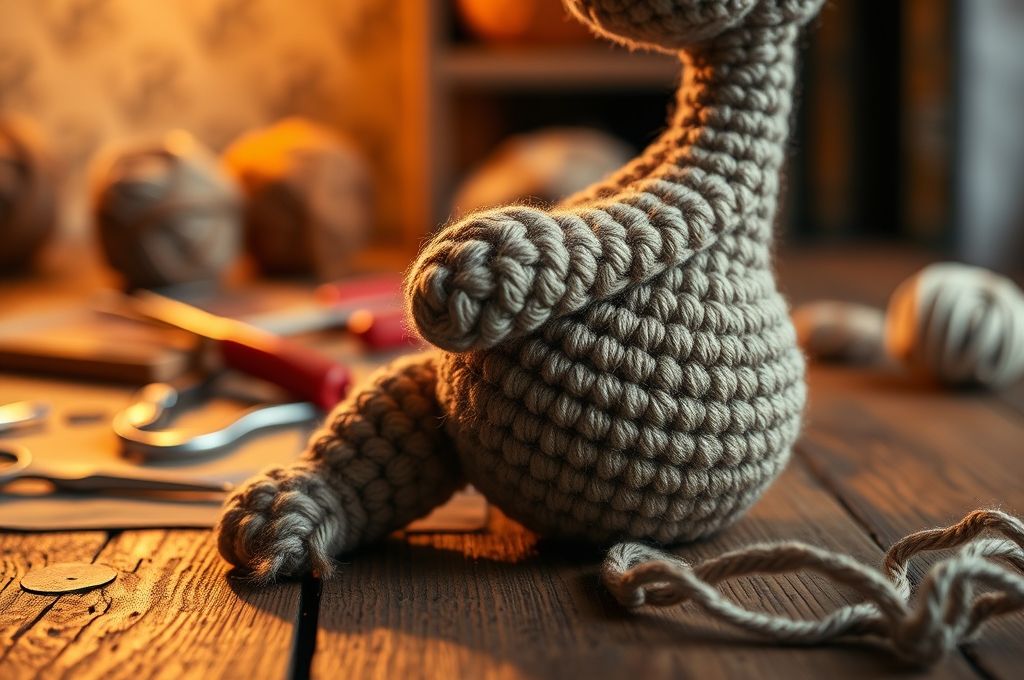
Before any stuffing happens, the foundation of your amigurumi’s shape is laid stitch by stitch. Unlike flat crochet, amigurumi is worked in continuous rounds, creating seamless spheres, ovals, and cylinders. The secret to smooth shaping? Precise increases and decreases.
When you’re crocheting a head or body, the early rounds typically follow a mathematical pattern: 6 single crochets in a magic ring, then 2 in each (12), then 1 in one, 2 in the next (18), and so on. This gradual increase creates a flat circle. But as you continue, the piece naturally curves into a sphere—this is the beginning of sculpting. The key is even distribution. If increases are clustered in one area, your piece will bulge or warp.
For example, when making a head, the first 6–8 rounds determine whether your amigurumi will have a round, baby-faced look or a more elongated, realistic profile. Want a chibi-style character? Keep the increases tight and consistent. Going for a fox with a snout? You’ll need to slow down the increases in the front while maintaining them on the sides.
Decreases are equally important. When closing a piece, using invisible decreases (crocheting two stitches together through the front loops only) keeps the surface smooth and avoids that “dimpled” look. Misplaced decreases can cause dents or asymmetry—especially noticeable on faces.
Pro Tip: Use stitch markers every 6 or 8 stitches to ensure your increases and decreases are evenly spaced. It’s like putting training wheels on your shaping—it keeps everything balanced and symmetrical.
Remember: every stitch is a tiny act of sculpting. With patience and precision, you’re not just crocheting—you’re carving with yarn.
Stuffing Secrets: More Than Just Fluff
Now that your piece is shaped, it’s time to bring it to life—literally. Stuffing might seem like the simplest part of amigurumi, but it’s where many projects go from “cute” to “meh.” The right stuffing technique can add volume, support, and even emotion to your character.
The most common stuffing material is polyester fiberfill, and for good reason: it’s lightweight, affordable, and easy to work with. But how you use it makes all the difference. Under-stuffing leads to floppy limbs and sunken faces. Over-stuffing can stretch stitches, distort shape, or make your amigurumi look like a balloon about to pop.
The golden rule? Stuff firmly, but not tightly. Your piece should hold its shape when placed on a table, but still have a little give when gently squeezed. Think of it like a stress ball—structured, but soft.
Here’s a step-by-step approach:
- Break fiberfill into small chunks (about the size of a walnut).
- Insert one piece at a time, using a chopstick or blunt needle to push it into corners.
- Stuff as you go—don’t wait until the end. This ensures even distribution.
- Check shape frequently. Hold the piece up and rotate it. Does one side look fuller? Add a bit more.
For expressive faces, consider strategic stuffing. Want wide, curious eyes? Add a little extra behind the eye area. A pouty mouth? Lightly stuff the chin. This subtle shaping adds personality without altering the pattern.
And don’t forget limbs! Use smaller amounts of stuffing for arms and legs, and roll fiberfill into tight “snakes” to fill long, narrow parts like tails or necks.
Bonus Tip: For a more natural feel, mix in a pinch of plastic pellets at the base of your amigurumi. This adds weight, helping it sit upright—perfect for display pieces.
Beyond the Basics: Advanced Shaping Techniques
Once you’ve mastered even increases and proper stuffing, it’s time to level up. The next frontier in amigurumi sculpting is intentional distortion—yes, you read that right. Sometimes, perfect symmetry isn’t the goal. Real creatures (and characters) have quirks: a tilted head, a curved back, or a lopsided smile.
One powerful technique is selective stuffing. Instead of filling a piece uniformly, you can emphasize certain areas. For example, when making a bear, stuff the shoulders and upper back more firmly to give it a sturdy, cuddly posture. Or, when crocheting a cat with a hunched back, under-stuff the middle section slightly to create a natural curve.
Another game-changer is shaping with wire. Thin, bendable aluminum or floral wire can be inserted into limbs, ears, or tails to allow posing. Simply crochet a small channel or wrap the wire in yarn before inserting it. This is especially useful for display pieces—imagine a dragon with a gracefully arched neck or a bunny with perked-up ears.
You can also use internal structures like small foam balls or rings to maintain shape. For instance, placing a tiny foam ball inside a head before stuffing helps prevent it from flattening over time. This is great for amigurumi that will be handled often, like toys for kids.
And let’s not forget layered stuffing. Start with a base layer of fiberfill, then add small pads of extra stuffing in key areas—like cheeks, belly, or paws. This creates dimension and mimics the way real animals have soft tissue in specific places.
These techniques transform amigurumi from static objects into dynamic, lifelike figures. It’s no longer just crochet—it’s textile sculpture.
Common Shaping Mistakes (And How to Fix Them)
Even the most careful crocheters run into shaping issues. The good news? Most problems have simple fixes.
Problem 1: A flat or pancake-shaped head.
This usually happens when increases aren’t distributed evenly or when you start decreasing too early.
Fix: Double-check your pattern. Use stitch markers to keep rounds aligned. If the head is already flat, try adding a few extra rounds with slow increases before starting decreases.
Problem 2: A lopsided body or crooked limb.
Often caused by inconsistent tension or missed stitches.
Fix: Count your stitches every round. If a limb is bent, re-stuff it carefully, ensuring fiberfill is pushed evenly into both sides. For persistent curves, insert a wire support.
Problem 3: Gaps at the top or bottom of a piece.
This occurs when the final decreases are too tight or too loose.
Fix: Use invisible decreases and pull the yarn tail tight after closing. If there’s still a hole, sew a few stitches around the edge to cinch it closed.
Problem 4: Stuffing showing through stitches.
Usually due to using too much stuffing or yarn that’s too loose.
Fix: Use a smaller hook to tighten your stitches, or switch to a denser yarn. Also, avoid over-stuffing—less is often more.
Problem 5: Facial features look sunken or distorted.
This happens when stuffing isn’t placed strategically.
Fix: Add small “pads” of fiberfill behind eyes, nose, or cheeks before sewing on features. You can even use tiny felt circles or embroidery floss balls for extra support.
Remember: every mistake is a learning opportunity. Even seasoned amigurumi artists have “ugly prototypes” hidden in drawers. The key is patience and practice.
Sculpting with Color and Texture
While shape and stuffing are structural, color and texture are the finishing touches that bring your amigurumi to life. And yes—they play a role in sculpting too.
Consider this: two identical crocheted heads, one in solid beige, the other with shaded cheeks, a darker muzzle, and subtle eyebrow highlights. Which one looks more three-dimensional? The second, of course. Color gradients create the illusion of form, just like shading in a drawing.
Techniques like tapestry crochet (carrying multiple yarns) or surface embroidery can add depth. For example, using a slightly darker yarn around the eye area makes the eyes appear recessed. Lighter yarn on the tip of the nose gives the impression of a raised bump.
Texture also influences perception. A smooth, tightly crocheted surface feels firm and clean. But adding bobbles, spikes, or fur-like stitches can suggest volume and softness. Try using long yarn loops for fluffy fur, or short, dense stitches for sleek fur.
You can even sculpt with embellishments. Sewing on tiny felt pads under the eyes creates pouches. Adding a small bead under the fabric makes a nose pop forward. These micro-details trick the eye into seeing more dimension.
And don’t underestimate yarn choice. Thicker yarns create bulkier, more exaggerated shapes. Fine yarns allow for delicate, realistic features. Metallic or variegated yarns can catch light in ways that emphasize curves and contours.
In essence, sculpting isn’t just internal—it’s visual. By combining physical shaping with clever color and texture work, you create amigurumi that don’t just sit on a shelf—they seem to breathe.
From Craft to Art: The Emotional Impact of Sculpted Amigurumi
There’s something quietly powerful about a well-sculpted amigurumi. It’s not just a toy or a decoration—it can feel like a companion. Think of the ones that sit on your desk, the handmade gift that made someone tear up, or the little creature that survived a child’s bedtime routine for years.
Why do some amigurumi feel more “alive” than others? It often comes down to intentional imperfection. A slightly tilted head, a crooked smile, a pose that suggests movement—these humanizing touches make a piece feel unique and personal.
Sculpting allows you to imbue personality. A firmly stuffed belly says “jolly.” A gently curved back whispers “tired but sweet.” A head tilted to the side? That’s curiosity. These subtle cues are the language of emotion in textile art.
And the process itself is therapeutic. The repetitive stitches, the careful stuffing, the attention to detail—amigurumi sculpting is a form of mindfulness. It’s a space where you slow down, focus, and create something with your hands. In a world of digital overload, that’s a rare gift.
Moreover, sculpted amigurumi often become keepsakes. A baby’s first toy, a memorial piece for a lost pet, a custom character based on a loved one—these aren’t just crafts. They’re vessels of memory and love.
When you master shaping and stuffing, you’re not just improving your crochet skills. You’re learning to tell stories without words. And that’s where craft becomes art.
Tools and Materials That Make a Difference
While skill is key, the right tools can elevate your amigurumi sculpting experience. You don’t need a fancy studio, but a few smart choices can make your work easier and more precise.
Hook Size: Using a hook smaller than recommended for your yarn creates tighter stitches, which prevents stuffing from showing and gives better shape control. Many amigurumi artists go down 1–2 mm from the yarn label suggestion.
Yarn: Cotton yarn is a favorite for amigurumi because it’s durable, holds shape well, and has minimal stretch. But acrylic is softer and more affordable. Consider sport or DK weight yarn for balanced detail and ease of handling.
Stuffing Tools: A plastic crochet hook or blunt tapestry needle is perfect for pushing fiberfill into tight spaces. Some crafters even use a knitting needle or chopstick—just be gentle to avoid snagging yarn.
Stitch Markers: Colored plastic or locking markers help you track rounds and increase/decrease points. Place them every 6 or 8 stitches for symmetry.
Wire: For posing, use 20–22 gauge aluminum wire—it’s soft enough to bend but holds its shape. Wrap it in yarn or tape before inserting to protect the fabric.
Needles: A sharp embroidery needle is great for sewing parts, while a blunt needle is safer for stuffing.
Optional but Helpful:
- A small scale to weigh fiberfill for consistency
- A ruler or caliper to measure parts
- A lightbox or bright lamp to see stitches clearly
Investing in quality tools isn’t about luxury—it’s about respecting your craft. When your tools work with you, not against you, your amigurumi will reflect that care.
Putting It All Together: A Step-by-Step Sculpting Practice
Let’s apply everything we’ve learned with a simple exercise: sculpting a basic amigurumi head with personality.
Materials:
- DK weight yarn
- 3.0 mm crochet hook
- Polyester fiberfill
- Stitch markers
- Embroidery needle
- Safety eyes (optional)
Step 1: Shape with Control
Start with a magic ring. Follow this increase pattern:
- Round 1: 6 sc in ring (6)
- Round 2: 2 sc in each (12)
- Round 3: 1 sc, 2 sc in next (18)
- Round 4: 2 sc, 2 sc in next (24)
- Rounds 5–7: 1 sc in each
- Round 8: 2 sc, 1 sc2tog (18)
- Round 9: 1 sc, 1 sc2tog (12)
- Round 10: sc2tog around (6)
Close and fasten off.
Use stitch markers every 6 stitches to keep increases even.
Step 2: Strategic Stuffing
After Round 5, begin stuffing lightly. By Round 7, stuff firmly but not tightly. Add a little extra behind where the eyes will go to make the face pop.
Step 3: Add Personality
Sew on eyes slightly above center. Embroider a small nose and subtle blush lines with pink thread. Try a tiny “bump” of stuffing under the nose yarn before sewing.
Step 4: Pose It
If desired, insert a wire loop into the neck before attaching the body. This allows head movement.
This small project combines shaping, stuffing, and emotional design. Try variations—elongate the snout, flatten the back, or tilt the head—to explore how small changes create different characters.
Conclusion: Sculpting More Than Yarn—You’re Shaping Joy
Amigurumi sculpting is more than a craft—it’s a blend of patience, precision, and imagination. Through careful shaping and thoughtful stuffing, you transform simple yarn into something that feels alive. You’re not just following patterns; you’re breathing personality into every stitch.
We’ve explored how increases and decreases form the skeleton of your piece, how stuffing adds soul, and how advanced techniques like wire and layered filling bring dynamic life. We’ve also seen how color, texture, and even mistakes can become part of the art.
But beyond the techniques, there’s a deeper truth: creating something by hand is an act of care. Whether you’re making a gift, a decoration, or just something for yourself, your amigurumi carries your energy, your focus, your love.
So pick up your hook. Experiment with stuffing. Try a new shaping trick. Don’t fear mistakes—they’re part of the journey. And when you hold your finished piece, take a moment to appreciate what you’ve made: not just a toy, but a tiny sculpture full of heart.
Now, we’d love to hear from you: What’s the most expressive amigurumi you’ve ever made? Share your story in the comments, post a photo, or challenge yourself to sculpt a new character this week. The world needs more handmade joy—start shaping yours today.

Daniele Ferreira is passionate about the world of crochet, dedicating her time to exploring techniques, creating unique pieces, and sharing her knowledge with beginners and aficionados alike. With attention to detail and creativity, she transforms yarn into true works of art, inspiring others to discover the beauty and joy of this manual art.


