
Introduction
You’ve spent hours—maybe weeks—carefully stitching every row of your lace shawl, sweater, or amigurumi. But when you finally weave in the last end, something’s… off. The edges curl. The stitches look uneven. The garment doesn’t drape the way the pattern photo promised.
What’s missing? Blocking.
Often overlooked or rushed, blocking is the secret weapon that transforms a handmade project from “homemade” to professional, polished, and perfectly shaped. While basic wet-blocking might suffice for a washcloth, advanced blocking techniques unlock the true potential of intricate lace, delicate fibers, and structured garments.
In this guide, we’ll go beyond the basics to explore precision methods used by seasoned makers and designers. You’ll learn how to choose the right blocking approach for your fiber type, master tension control for lace motifs, and even reshape stubborn garments without damage. Plus, we’ll cover tools, timing, and pro tips that make all the difference—whether you’re finishing a wedding shawl or preparing a crochet sample for sale.
Ready to give your projects the red-carpet treatment they deserve? Let’s pin, steam, and shape our way to perfection.
1. Why Blocking Matters—Especially for Advanced Projects
Blocking isn’t just about making your work look neat—it’s about honoring the design intent of your pattern and the nature of your yarn.
Consider lace crochet: those delicate picots, open fans, and geometric repeats only “open up” when gently stretched and dried under tension. Without blocking, they collapse into a soft, undefined blob. Similarly, a sweater made in wool may stretch or shrink unpredictably if not blocked to exact measurements.
Fiber behavior plays a huge role:
- Wool and other animal fibers (alpaca, mohair) respond beautifully to wet-blocking—they “bloom” and hold their shape due to the scales on the fiber that lock together when agitated with water and heat.
- Cotton, linen, and bamboo benefit from wet-blocking too, but they don’t “memory-set” like wool—they’ll need re-blocking after washing.
- Acrylic doesn’t react to water the same way, but steam blocking can temporarily set stitches and reduce curling.
Real-world impact: A designer submitting a sample to a magazine will always block it meticulously—because unblocked photos look sloppy, even if the stitches are perfect. If you sell your work, blocking directly affects perceived value. A well-blocked shawl can command 20–30% more than an identical unblocked one.
In short, blocking isn’t optional finishing—it’s essential craftsmanship.
2. Choosing the Right Blocking Method for Your Fiber and Project
Not all blocking is created equal. There are three main techniques, and choosing the wrong one can lead to ruined projects or wasted time.
Wet Blocking
Best for: wool, alpaca, wool blends, cotton, linen
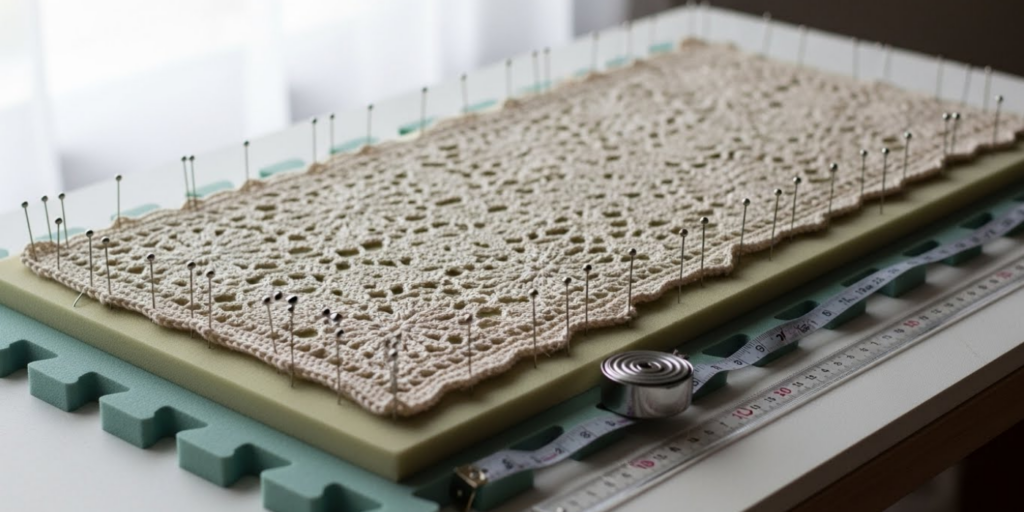
Process: Soak the item in lukewarm water (with or without gentle wool wash), gently squeeze out water (never wring!), then pin to shape on a flat, waterproof surface.
Tip: Roll in a towel first to remove excess moisture—this speeds drying and prevents water spots.
Spray (or Mist) Blocking
Best for: delicate lace, pieces with embellishments (buttons, beads), or items you don’t want to fully saturate
Process: Pin the dry item to shape, then lightly spritz with water until damp. Let dry completely.
Great for: Quick touch-ups or projects where full immersion could damage details.
Steam Blocking
Best for: acrylic, synthetics, or blended yarns that don’t respond to water
Process: Hold a steam iron or garment steamer 2–3 inches above the pinned project—never touch the iron to the yarn. The heat and moisture relax the fibers just enough to set the shape.
Warning: Too much heat can melt acrylic or flatten texture permanently. Test on a swatch first!
Pro insight: Many advanced makers combine methods. For example, lightly wet-block a wool shawl to open the lace, then use a cool iron (with pressing cloth) to gently press seams on a blocked sweater.
The key? Know your yarn label—and when in doubt, swatch and test.
3. Precision Tools and Setup for Flawless Results
You don’t need a professional studio—but a few smart tools make advanced blocking easier, faster, and more accurate.
Essential blocking kit:
- Waterproof blocking mats (interlocking foam tiles are popular—they’re gridded for measuring symmetry)
- Rust-proof T-pins or blocking wires (wires are game-changers for lace—they create smooth, even edges without dozens of pins)
- Measuring tape or ruler (to ensure both sides of a shawl or sleeves of a sweater match exactly)
- Gentle wool wash (like Soak or Eucalan—no-rinse formulas save time and reduce agitation)
Bonus tools for advanced work:
- Dress form (for blocking fitted garments like cardigans or tops—pin directly onto the form for 3D shaping)
- Blocking combs (for evenly spacing scallops or picots on shawl edges)
- Fan or dehumidifier (to speed drying in humid climates—critical for preventing mildew on wool)
Setup tip: Block in a clean, dust-free area with good airflow. Avoid blocking on carpet (it traps moisture) or warped surfaces (your piece will dry crooked).
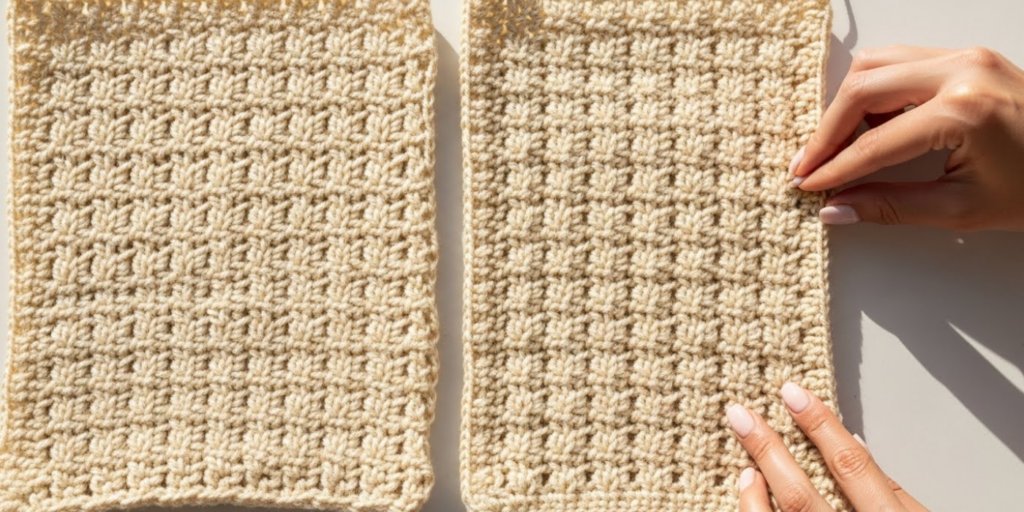
And always photograph your project before blocking—especially if you’re submitting to a magazine or documenting your work. It’s amazing to see the “before and after” transformation!
4. Advanced Techniques: Shaping Lace, Fixing Mistakes, and Resizing
Now, let’s get into the real magic of advanced blocking.
Opening Up Lace to Its Full Potential
Lace patterns rely on negative space. To make those eyelets crisp:
- Stretch the piece slightly beyond its final size while damp.
- Use blocking wires through the edge stitches, then pin the wires at consistent intervals.
- For triangular shawls, pin the center point first, then work outward symmetrically.
Result: A shawl that looks airy, elegant, and intentional—not like a tangled web.
Correcting Minor Mistakes
Did a few stitches pull too tight? Is one sleeve slightly shorter? Blocking can visually even out small errors. Gently stretch the tighter section while damp, or compress the looser one. It won’t fix major gauge issues—but it can “cheat” minor inconsistencies.
Reshaping or Resizing (Carefully!)
While you can’t turn a size medium into a large, you can tweak dimensions slightly:
- To lengthen: Pin vertically with gentle tension.
- To narrow: Overlap edges slightly as you pin.
- To flatten curling edges: Pin every 1–2 inches along borders until completely dry.
Caution: Never force fibers beyond their natural elasticity. Overstretching wool can cause permanent distortion.
Pro move: For garments, block pieces before seaming. This ensures seams align perfectly and reduces bulk. Then, give the finished piece a light final block to unify the shape.
5. The Art of Patience: Drying, Storage, and Maintenance
The final—and most underestimated—part of advanced blocking? Letting it dry completely.
Rushing this step leads to:
- Uneven drying (one side stiff, the other floppy)
- Lingering dampness that invites mildew
- Shape loss as fibers relax post-removal
Drying times vary:
- Wool: 24–48 hours
- Cotton: 36–72 hours
- Acrylic (steam-blocked): 1–2 hours
Never skip this: Your project isn’t “done” until it’s bone-dry.
Once dry:
- Remove pins gently to avoid snagging.
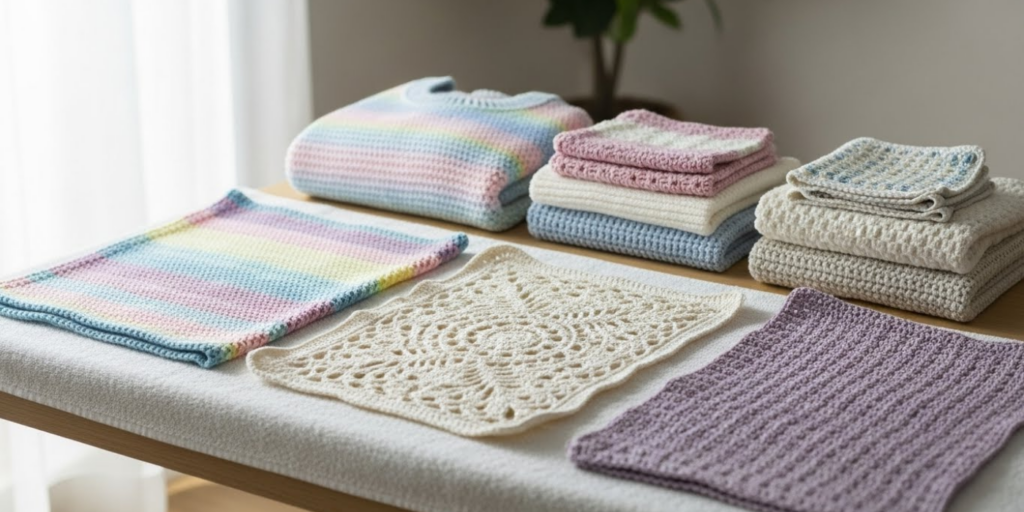
- Store folded (not hung) to prevent stretching.
- For future washes, re-block as needed—especially lace or structured items.
Remember: Blocking isn’t a one-time fix. It’s part of the ongoing care of handmade textiles. Treat your pieces with this level of respect, and they’ll reward you with beauty and longevity.
Moreover, there’s something deeply meditative about the blocking process—the quiet focus, the transformation, the trust that your work will emerge better than before. In a fast-paced crafting world, blocking reminds us: some things can’t be rushed.
Conclusion
Advanced blocking isn’t just a finishing step—it’s where craftsmanship meets artistry. By understanding fiber behavior, choosing the right technique, using precision tools, and applying smart shaping strategies, you can elevate every project from “nice” to truly exceptional.
We’ve covered why blocking matters far beyond neatness, how to match methods to materials, essential tools for accuracy, and pro-level tricks for lace, mistake-correction, and gentle resizing. Most importantly, we’ve emphasized that patience and care during drying are just as vital as the pinning itself.
Whether you’re creating heirloom shawls, selling garments, or simply wanting your work to reflect your best effort, mastering these techniques will pay off in confidence, quality, and pride.
Now, over to you:
👉 What’s the most dramatic “before and after” you’ve seen from blocking? Or which technique are you excited to try next? Share your stories or questions in the comments—we’d love to hear from you!
And if you’ve been skipping blocking, consider this your invitation to give it a real chance. Pin your next project with intention, step back, and watch your stitches come alive.
Your hook does the creating—but blocking? That’s where the magic settles in. 🧶✨

Daniele Ferreira is passionate about the world of crochet, dedicating her time to exploring techniques, creating unique pieces, and sharing her knowledge with beginners and aficionados alike. With attention to detail and creativity, she transforms yarn into true works of art, inspiring others to discover the beauty and joy of this manual art.


