
Introduction: Where Yarn Blooms Into Art
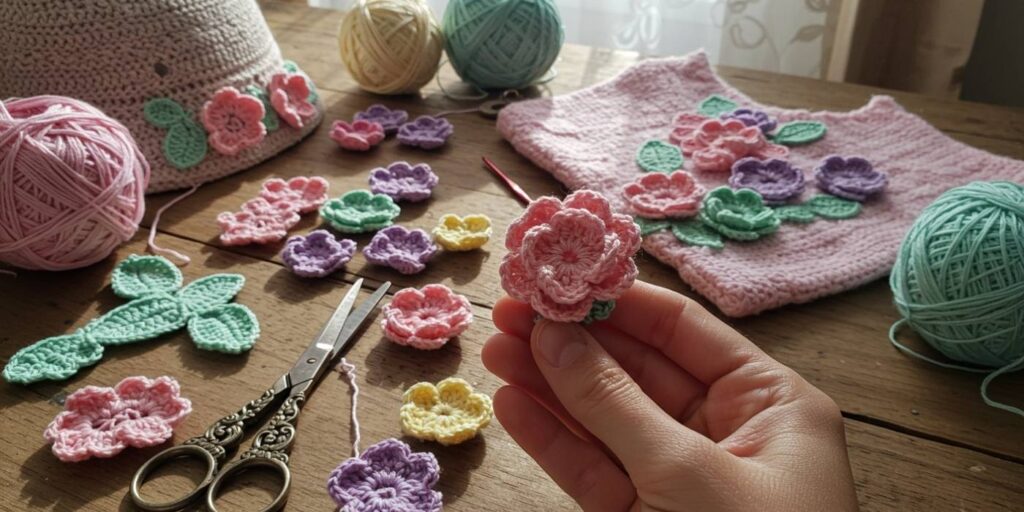
Imagine taking a plain scarf, hat, or baby blanket — and with just a few rounds of crochet, transforming it into something that looks like it stepped out of a storybook garden. That’s the magic of 3D crochet flowers and embellishments.
These aren’t your grandma’s flat appliqués. We’re talking petals that curl, centers that puff, leaves that flutter, and vines that twist — all made with yarn, a hook, and a sprinkle of creativity. Whether you’re looking to personalize a gift, upcycle an old sweater, or simply flex your crochet muscles in the most delightful way, 3D floral crochet is your secret weapon.
In this article, we’ll walk you through everything you need to know to start making your own dimensional crochet flowers — from choosing the right yarn and hook, to mastering beginner-friendly patterns, to attaching them like a pro. You’ll also discover how these little bursts of texture can turn simple projects into heirloom-worthy treasures, and why they’re having a major moment in the crafting world right now.
No experience? No problem. We’ve got you. Let’s make your crochet bloom — literally.
Why 3D Crochet Flowers Are Having a Major Moment
You’ve seen them everywhere — on Instagram, Etsy, even high-fashion runways. Tiny crochet roses pinned to berets. Sunflowers stitched onto tote bags. Delicate cherry blossoms climbing up cardigans.
3D crochet embellishments are trending — and for good reason.
They add instant charm, dimension, and handmade personality to any project. In a world of mass-produced fast fashion, a hand-crocheted flower says: This was made with care. This is one of a kind.
But beyond aesthetics, here’s why you should try them:
🌼 They’re surprisingly easy — Most 3D flowers use basic stitches (single crochet, double crochet, slip stitch) arranged in clever ways.
🌼 Quick to make — Many take under 30 minutes. Perfect for “small win” crafting sessions.
🌼 Great stash-busters — Use up leftover yarn in small amounts.
🌼 Customizable forever — Change colors, sizes, petal shapes — no two flowers need to be alike.
🌼 Therapeutic & satisfying — There’s something deeply calming about shaping yarn into nature-inspired forms.
I made my first 3D rose while binge-watching a baking show. By the end of episode two? I had a bouquet. No exaggeration.
Fun Stat: According to Etsy’s 2024 trend report, searches for “3D crochet flowers” increased by 173% year-over-year. People are craving handmade, tactile, joyful details — and you can be the one to provide them.
Choosing the Right Yarn & Hook: Tiny Tweaks, Big Impact
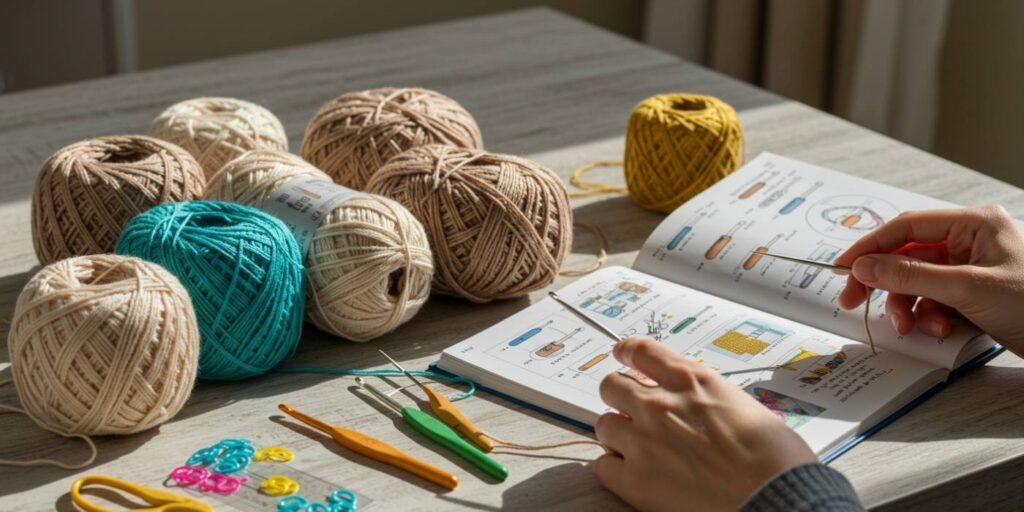
Not all yarns behave the same when sculpted into petals. The fiber, weight, and texture you choose will dramatically affect how your flower turns out.
Here’s your cheat sheet:
🌸 Best Yarns for 3D Flowers:
- Cotton (Worsted or DK Weight) — Holds shape beautifully. Perfect for roses, daisies, and structured blooms. Try Lily Sugar’n Cream or Paintbox Cotton DK.
- Acrylic (Light to Medium Weight) — Soft, affordable, and great for fluffy or ruffled flowers like peonies or carnations. Red Heart Soft or Caron Simply Soft work wonders.
- Mohair or Chenille Blends (for texture) — Use sparingly! Adds a fuzzy halo or velvety touch — ideal for center details or fantasy flowers.
🌸 Yarns to Avoid (for now):
- Super bulky yarn — Too thick to shape delicate petals.
- Slippery silk or bamboo — Hard to control tension; petals won’t hold their curl.
- Eyelash or novelty yarn — You won’t see your stitches, and shaping becomes impossible.
🌸 Hook Size Matters:
Go one or two sizes smaller than the yarn label recommends. Why? Tighter stitches = better structure. A flower made with loose stitches will flop — and not in a good way.
Example: Using worsted weight? Try a 4mm (G) or 3.5mm (E) hook instead of the standard 5mm (H).
Pro Tip: Swatch a tiny circle first. If it lies flat and holds its shape when pinched, you’re golden. If it curls wildly or feels floppy, adjust your hook or yarn.
5 Beginner-Friendly 3D Flower Patterns You Can Master Today
You don’t need to be an expert to make stunning 3D flowers. In fact, most popular designs use the same 3–5 basic stitches. Here are five foolproof patterns to start with — each with a unique personality.
🌼 1. The Classic Rose (Spiral Technique)
Uses: Hats, hair clips, gift toppers
Skill Level: Easy
Stitches: Single crochet, slip stitch
Why it works: You crochet in a continuous spiral, then roll it up like a cinnamon bun. Secure with a few stitches — boom, instant rose.
Bonus: Works up in 15 minutes.
🌼 2. The Puff Daisy (Cluster Magic)
Uses: Baby blankets, spring sweaters, wall art
Skill Level: Easy
Stitches: Chain, double crochet, puff stitch (just 5 dc in one spot!)
Why it works: The puffed center gives instant dimension. Petals are quick fan shapes. Looks complex, crochets simple.
🌼 3. The Layered Sunflower (Rounds + Fringe)
Uses: Tote bags, pillow covers, wall hangings
Skill Level: Easy-Intermediate
Stitches: Single crochet, double crochet, front/back post stitches for texture
Why it works: Brown center made with post stitches mimics seeds. Yellow petals are simple elongated ovals sewn on later.
🌼 4. The Ruffled Carnation (Front Loops Only)
Uses: Boutonnieres, card embellishments, corsages
Skill Level: Intermediate (but worth it!)
Stitches: Double crochet in front loop only, chain
Why it works: Crocheting only in the front loop creates automatic ruffles — no shaping needed. Just keep going and watch the frills bloom.
🌼 5. The Simple 5-Petal Flower (Granny Style)
Uses: Everything. Seriously.
Skill Level: Beginner
Stitches: Chain, double crochet, slip stitch
Why it works: It’s basically a mini granny square with petals. Fast, flat, then curled slightly at the tips for 3D effect.
Downloadable Tip: Keep a “flower journal” — sketch your color combos, note hook sizes, and paste photos. You’ll build your own library of go-to blooms.
Shaping, Stuffing, and Sculpting: The Secrets to Lifelike Dimension
This is where the “3D” magic happens — and it’s easier than you think.
Most 3D flowers get their shape from one (or more) of these techniques:
🌀 Rolling & Curling — Like the spiral rose. Roll while damp or use steam from an iron (hover, don’t touch!) to set the curve.
🧵 Strategic Decreases — Fewer stitches on one side of a petal = natural curl. Try 6 sc on the outer edge, 4 sc on the inner.
🌿 Wire or Pipe Cleaner Backing — For leaves or long-stemmed flowers, insert thin floral wire before sewing shut. Bend into shape!
🧸 Light Stuffing — Tiny bits of polyfill in flower centers or layered petals add subtle puff. Don’t overdo it — you want charm, not a marshmallow.
My “Aha!” Moment: I used to think my flowers looked “flat” because I wasn’t using fancy stitches. Turns out? I just wasn’t shaping them. A gentle pinch, a rolled edge, a curled tip — that’s all it took to bring them to life.
Pro Tip: Use locking stitch markers to hold petal shapes while you sew or steam. No more awkward finger cramps!
How (and Where!) to Attach Your Flowers Like a Pro
You’ve made a gorgeous 3D bloom… now what? Slap it on with a safety pin? Please don’t.
Here’s how to attach embellishments securely — and stylishly:
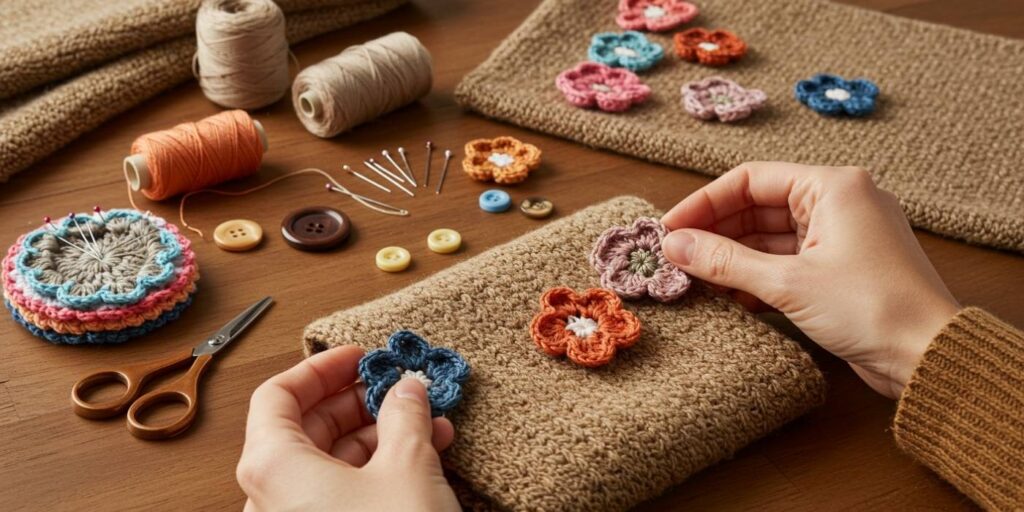
📍 Sewing vs. Crocheting On:
- Sewing (recommended for beginners): Use a yarn needle and matching thread. Stitch through the base of the flower and into the project’s fabric. Use small, hidden stitches.
- Crocheting Directly (advanced): Join yarn at the attachment point and work a few rounds around the flower’s base as you attach it. Creates seamless integration.
📍 Placement Matters:
- Off-center looks more organic than perfectly symmetrical.
- Clusters of 3 (small, medium, large) create visual interest.
- Along seams or hems hides attachment points beautifully.
📍 Reinforcement Tricks:
- Add a small felt circle behind the flower before sewing — prevents sagging on stretchy fabrics.
- For heavy flowers (like large sunflowers), stitch through multiple layers of the project or add a hidden button on the inside for support.
📍 Temporary vs. Permanent:
Want to move your flower around? Sew on a snap button or small brooch pin to the back. Now your bloom is interchangeable!
Real-Life Hack: I turned a plain denim jacket into a boho masterpiece by sewing 12 assorted crochet flowers along one shoulder and sleeve. Took an afternoon. Got compliments for months.
Beyond Flowers: Leaves, Berries, Butterflies & More
Once you’ve mastered flowers, the world of 3D crochet embellishments opens wide.
Try branching out with:
🍃 Leaves — Use green yarn and simple teardrop shapes. Add veins with a chain stitch down the center. Curl the edges with your fingers or steam.
🍒 Berries & Buds — Tiny balls worked in the round, stuffed lightly. Cluster 3–5 together on a stem for realism.
🦋 Butterflies — Two wing shapes + a wrapped body. Bend antennae with wire.
🍄 Mushrooms — Red cap (worked flat, then gathered at the center), white stem, and optional French knot dots. Adorable on kids’ items.
❄️ Snowflakes & Stars — Use metallic or white yarn. Stiffen with fabric glue or sugar water for ornaments.
Why Expand? Mixing florals with other elements creates storytelling. A vine with flowers + leaves + a butterfly? That’s not decoration — that’s a scene.
Project Idea: Crochet a “seasonal sampler” — one flower, one leaf, one critter for each season. Frame them in embroidery hoops for wall art.
Creative Ways to Use 3D Flowers (Beyond the Obvious)
Sure, flowers look cute on hats and scarves. But let’s think bigger — and weirder.
Here’s how crafters are using 3D crochet blooms in unexpected, brilliant ways:
🎀 Jewelry — Turn mini roses into earrings or pendants. Seal with Mod Podge for durability.
📚 Bookmarks — Attach a flower to a ribbon or tassel. Makes reading feel fancy.
🎁 Gift Toppers — Replace bows with crochet flowers + a button loop. Reusable and adorable.
🖼️ Wall Art & Hoop Embellishments — Arrange flowers in a wreath or vertical garden inside an embroidery hoop.
👟 Shoe Clips — Yes, really. Use strong glue or sew onto elastic bands to clip onto sneakers or sandals.
💍 Wedding Accents — Bouquets, boutonnieres, cake toppers, aisle markers — all customizable, all keepsakes.
🧸 Stuffed Animal Details — Give your amigurumi bunny a flower crown or your teddy bear a daisy on its paw.
Story Time: My niece wore a crochet daisy pinned to her backpack all through middle school. Teachers asked where she bought it. She grinned and said, “My aunt made it.” That tiny flower became her signature.
Troubleshooting Common Flower Fails (And How to Fix Them)
Even the best of us run into blooming problems. Here’s how to troubleshoot like a pro:
💔 “My petals won’t curl!”
→ Try a smaller hook. Or, after finishing, gently pull the outer edge of each petal with your fingers. Steam lightly with an iron (hover 6” above) to set.
💔 “My flower looks lumpy or misshapen.”
→ Check your stitch count. Even one extra stitch per round adds up. Count religiously — especially in early rounds.
💔 “The center is too loose/flat.”
→ Add a bead, button, or French knot in the middle. Or work a tight circle of single crochet to anchor the petals.
💔 “It’s too floppy.”
→ Switch to cotton. Or, after finishing, brush a tiny amount of fabric stiffener (like Mod Podge Stiffy) on the back. Let dry flat.
💔 “Colors look muddy.”
→ Use high-contrast combos. Bright center + pastel petals? Gorgeous. Two similar tones? Blah. Try pairing coral + cream, or navy + mustard.
Golden Rule: No flower is a failure. Even “ugly” blooms have charm. I keep a jar of “weird flowers” on my desk — they make me laugh and remind me that creativity doesn’t need to be perfect.
Conclusion: Let Your Creativity Blossom — One Petal at a Time
3D crochet flowers aren’t just embellishments — they’re tiny acts of joy. They’re proof that with a hook, some yarn, and a little patience, you can create something that feels alive.
Whether you’re stitching roses onto a winter hat, surprising a friend with a bouquet of yarn sunflowers, or turning leftover scraps into butterfly hairpins, you’re not just crafting — you’re storytelling. You’re adding soul to the everyday.
Remember:
🔸 Start simple — a spiral rose or puff daisy is all you need.
🔸 Play with yarn and hook sizes to control shape and texture.
🔸 Don’t skip the shaping — a curled petal makes all the difference.
🔸 Sew them on securely, but don’t be afraid to get creative with placement.
🔸 And most importantly — have fun. Crochet flowers are meant to be whimsical, not perfect.
So grab your hook. Dig into your scrap yarn basket. Make something that makes you smile.
Now, over to you!
What’s the first 3D flower you’re going to try? Or better yet — what’s the quirkiest place you’ve ever attached a crochet flower? Share your stories, photos, or questions in the comments below. Let’s grow this garden together — one stitch, one petal, one wild, wonderful idea at a time. 🌸🧶

Daniele Ferreira is passionate about the world of crochet, dedicating her time to exploring techniques, creating unique pieces, and sharing her knowledge with beginners and aficionados alike. With attention to detail and creativity, she transforms yarn into true works of art, inspiring others to discover the beauty and joy of this manual art.


