
Introduction: Unlock the Magic of Mosaic Crochet
Imagine wrapping yourself in a blanket that looks like it was designed by a modern artist — bold lines, crisp angles, and mesmerizing symmetry — yet you made it with just two simple stitches and one hook at a time. That’s the magic of mosaic crochet.
Often mistaken for complex colorwork, mosaic crochet is actually one of the most accessible and forgiving techniques for crocheters of all levels. Whether you’re a beginner looking to level up or an experienced crafter craving fresh inspiration, this method lets you create stunning geometric designs without the headache of juggling multiple yarns or counting endless stitches.
In this guide, you’ll discover how mosaic crochet works, why it’s become a favorite among fiber artists, and how you can start making your own eye-catching projects — even if you’ve never touched a color chart before. We’ll walk through the basics, break down common myths, share practical tips to avoid mistakes, and reveal how this technique can transform your creative confidence. Plus, you’ll get easy pattern ideas you can start today — no fancy tools or expensive supplies required.
Ready to turn simple stitches into stunning art? Let’s dive in.
What Exactly Is Mosaic Crochet? (And Why You’ll Love It)
At first glance, mosaic crochet looks like advanced tapestry or fair isle work — intricate, multicolored, and intimidating. But here’s the secret: you only use one color per row.
That’s right. No tangled strands. No weaving in a dozen ends every few inches. Mosaic crochet relies on strategically placed double crochet (or treble crochet) stitches that “reach back” into the row below, pulling up a contrasting color from two rows down. The result? Clean, graphic patterns that look complex but are surprisingly simple to execute.
Think of it like optical illusion knitting — but easier. You’re not changing colors mid-row. You’re not carrying yarn across the back. You’re just following a rhythm: work in Color A, skip a stitch, work a tall stitch into the row below in Color B, repeat.
Why does this matter for you?
- Beginner-friendly: If you know how to chain and double crochet, you’re already halfway there.
- Portable & low-stress: No need to manage multiple bobbins or worry about tension issues from color changes.
- Visually rewarding: Even your first project will look polished and intentional — perfect for gifts or Instagram-worthy makes.
- Endlessly customizable: From minimalist Scandinavian designs to bold Moroccan tiles, the pattern possibilities are limitless.
One crocheter, Sarah from Oregon, shared how mosaic crochet revived her love for the craft after years of feeling stuck in “scarf purgatory.” “I thought colorwork was only for experts,” she said. “But with mosaic, I made a pillow cover that looked store-bought — and I actually understood what I was doing!”
Getting Started: Tools, Yarn, and Your First Swatch
You don’t need a fancy kit or exotic materials to begin. In fact, the beauty of mosaic crochet lies in its simplicity.
What You’ll Need:
- Two contrasting colors of yarn (worsted weight is ideal for beginners)
- A crochet hook (check your yarn label — usually a 5mm or 5.5mm)
- Scissors and a tapestry needle
- Stitch markers (optional but helpful)
Pro Tip: Choose colors with high contrast — think charcoal and cream, navy and mustard, or black and white. Subtle tones can blur the geometric effect you’re aiming for.
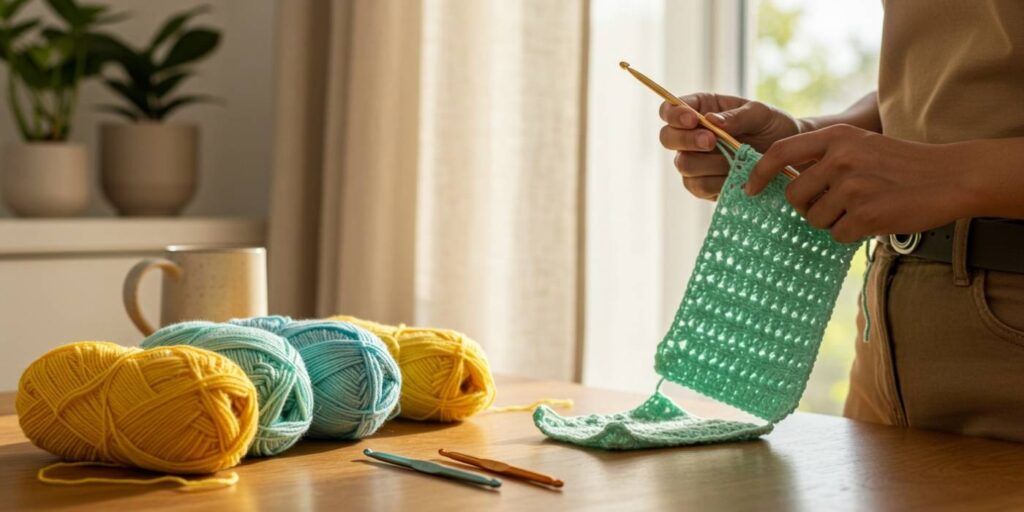
Your First Practice Swatch
Let’s keep it simple. Here’s a mini pattern to get you started:
Row 1 (Color A): Chain 20. Double crochet in the 4th chain from hook (counts as first dc + ch-1), skip next ch, dc in next ch, ch 1. Repeat from * to end. Turn.
Row 2 (Color A): Ch 3 (counts as dc), dc in next ch-1 space, ch 1, skip next dc, dc in next ch-1 space. Repeat to end. Turn.
Row 3 (Color B): Ch 3, dc in next ch-1 space, ch 1, skip next dc, mosaic stitch: yarn over twice, insert hook into the ch-1 space two rows below (in Row 1), pull up a loop, complete as a treble crochet. Repeat to end.
That “mosaic stitch” is your golden ticket. It’s just a tall stitch (usually treble) worked into the row below — not the current row. This pulls up the old color and creates that “floating” geometric line.
Practice this 6-row repeat (3 rows per color) until the pattern clicks. Don’t worry about perfection — focus on rhythm. Count your stitches at the end of each row. Use stitch markers to mark the first and last stitch if you lose your place.
Common Mistake Alert: Working the mosaic stitch into the wrong row. Always count down TWO rows — not one. If your pattern looks broken, this is usually why.
Once you’ve got the swatch down, you’re ready to scale up. Try a coaster, then a placemat, then a pillow — each project builds confidence without overwhelm.
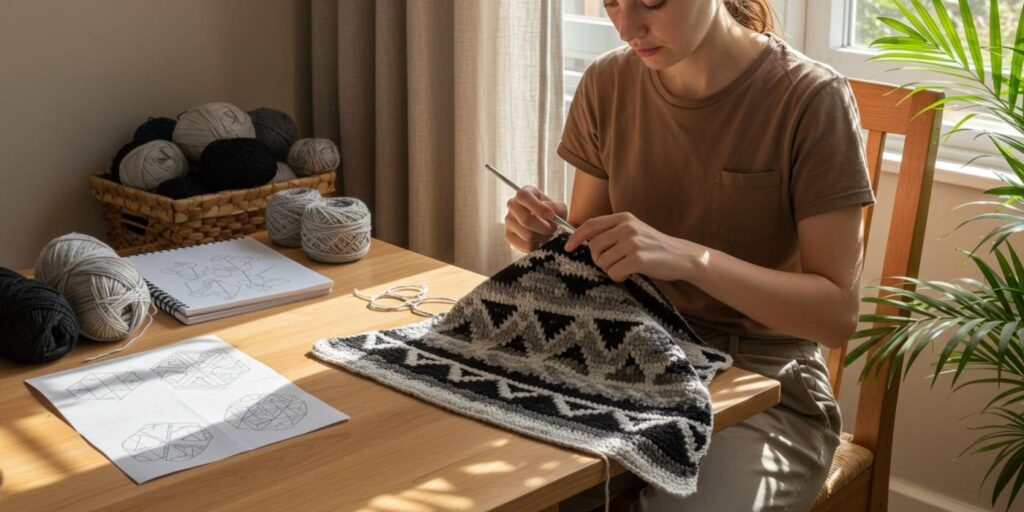
Reading Mosaic Charts Like a Pro (No Decoder Ring Needed)
Charts can look like hieroglyphics at first — but mosaic charts are actually simpler than traditional crochet diagrams.
Most mosaic patterns use grid charts where:
- Each square = one stitch or one stitch + chain space
- Color of the square = color you’re working with in that row
- Symbols or shaded squares = where to place the mosaic (tall) stitch
Here’s how to “read” it:
- Start at the bottom right (like reading a book — for right-handers).
- Odd rows = right to left. Even rows = left to right (unless noted otherwise).
- When you see a square in a different color than your current yarn, that’s where you’ll work the mosaic stitch into the row below.
- Blank or same-color squares = work a regular dc or dc + ch-1 combo.
Let’s break it down with a real example:
Imagine Row 5 (you’re using Teal). The chart shows three teal squares, then a coral square, then two teal, then coral again.
Translation:
- Work 3 normal dc + ch-1 spaces in teal.
- On the 4th stitch, work a treble crochet into the corresponding space two rows below (which should be in coral).
- Continue with 2 normal teal stitches.
- Then another mosaic stitch (treble) into the coral row below.
See? No math. No panic. Just follow the color cues.
Pro Tip: Print your chart and use a highlighter or sticky note to track your current row. Digital patterns? Zoom in and use a tablet stylus to check off rows as you go.
Still nervous? Try “chart-free” written patterns first. Many designers (like Dedri Uys or Underground Crafter) offer both formats. Once you’re comfortable with the rhythm, charts become second nature — and way faster to follow.
Pattern Power: 3 Easy Projects to Build Your Confidence
Theory is great — but nothing beats the thrill of finishing something beautiful with your own hands. Here are three beginner-friendly mosaic projects, each designed to teach you something new.
1. The Minimalist Coaster Set (Learn: Tension & Edging)
- Yarn: Cotton worsted (Color A: White, Color B: Black)
- Hook: 4.5mm
- Pattern: 6-row chevron repeat
Why start here? Small size = quick win. Cotton holds crisp stitches, perfect for seeing your progress. Plus, you’ll learn how to add a clean border — a skill that elevates any project.
Bonus: Make 4, bind them with a ribbon, and gift them. Instant hero status.
2. The Boho Throw Pillow (Learn: Gauge & Blocking)
- Yarn: Acrylic blend (Color A: Cream, Color B: Terracotta)
- Hook: 5.5mm
- Pattern: 8-row diamond repeat
Pillows are forgiving. Slightly off gauge? Stuff it firmer. Uneven edges? A quick steam block hides a multitude of sins. This project teaches you how to measure gauge in mosaic (hint: it’s different than regular crochet) and why blocking is non-negotiable for sharp lines.
Design Hack: Use a pillow insert 2” smaller than your finished cover for a plump, boutique look.
3. The Statement Scarf (Learn: Pattern Repeats & Color Flow)
- Yarn: DK wool blend (Color A: Charcoal, Color B: Mustard)
- Hook: 4mm
- Pattern: 12-row zigzag repeat
Scarves let you play with longer repeats and see how color transitions affect the overall design. Worried about commitment? This scarf works up in under 10 hours. Change colors every 6 rows for a bold stripe effect, or every 12 for a more subtle flow.
Stylist Tip: Wear it folded once for a chunky cowl effect — the geometric pattern pops even more.
Troubleshooting Like a Champion: Fix Mistakes Before They Fix You
Even seasoned crocheters hit snags. The good news? Most mosaic mistakes are easy to fix — if you catch them early.
Problem #1: “My edges are wobbly!”
Cause: Forgetting to work into the turning chain or skipping the first/last stitch.
Fix: Always treat the turning chain as a stitch. Place a stitch marker in the top of it each row. Count your stitches religiously until it becomes automatic.
Problem #2: “The mosaic stitches look loose or gappy.”
Cause: Not pulling up enough yarn when working into the lower row, or using a hook that’s too large.
Fix: When inserting your hook two rows down, wiggle it slightly to grab a good loop. Try going down a hook size for the mosaic stitches only — or switch to a tighter tension on those stitches.
Problem #3: “I lost my place in the chart!”
Cause: Distractions, poor lighting, or not marking your progress.
Fix: Use a magnetic board or app like “Knit Companion” to track rows. If you’re mid-row and realize you’re lost, frog back to the last FULL row you’re sure of. Better to lose 5 minutes than 5 hours.
Golden Rule: If you’re frustrated, put it down. Walk away. Come back with fresh eyes. Mosaic crochet rewards patience — not perfectionism.
Beyond the Basics: How to Design Your Own Mosaic Patterns
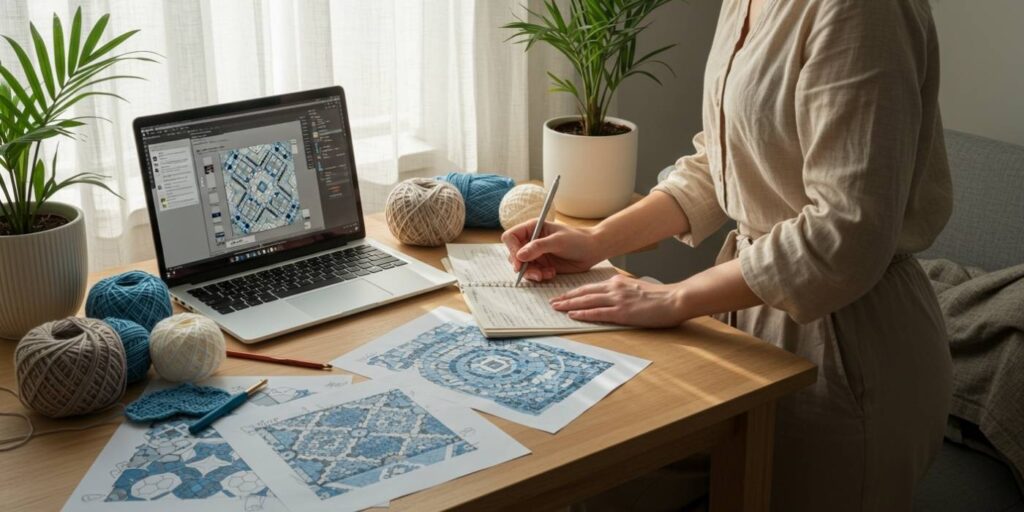
Once you’ve mastered the fundamentals, the real fun begins: creating your own designs.
You don’t need to be a mathematician or a graphic designer. Start simple.
Step 1: Sketch It Out
Grab graph paper (or use a free app like Stitch Fiddle). Shade in squares to create shapes: triangles, diamonds, chevrons, hexagons. Keep it symmetrical at first — it’s easier to follow.
Step 2: Assign Colors
Decide which rows will be Color A and which will be Color B. Remember: mosaic stitches pull from two rows down, so plan your color changes accordingly.
Step 3: Test It Small
Make a 10×10 swatch of your design. Does the shape read clearly? Are the lines crisp? Adjust spacing or stitch height if needed.
Step 4: Scale and Share
Turn your swatch into a cowl, tote bag, or wall hanging. Share it on Ravelry or Instagram — you’ll be amazed at how many people ask, “Is that really crochet?!”
Inspiration Hack: Look at tile floors, quilts, or even pixel art for geometric ideas. Nature’s patterns (honeycombs, fish scales) also translate beautifully.
One designer, Marco from Barcelona, turned his love of retro video games into a viral mosaic blanket featuring 8-bit mushrooms and stars. “I just sketched Mario blocks on graph paper,” he laughs. “Now I take commissions from gamers worldwide.”
Your imagination is the only limit.
Why Mosaic Crochet Is More Than Just a Trend
In a world of fast fashion and disposable décor, mosaic crochet offers something rare: slow, intentional creation with lasting impact.
It’s meditative. The rhythm of alternating rows becomes almost hypnotic — a form of yarn-based mindfulness. Many crocheters report using mosaic projects to unwind after work or manage anxiety.
It’s sustainable. You can use stash yarn, upcycle thrifted sweaters, or choose eco-friendly fibers. Each piece is made to last — not landfill.
It’s empowering. There’s a quiet confidence that comes from mastering a technique that looks far more complex than it is. You’ll start seeing geometry everywhere — and realizing you can recreate it with your own two hands.
And perhaps most importantly — it’s joyful. There’s pure delight in stepping back and seeing a pattern emerge, row by row, color by color, like watching a mosaic tile floor come to life under your fingers.
Conclusion: Your Mosaic Journey Starts Now
We’ve covered a lot — from the basic mechanics of mosaic stitches to designing your own patterns and troubleshooting common hiccups. But here’s the truth: you don’t need to master it all at once.
Start small. Make that coaster. Frog it if you hate it. Try again. Watch a YouTube tutorial if the written instructions feel fuzzy. Join a Facebook group or Ravelry forum — the mosaic crochet community is famously welcoming.
Remember: every stunning blanket, every gallery-worthy wall hanging, every “How did you DO that?!” pillow started exactly where you are now — with a single chain, a deep breath, and the willingness to try.
So grab your hook. Pick two colors that make your heart sing. Cast on. And let the geometry unfold beneath your fingers.
You’ve got this.
Your Turn: What’s the first mosaic project you’re excited to make? Share your plan (or your finished piece!) in the comments below — we’d love to cheer you on. And if this guide helped you, pass it on to a crafty friend. The more, the merrier — and the more beautiful the world becomes, one stitch at a time.

Daniele Ferreira is passionate about the world of crochet, dedicating her time to exploring techniques, creating unique pieces, and sharing her knowledge with beginners and aficionados alike. With attention to detail and creativity, she transforms yarn into true works of art, inspiring others to discover the beauty and joy of this manual art.


