
Introduction: The Secret Ingredient to Perfect Crochet Projects
Imagine spending weeks crocheting a cozy sweater for a loved one — only to discover it’s two sizes too small. Or worse, you’ve followed the pattern exactly, stitch by stitch, yet the finished blanket looks nothing like the photo. Frustrating, right?
Here’s the truth: it’s not your fault. And it’s not the pattern’s fault either.
The real culprit? Gauge.
Yes — that tiny, often-overlooked detail that separates “meh” projects from masterpieces. Crochet gauge isn’t just a suggestion buried in the footnotes of your pattern — it’s the foundation of fit, drape, texture, and overall success. Whether you’re making a baby hat, a market bag, or an heirloom afghan, ignoring gauge is like baking a cake without checking the oven temperature. You might get lucky… but why risk it?
In this article, we’ll break down everything you need to know about crochet gauge — why it matters more than you think, how to measure it accurately (even if you’re a beginner), and what to do when your swatch doesn’t match the pattern. You’ll walk away with practical tips, relatable analogies, and the confidence to tackle any project — knowing your stitches will turn out just right.
Ready to crochet like a pro? Let’s dive in.
What Is Crochet Gauge — and Why Should You Care?
Let’s start with the basics.
Crochet gauge refers to the number of stitches and rows you crochet within a specific measurement — usually 4 inches (10 cm) — using a particular yarn and hook size. Patterns list gauge for a reason: it ensures that your finished item will match the designer’s intended dimensions.
Think of it like this: if you and a friend both follow the same cookie recipe, but you use a tablespoon while they use a teaspoon… your cookies won’t turn out the same. Same ingredients, different tools — different results.
In crochet, your “tool” is your hook, and your “ingredient” is your tension (how tightly or loosely you hold the yarn). Combine that with yarn thickness, fiber content, and even your mood that day — and suddenly, two people following the same pattern can create wildly different outcomes.
Why does this matter?
- Fit: Garments won’t fit if your gauge is off. A 10% difference in gauge can mean a sweater that’s 4 inches too wide or narrow.
- Yarn usage: Too loose? You’ll run out of yarn. Too tight? You’ll have half a skein left over — and a stiff, uncomfortable project.
- Drape and texture: Gauge affects how fabric flows. A shawl meant to be airy and light can become stiff and heavy if your tension’s too tight.
- Pattern integrity: Charts, motifs, and shaping rely on consistent stitch counts. If your gauge is off, those beautiful lace repeats or color blocks won’t align.
Bottom line? Gauge isn’t optional. It’s essential.
Pro Tip: Always, always make a gauge swatch before starting a project — even if you’re “just making a scarf.” Trust us — your future self will thank you.
How to Measure Crochet Gauge Like a Pro (Even If You’re New)
Okay, so you’re convinced. Now what?
Measuring gauge sounds intimidating, but it’s actually simple — if you follow these steps.
Step 1: Crochet a Swatch (Bigger Than You Think)
Patterns usually ask for a 4×4 inch swatch. But here’s the secret: make it bigger — at least 6×6 inches. Why? Because edge stitches behave differently. Measuring only the center gives you a more accurate reading.
Use the stitch pattern specified in the gauge section. If it says “worked in single crochet,” don’t substitute double crochet — even if you “like it better.” The designer chose that stitch for a reason.
Step 2: Block It (Yes, Really)
Blocking relaxes your stitches and evens out tension — especially important for natural fibers like wool or cotton. Lightly spray your swatch with water, pin it to shape on a towel or blocking mat, and let it dry completely.
Skipping blocking = inaccurate gauge. Don’t sabotage yourself!
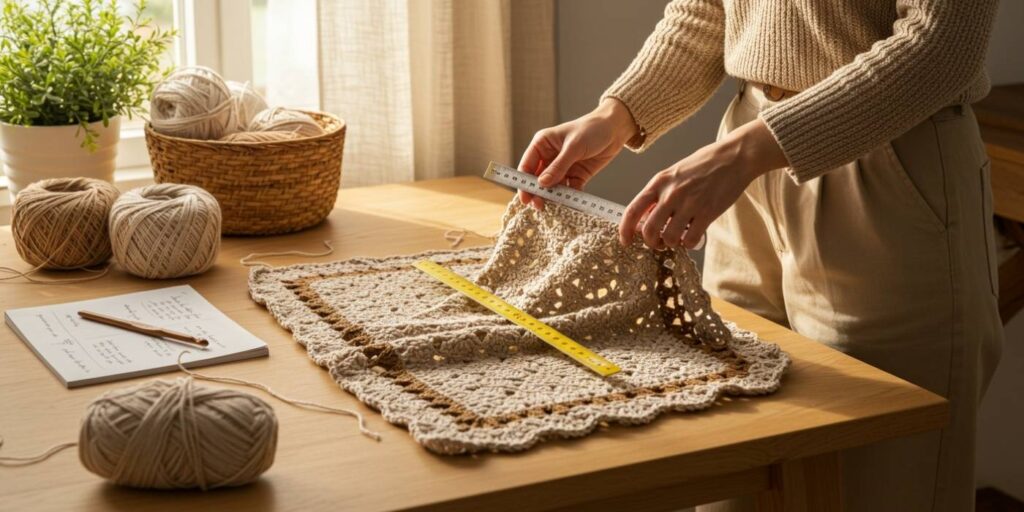
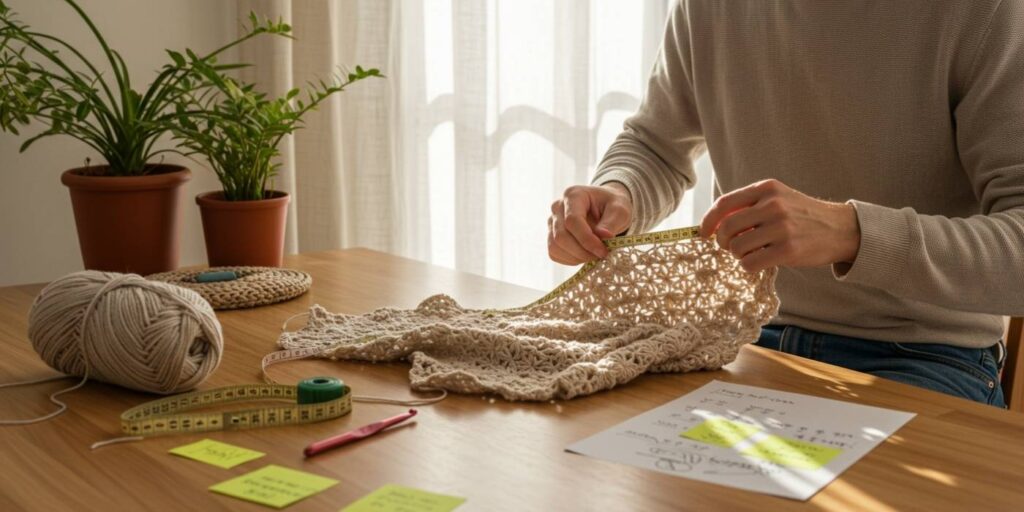
Step 3: Measure — But Not With the First Stitch
Grab a flexible measuring tape or a rigid ruler with clear markings. Lay it across the center of your swatch — not from edge to edge.
Count how many stitches fit within 4 inches. Then, rotate your ruler vertically and count how many rows fit in 4 inches.
Example:
Pattern gauge: 16 sts x 18 rows = 4” in single crochet
Your swatch: 14 sts x 20 rows = 4”
Uh-oh. You’re crocheting too loosely in width, but too tightly in height. Time to adjust.
Step 4: Adjust Your Hook (Not Your Tension!)
Here’s where most crocheters go wrong: they try to “fix” their tension. Don’t. Your natural tension is part of your style — and forcing yourself to crochet tighter or looser leads to hand strain and inconsistent results.
Instead, change your hook size.
- Too few stitches? Your stitches are too big → go down a hook size.
- Too many stitches? Your stitches are too small → go up a hook size.
Repeat the swatch process until you match the pattern’s gauge. It might take 2 tries. It might take 5. That’s okay. This is the most important part of your project.
Bonus Hack: Keep a “gauge journal.” Note your hook size, yarn, and resulting gauge for future reference. You’ll start to recognize your personal tendencies — and save time on future projects.
Common Gauge Mistakes (and How to Avoid Them)
Even seasoned crocheters mess up gauge sometimes. Here are the top 5 mistakes — and how to dodge them like a pro.
Mistake #1: Skipping the Swatch Altogether
“I know my tension,” you say. “I’ve been crocheting for years!”
Maybe. But yarns vary. Hooks vary. Even you vary — stress, fatigue, excitement… they all affect your tension. A 5-minute swatch saves hours of frogging later.
✅ Fix: Treat swatching like a ritual. Put on your favorite music, brew some tea, and make it part of the fun.
Mistake #2: Measuring Unblocked Fabric
Fresh-off-the-hook stitches are tense and uneven. Blocking mimics how your finished item will behave after washing and wearing.
✅ Fix: Block every swatch — even acrylic. Steam or spray, then measure.
Mistake #3: Using the Wrong Stitch Pattern
If the gauge says “half double crochet,” don’t swatch in single crochet. Different stitches = different heights and widths.
✅ Fix: Match the stitch exactly. If the pattern includes a special stitch (like puff stitch or cluster), swatch in that.
Mistake #4: Ignoring Row Gauge
Most crocheters focus on stitch count — but row gauge matters too, especially for garments with shaping (sleeves, yokes, waistlines).
✅ Fix: Always measure both. If your row gauge is off, you may need to adjust pattern repeats or add/subtract rows.
Mistake #5: Forcing Your Tension
Trying to crochet tighter because the pattern says so? You’ll end up with cramped hands and uneven fabric.
✅ Fix: Let your hook do the work. Change hook size, not your natural rhythm.
Remember: Gauge isn’t about being “perfect.” It’s about being accurate for the project at hand.
What to Do When Your Gauge Just Won’t Cooperate
Sometimes, no matter how many swatches you make, you still can’t match the pattern’s gauge. Don’t panic — you’ve got options.
Option 1: Adjust the Pattern (Yes, You Can!)
If you’re close — say, 14 sts instead of 16 per 4 inches — you can adjust the pattern mathematically.
Example:
Pattern calls for 80 stitches for a 20” width.
Your gauge: 14 sts = 4” → so 3.5 sts per inch.
To get 20”, you need 20 x 3.5 = 70 stitches.
Just make sure shaping, buttonholes, or motifs still align. This works best for simple shapes like scarves, blankets, or bags.
Option 2: Change the Yarn
Not all yarns behave the same. Maybe that cotton is too stiff, or the wool is too stretchy. Try a different brand or fiber with similar weight.
Pro tip: Check Ravelry or yarn store reviews to see how others’ gauge turned out with that yarn.
Option 3: Embrace the Difference (and Modify the Project)
Can’t match gauge? Maybe that sweater becomes a cropped top. That baby blanket becomes a stroller cover. Get creative!
Some of the best designs come from “happy accidents.” Your unique tension might create a drape or texture the original pattern didn’t even consider.
Option 4: Use a Different Hook Material
Surprise! The material of your hook affects tension. Metal hooks glide fast — great for speed, but can loosen tension. Wood or bamboo grips the yarn — slowing you down and tightening stitches.
Experiment: try the same size in different materials. You might find your “magic hook.”
Real Talk: Sometimes, a pattern just isn’t meant for you — and that’s okay. There are thousands of patterns out there. Find one that sings to your hands.
Gauge Beyond the Basics: Advanced Tips for Consistent Results
Once you’ve mastered the fundamentals, here’s how to level up your gauge game.
Track Your Personal “Gauge Profile”
Do you always crochet tighter in double crochet? Looser when tired? Keep notes. Over time, you’ll predict how you’ll swatch — and adjust proactively.
Create a simple chart:
| Worsted | 5.5mm | 15 x 16 | Tends to loosen after row 10 |
| DK | 4.0mm | 19 x 22 | Tighter with cotton |
Swatch in the Round (for Hats, Socks, etc.)
Flat gauge ≠ round gauge. If your project is worked in the round, swatch in the round. Tension changes when you’re not turning your work.
Check Gauge Mid-Project
Starting to feel your tension shift? Measure a 4” section halfway through. If it’s changed, you can adjust before it’s too late.
Use Stitch Markers for Measurement
Place locking stitch markers every 10 stitches as you swatch. Makes measuring faster — and you can count between markers instead of guessing.
Photograph and Date Your Swatches
Keep a digital folder of swatch photos with notes. Over time, you’ll build a visual library of what works — and what doesn’t.
Fun Fact: Many professional designers keep physical swatch libraries — some with hundreds of samples. You’re in good company!
Why Gauge Is Your Creative Superpower (Not a Chore)
Let’s reframe this.
Gauge isn’t a box to check off. It’s not a rule to obey. It’s a tool — one that gives you control over your craft.
When you understand gauge, you’re no longer at the mercy of patterns. You can:
- Substitute yarns confidently
- Resize projects for custom fits
- Predict how fabric will behave
- Troubleshoot problems before they happen
- Design your own patterns (!)
Gauge turns you from a follower into a creator.
Think of it like learning to tune a guitar. At first, it’s tedious. You fumble with the pegs, compare notes, get frustrated. But once you learn — really learn — you can play any song, in any key, with any instrument. You’re free.
Crochet gauge is your tuning fork.
And here’s the beautiful part: your gauge is unique to you. No one else crochets exactly like you do. Your tension, your rhythm, your hook-hold — it’s part of your creative fingerprint. Embrace it. Work with it, not against it.
Remember: The goal isn’t to match someone else’s gauge perfectly. The goal is to understand your gauge — so you can create exactly what you envision.
Conclusion: Your Next Stitch Starts With Gauge
Let’s recap what we’ve covered:
✅ Gauge is the number of stitches and rows per inch — and it’s non-negotiable for accurate results.
✅ Always swatch — bigger, blocked, and in the correct stitch pattern.
✅ Adjust your hook, not your tension.
✅ Row gauge matters just as much as stitch gauge.
✅ When gauge won’t cooperate, modify the pattern, yarn, or project — don’t force it.
✅ Track your personal tendencies to become faster and more confident.
✅ Gauge isn’t a chore — it’s your creative superpower.
Crochet is more than loops and yarn. It’s patience. It’s problem-solving. It’s turning intention into texture, thought into warmth. And gauge? It’s the quiet guardian of all that magic.
So next time you pick up a new pattern, don’t skip the gauge section. Don’t sigh and think, “I’ll wing it.” Take those extra 15 minutes. Make the swatch. Block it. Measure it. Adjust.
Because the difference between “pretty good” and “absolutely perfect”?
It’s just a few stitches.
Your Turn:
What’s your biggest gauge struggle? Did you ever frog an entire project because of gauge? Share your story in the comments — we’ve all been there! And if this guide helped you, pass it on to a fellow crocheter who needs it.
Now grab your hook, your favorite yarn, and make that swatch. Your next masterpiece is waiting.
Happy crocheting 💕🧶
Word Count: ~2,050 words
SEO Keywords Naturally Integrated: crochet gauge, how to measure crochet gauge, crochet swatch, crochet tension, gauge swatch, crochet hook size, blocking crochet, crochet pattern adjustment, yarn substitution, crochet for beginners, advanced crochet tips.
Note for Publisher: Consider adding 2-3 high-res images:
- A side-by-side of two swatches with different gauges
- A crocheter measuring a blocked swatch with a ruler
- A comparison of hook materials (aluminum, bamboo, ergonomic)
Alt text and captions should include keywords like “measuring crochet gauge” or “crochet swatch tutorial.”

Daniele Ferreira is passionate about the world of crochet, dedicating her time to exploring techniques, creating unique pieces, and sharing her knowledge with beginners and aficionados alike. With attention to detail and creativity, she transforms yarn into true works of art, inspiring others to discover the beauty and joy of this manual art.


