

Have you ever picked up your crochet hook, ready to start a new project, only to realize you’re missing something small—but crucial? Maybe you couldn’t find a stitch marker, or your scissors were buried under a mountain of craft supplies. If so, you’re not alone. While yarn and hooks are the stars of the crochet world, it’s the unsung heroes—the little tools we call crochet notions—that truly make the craft smoother, faster, and more enjoyable.
Crochet notions are the supporting cast in your crafting journey: simple, often overlooked, but absolutely essential. From keeping your stitches neat to helping you finish projects with professional flair, these tools elevate your work from “homemade” to “handmade with care.” Whether you’re a beginner just learning the chain stitch or an experienced crocheter designing your own patterns, understanding and using the right notions can transform your experience.
In this article, we’ll explore the most important crochet notions every crafter should know about. You’ll discover what they do, why they matter, and how to choose the best ones for your needs. We’ll also share practical tips, real-life examples, and even a few personal stories to show just how much difference these small tools can make. By the end, you’ll not only appreciate the power of a good tapestry needle—you might even be inspired to upgrade your entire crochet toolkit. Let’s dive in.
What Are Crochet Notions? (And Why They Matter More Than You Think)
When most people think of crochet, they picture soft yarn and a colorful hook. But behind every beautifully finished blanket, amigurumi toy, or intricate lace shawl, there’s a collection of tiny tools doing the heavy lifting. These are crochet notions—the accessories that support and enhance your crochet process.
The term notion comes from the broader sewing and crafting world, where it refers to small but necessary items like pins, thread, or measuring tapes. In crochet, notions include things like stitch markers, tapestry needles, row counters, scissors, and even project bags. They may seem minor, but try crocheting a complex pattern without them—you’ll quickly see how vital they are.
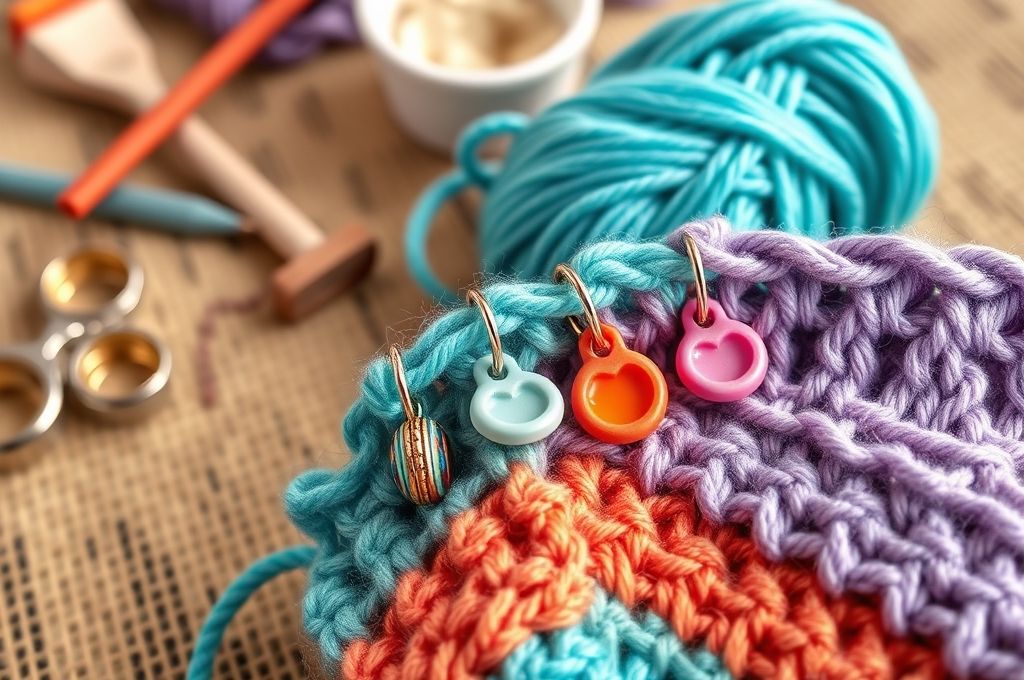
Take stitch markers, for example. Without them, it’s easy to lose track of where a round begins in a circular project like a hat or a granny square. One misplaced stitch can throw off an entire pattern. But place a small ring or locking marker at the start of each round, and suddenly your work stays organized and error-free.
Similarly, a blunt-tipped tapestry needle is essential for weaving in ends and seaming pieces together. Using a regular sewing needle might work in a pinch, but it’s more likely to split delicate yarn fibers or poke through stitches unintentionally.
Crochet notions aren’t just about convenience—they’re about craftsmanship. They help you maintain consistency, reduce frustration, and achieve polished results. Think of them like the spices in a recipe: you could cook without them, but the dish wouldn’t have the same depth or flavor.
So, while yarn and hooks get the spotlight, notions are the quiet professionals working behind the scenes. And once you start using them regularly, you’ll wonder how you ever crocheted without them.
Stitch Markers: Your Project’s Best Friend
Imagine you’re crocheting a baby blanket in a repeating pattern. You get to row 47, put the project down to answer the door, and when you come back… you can’t remember where the pattern restarts. Sound familiar? That’s where stitch markers come in.
Stitch markers are small rings or clips placed on specific stitches to mark important points in your work. They’re especially useful for:
- Indicating the beginning of a round in circular crochet
- Highlighting pattern repeats
- Marking shaping points (like where to increase or decrease)
- Identifying the right side of your work
There are two main types: ring markers and locking markers. Ring markers are simple plastic or metal circles that slide directly onto your stitches. They’re great for temporary marking and move easily as your work progresses. Locking markers, often made of flexible plastic, snap onto a stitch and stay put—perfect for marking decreases or holding live stitches.
Many crocheters swear by using different colors to represent different actions. For instance, red might mean “increase here,” while blue means “start of round.” This color-coding system turns your project into a visual roadmap.
A real-life example: Sarah, a crochet designer from Oregon, once spent hours unraveling a miscounted sleeve because she forgot to mark her increase rows. After that, she started using stitch markers religiously. “Now,” she says, “I don’t start a project without them. They’ve saved me so much time and heartache.”
Whether you’re following a pattern or designing your own, stitch markers help you stay on track. They’re inexpensive, easy to use, and one of the smartest investments you can make in your crochet journey.
Tapestry Needles: The Secret to a Polished Finish
You’ve just finished your first crochet sweater. The shaping is perfect, the colors pop, and the texture is dreamy. But then you look at the back—and see a jungle of loose yarn tails. This is where the tapestry needle comes to the rescue.
Also known as a yarn needle or blunt needle, this tool is designed specifically for weaving in ends and sewing pieces together. Unlike sharp sewing needles, tapestry needles have a large eye and a blunt tip, which allows them to glide through stitches without splitting the yarn.
Here’s why it’s indispensable:
- Weaving in ends: A securely woven tail prevents your project from unraveling over time.
- Seaming: Whether you’re joining granny squares or attaching sleeves, a tapestry needle helps create invisible seams.
- Adding details: Perfect for embroidering features on amigurumi or attaching buttons.
When choosing a tapestry needle, consider the size of your yarn. Thicker yarns need larger needles (like sizes 13–18), while fine threads work best with smaller ones (sizes 18–24). Stainless steel needles are durable and smooth, while plastic ones are lightweight and budget-friendly.
Pro tip: Always weave your ends in a zig-zag pattern through several stitches. This distributes tension and makes the tail nearly impossible to pull out.
I remember my first big project—a striped afghan with over 50 color changes. I tried skipping the weaving-in step, thinking, “I’ll do it later.” Spoiler: I never did. The blanket looked great… until I washed it. Several ends came loose, and I had to rework half the piece. Lesson learned: Never underestimate the power of a good tapestry needle.
With the right technique and tool, finishing your work doesn’t have to be a chore—it can be the final act of pride in a job well done.
Scissors: Small Tool, Big Impact
It might seem obvious, but not all scissors are created equal—especially when it comes to crochet. Regular household scissors can be too bulky, too sharp, or just plain awkward for cutting yarn. That’s why having a dedicated pair of small, sharp craft scissors makes a surprising difference.
Good crochet scissors should:
- Be compact (4–6 inches long)
- Have a sharp, pointed tip for precision cuts
- Fit comfortably in your hand
- Be made of rust-resistant material
Why does this matter? Imagine you’re working on a delicate lace shawl with fine thread. You need to cut the yarn cleanly without snagging nearby stitches. Dull or oversized scissors could pull the fibers or accidentally cut the wrong strand. A quality pair ensures a clean, controlled cut every time.
Many crocheters keep a tiny pair attached to their project bag or even wear them on a scissor fob—a decorative holder that clips to your wrist or hook. This way, they’re always within reach, reducing the frustration of constantly searching for them.
There’s also a psychological benefit: using a tool that feels just right enhances your crafting experience. It’s like using a chef’s knife instead of a butter knife—you feel more in control, more capable.
One crocheter, Maria from Texas, shared how switching to embroidery scissors transformed her workflow. “I used to hate cutting yarn—it felt messy and imprecise. Now, with my little gold scissors, it’s satisfying. It’s like putting a period at the end of a sentence.”
So, while scissors may seem like the most basic tool in your kit, don’t overlook their importance. A good pair isn’t just functional—it’s a small luxury that adds joy to your craft.
Row Counters: Never Lose Track Again

Have you ever repeated a row by accident—or worse, skipped one—and only noticed after you’d crocheted another 20 rows? It’s a common frustration, especially with repetitive patterns or when working on large projects like blankets or sweaters.
Enter the row counter—a simple device designed to help you keep track of your progress. Available in physical and digital forms, row counters eliminate the guesswork and mental strain of counting in your head.
Types of row counters:
- Click counters (mechanical): Small handheld devices you press after each row. Some attach to your hook.
- Digital apps: Smartphone tools that let you log rows, set reminders, and save multiple projects.
- Pencil and paper: The old-school method, still effective if you’re disciplined.
Mechanical counters are popular because they’re tactile and don’t rely on batteries or phone signals. You simply click as you go, and if you lose count, you can usually reset and restart. Some crocheters even use abacus-style counters that slide beads to mark rows or pattern repeats.
The benefit? Peace of mind. Knowing you’ve completed exactly 15 rows of single crochet means you can set your project down and pick it up later without stress.
Consider this: a sweater pattern might require 80 rows for the body. Without a counter, you’re relying on memory or sticky notes—which can fall off or get lost. With a counter, you’re confident in your progress.
And don’t forget pattern repeats! If your design has a 6-row repeat, a counter helps you stay aligned so your texture stays consistent from top to bottom.
While some experienced crocheters claim they “don’t need one,” most admit they’ve made mistakes they could’ve avoided with a counter. As one Reddit user put it: “I used to think row counters were for beginners. Then I frogged (ripped out) 3 hours of work because I lost count. Now I never start without one.”
Measuring Tools: Precision Makes Perfect
Crochet isn’t just about creativity—it’s also about fit and proportion. Whether you’re making a hat, a garment, or a stuffed animal, accurate measurements ensure your project turns out as intended.
That’s where measuring tools come in. The most essential is a flexible tape measure, the kind used in sewing. Unlike rigid rulers, tape measures bend easily and can wrap around hats, sleeves, or curved edges.
Use your tape measure to:
- Check gauge (how many stitches per inch)
- Measure body parts for custom-fit clothing
- Track the size of your project as it grows
- Ensure symmetry in amigurumi or toys
For example, if you’re crocheting a beanie, you’ll want to measure the circumference of the crown as you work. Without this, you might end up with a hat that’s too tight or too loose.
Another helpful tool is a ruler or gauge tool. These often have built-in stitch counters and help you measure tension accurately. Some even feature hole sizes to check hook dimensions.
And let’s not forget blocking tools. After finishing a lace project, you might pin it to a foam board and use a ruler to stretch it into perfect shape. This step can turn a slightly uneven piece into a stunning, professional-looking design.
A real-world story: Emma, a UK-based crocheter, once made a cardigan for her daughter. She didn’t measure the armholes, assuming they’d “look right.” When she tried it on, the sleeves were too tight. “I had to rip out both arms and rework them,” she said. “Now I measure everything—even if it’s just a scarf.”
Measuring isn’t about perfectionism—it’s about respect for your time and effort. A few seconds with a tape measure can save hours of frogging later.
Project Bags and Organizers: Keep Your Craft Calm
Crochet is relaxing—but only if you’re not constantly digging through a tangled mess of yarn, hooks, and loose notions. That’s where project bags and organizers come in.
A good project bag does more than carry your supplies. It:
- Protects your work from dust and pets
- Keeps everything in one place
- Makes crocheting on the go stress-free
- Reduces clutter at home
Look for bags with:
- Inner pockets for scissors, needles, and markers
- A clip or loop to hold your hook
- A sturdy base to prevent sagging
- A closure to keep yarn from escaping
Many crocheters love zippered pouches inside their bags to separate notions. Others use binder rings to hold pattern printouts or stitch diagrams.
There’s also a mental benefit: a tidy workspace leads to a calmer mind. When your tools are organized, you can focus on the joy of creating, not the frustration of searching.
I once met a woman at a craft fair who kept all her crochet supplies in a shoebox. “It works,” she said, “but I spend more time untangling yarn than actually crocheting.” After buying a simple canvas project bag with compartments, she told me her crafting time doubled because she wasn’t wasting energy on chaos.
And let’s be honest—there’s something deeply satisfying about unzipping a well-organized bag, seeing everything in its place, and picking up right where you left off.
Beyond the Basics: Unique Notions That Elevate Your Craft
While the tools we’ve covered so far are essential, there are a few specialty notions that can take your crochet to the next level.
1. Stitch Holders: These are like temporary parking spots for live stitches. Great for sweaters or toys where you need to set aside stitches for later (like necklines or armholes).
2. Yarn Gauges: Small tools that help you match yarn weight to hook size. Some even have notches labeled with standard yarn categories (e.g., DK, worsted, bulky).
3. Magnetic Counters: Attach to your hook or wrist and use magnets to track rows or rounds. Ideal for circular projects.
4. Needle Grips: Rubber or silicone sleeves that make tapestry needles easier to handle, especially for those with arthritis or hand fatigue.
5. Yarn Guides: Clips or rings that attach to your bag or clothing, helping yarn feed smoothly without tangling.
These tools may not be necessary for every project, but they solve specific problems and show how thoughtful design supports creativity.
For instance, a crocheter with hand pain might find a needle grip life-changing. Or someone who loves amigurumi will appreciate stitch holders when assembling complex parts.
The key is to experiment. Try a new notion, see how it fits your style, and keep what works. Crochet is personal—your toolkit should reflect your needs.
Building Your Ideal Crochet Kit: A Practical Guide
Now that you know the essential notions, how do you build a toolkit that works for you?
Start with the core five:
- Stitch markers (a mix of ring and locking)
- Tapestry needles (at least two sizes)
- Small, sharp scissors
- Row counter (mechanical or app-based)
- Flexible tape measure
Add as you grow:
- Project bag with pockets
- Yarn needle organizer
- Stitch holders
- Measuring gauge
Store them in a notion case—a small zip pouch or a divided box. Label sections if needed. Keep everything in your project bag so it’s always ready.
And don’t forget backups! Keep an extra needle or pair of scissors in your car or at work. You never know when inspiration will strike.
Remember: the best toolkit isn’t the most expensive—it’s the one that makes you feel confident, organized, and excited to create.
Final Thoughts: The Joy of the Little Things
Crochet is more than a hobby—it’s a practice of patience, creativity, and care. And just like life, it’s often the small things that make the biggest difference.
The stitch marker that saves you from unraveling hours of work.
The tapestry needle that turns a messy back into a work of art.
The scissors that give you a clean, satisfying cut.
These tools may be tiny, but their impact is huge. They’re not just about function—they’re about respect for your craft. Every time you use a proper notion, you’re honoring the time, skill, and love you pour into your projects.
So, take a moment to look at your crochet bag. Is it missing anything? Could a simple upgrade make your experience better?
Don’t wait for a mistake to happen. Invest in the tools that support your creativity. Your future self—and your finished projects—will thank you.
Conclusion: Craft Smarter, Not Harder
We’ve explored the world of crochet notions—those small but mighty tools that go beyond yarn and hooks. From stitch markers and tapestry needles to row counters and project bags, each one plays a vital role in making your crochet experience smoother, more accurate, and more enjoyable.
These tools aren’t luxuries—they’re practical solutions to common challenges. They help you avoid mistakes, save time, and produce higher-quality work. And perhaps most importantly, they let you focus on what you love: creating.
As you continue your crochet journey, I encourage you to take inventory of your toolkit. Are there notions you’ve been ignoring? Tools you’ve never tried but might benefit from? Don’t be afraid to experiment. Sometimes, the smallest addition can make the biggest difference.
And remember: every expert crocheter was once a beginner who learned the value of the little things.
Now, I’d love to hear from you: What’s your favorite crochet notion, and how has it changed your crafting experience? Share your thoughts in the comments below—or tag us on social media with a photo of your go-to tool. Let’s celebrate the unsung heroes of crochet together.
Happy hooking! 🪝✨

Daniele Ferreira is passionate about the world of crochet, dedicating her time to exploring techniques, creating unique pieces, and sharing her knowledge with beginners and aficionados alike. With attention to detail and creativity, she transforms yarn into true works of art, inspiring others to discover the beauty and joy of this manual art.


